B-7
OPERATION
2.
4-Step
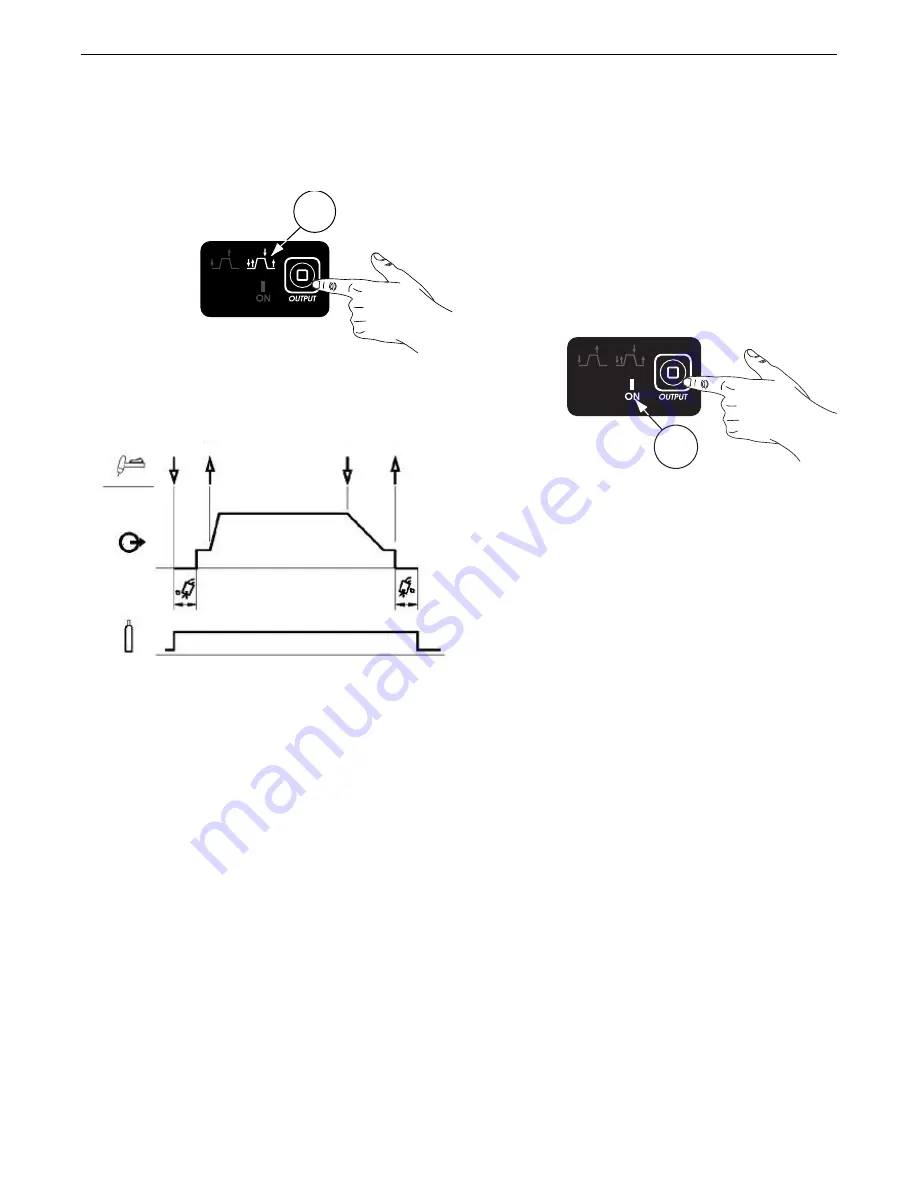
(See Figure B.9) – With 4-step trigger mode and a TIG
welding mode selected, the following weld sequence will occur. In
4-step, all sequencer functions should be set. If a standard foot
amptrol is connected, only its trigger input is functional and the
remote output control will be disabled
4-Step Functionality
(See Figure B.10)
A. Press and hold the TIG torch trigger to start the
sequence. The machine will open the gas valve to
start the flow of shielding gas according to the set
pre-flow time. After the pre-flow, the output of the
machine is turned ON. The arc is started according
to the selected weld mode and the specified starting
current. The starting current will be held until the
torch trigger is released.
B. Releasing the trigger starts the initial slope function.
The output current will be increased at a rate
dependent on the specified initial slope time, until the
operating amperage is reached.
If the torch trigger is pushed during the upslope
time, the arc will immediately shut off and output will
be switched OFF.
C. When the main weld is complete, push and hold the
torch trigger to start the final down slope. The
machine will decrease the output current at a rate
determined by the specified final slope time, until the
finishing current is reached.
D. The finished current will be maintained for as long as
the torch trigger is held. Upon releasing the torch
trigger, output will be switched OFF and the post
flow time will start.
3.
Output On
-This function is designed to be used when
TIG welding without the use of an arc-start controller.
If “ON” is selected, the machine’s output terminals are
fully energized. Operator touches tungsten initiating
the starting process. Once the tungsten is lifted from
the work piece the amperage will proceed to welding
amperage. Output “ON” is always illuminated when
STICK welding.
(See Figure B.11)
ASPECT™ 375
(1)
(A)
(C)
(D)
(B)
A
2
3
FIGURE B.9
FIGURE B.11
FIGURE B.10


