Installation
25
3
Ins
talla
tion
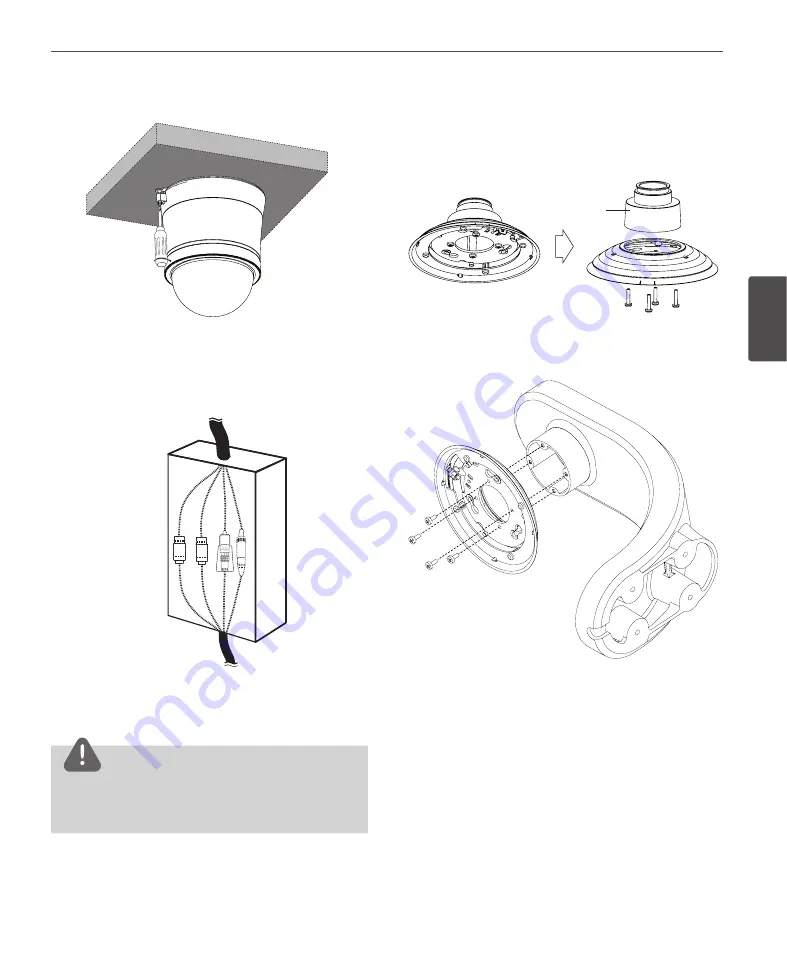
7. Tighten the locking screw.
Ø 166 mm
8. Connect the cables to the cable jacks of the camera
body. After installing the camera, you should arrange
the cables using the outlet box to protect the cables.
CAUTION
Do not expose the connected part of the camera cable
jacks in the rain or moisture.
Check the red stripe on one side of the safety cable.
Wall mount (optional)
Install the camera by the following order.
1. Disassemble the PIPE Installation Bracket to remove the
[A] part.
[A]
2. Install the PIPE Installation Bracket to the Wall Mount
assembly.


