background image

ʅ

ʅ

ʅ

ʅ

aria

130 - DIGITAL KEY TELEPHONE SYSTEM USER GUIDE 

38

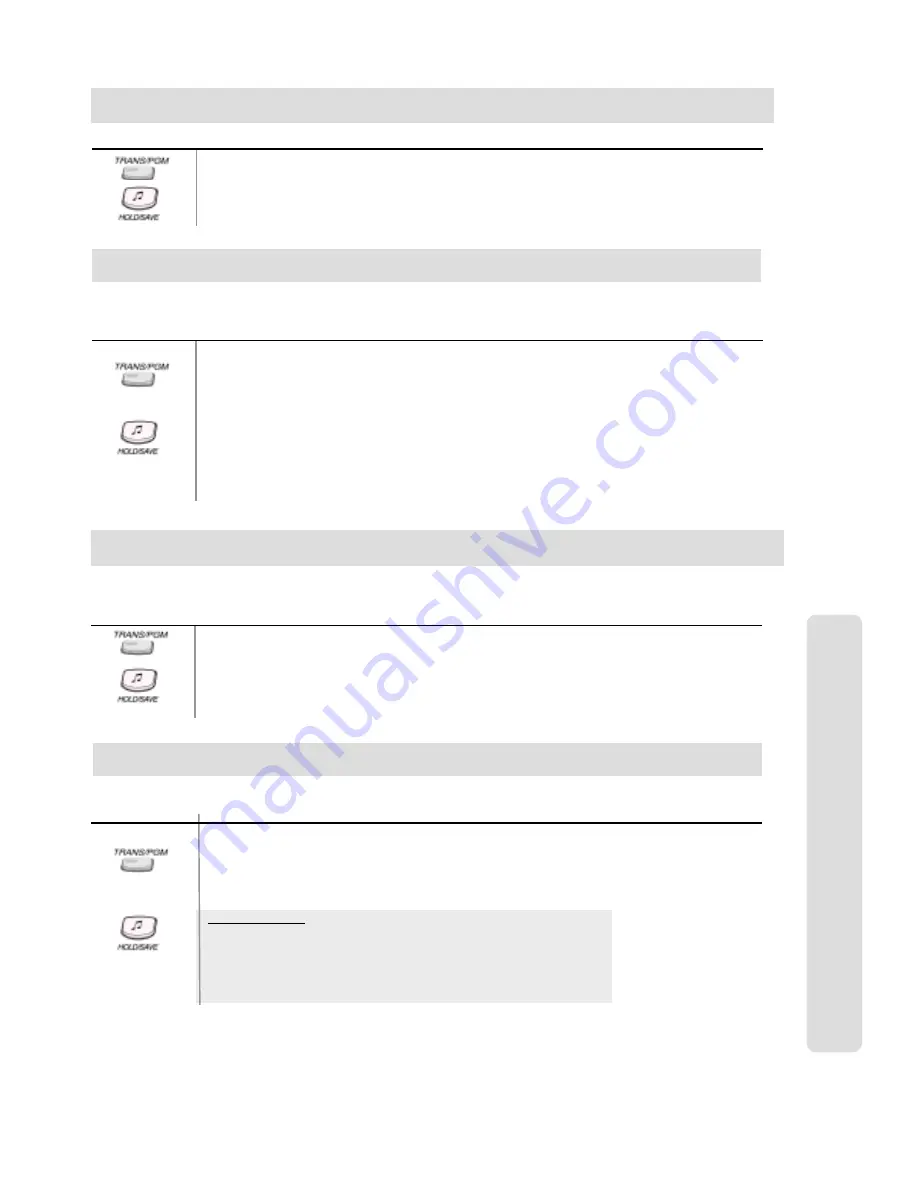
To print out the Room Status,

Press 

TRANS/PGM

button.

Dial  

# 2 2

Dial the range of Room Numbers to be printed.

Press 

HOLD/SAVE

button.

Button

Procedures

Printing a Guest's Room Status (at Front Desk) 

If you do not want guests to be able to dial each other unless they are transferred by the attendant then, it is possible to 
block single or multiple rooms.   

To enable intercom calls,

Press 

TRANS/PGM

button.

Dial  

# 3 1

Dial the range of Room Number.

Press 

HOLD/SAVE

button.

To disable intercom calls,

Press 

TRANS/PGM

button.

Dial  

# 3 2

Dial the range of Room Number.

Press 

HOLD/SAVE

button.

Button

Procedures

Intercom Call Enable/Disable (at Front Desk) 

Hote

l Operation

By guest's request, system attendant can enable one-time CO call to intercom only station. In this time, calling station's COS 
is temporally changed to charged station's COS. The guest can make only one external call for request. 

To enable one-time outside call,

Press 

TRANS/PGM

button.

Dial  

# 4 3

Dial the room number that the call will be made from.

Dial the room number that the call will be charged to.

Press 

HOLD/SAVE

button.

Button

Procedures

To set the LCD language type,

Press 

TRANS/PGM

button.

Dial 

7 1

Dial the range of room number to be changed.

Dial the language code (0~14)

Press 

HOLD/SAVE

button.

Button

Procedures

The default language is English and if the language is changed then, it will be reset to default when the guest checks out.   

Change LCD Display Language

One-Time CO Call Enable (at Front Desk) 

Language Codes 

00: English

01: Italian 

02: Finnish

03: Dutch 

04: Swedish 

05: Danish

06: Norwegian 

07: Hebrew

08: Germany

09: French

10: Portuguese

11: Spanish 

12: Korean

13: Estonia

14: Russian

Summary of Contents for aria 130

Page 1: ...IDE USER GUIDE Co ntains Quic k Re fe re nc e Guide s Co ntains Quic k Re fe re nc e Guide s Digital Ke ys e t Digital Ke ys e t Fe ature s Fe ature s Atte ndant Atte ndant Ope ration Ope ration Ho te l Ho te l Opt io n Fe ature s Opt io n Fe ature s Sing le Line Te le phone Analo g ue Sing le Line Te le phone Analo g ue Ope rat io n Ope rat io n ...

Page 2: ...aria 130 NB Although every effort is made to keep this Guide up to date Features and Functions are subject to change without notice An inclusion of a feature or function in this guide does not imply it is operational on your system Some features require specific hardware or software installation Please check with your aria dealer for further details ...

Page 3: ... Custom Message Programming 20 Using Dial By Name 19 V Voice Announcement 21 Voice Over 14 W Wake up Call 19 Attendant Operation 26 Attendant Clock Set 26 Attendant DSS Operation 30 Attendant Intrusion 27 Attendant LCD Language 30 Attendant Programming Menu Table 32 33 Changing Time Date Format 27 CO Outgoing Disable 27 Customized Message 28 Day On demand Night Weekend Mode Svc 28 Dial By Name 29 ...

Page 4: ...al or outside When called party answers press CONF button Add next conference party by selecting another outside line or intercom station When the party answers press CONF button twice All parties are connected To terminate a conference The conference initiator should be actively in the conference Hang up or press CONF button to finish the conference only for conference initiator Leaving a Message...

Page 5: ...ton Dial 0 4 1 Enter Date YYMMDDHH and press HOLD SAVE button Enter Time HHmm and press HOLD SAVE button If there is no need to change date or time do not dial current date time and press HOLD SAVE button Entering Account Code To enter Acc Code prior to a call Press Acc Code flexible button Dial the account code 1 12 digits to end digit entry Access the Line To enter Acc Code during a call Press A...

Page 6: ...n Hold 13 Changing Differential Ring 13 Voice Over 14 Answering a Call Wait with Voice Over 14 Directed Call Pick up 14 Call Wait Camp on 14 Mute 14 Call Back 14 Message Waiting 15 Do Not Disturb 15 Call Forward 15 Paging 16 Flash 16 Speakerphone 16 Speaker Volume Control 17 Ring Volume Control 17 System Features 17 Placing an Intercom Group Call 17 Placing a CO Call on Hold 17 Group Call Pick up ...

Page 7: ...nt LCD Language 30 Intercom Box BGM Selection by Attendant 30 External Page Port BGM Selection by Attendant 30 Attendant DSS Operation 30 Make a Page 31 Transferring an Outside Line to Another Station 31 Intercom Group Call 31 Overriding a Key Telephone in Do Not Disturb 31 Attendant Programming Menu Table 32 33 Hotel Operation 34 Introduction 34 Register Hotel Name 34 Check In 34 Check In Change ...

Page 8: ...nsfer Screened and Unscreened 43 Last Number Redial 43 Station Speed Dialing 43 Conference Calling 43 Message Waiting 43 Call Forwarding your Station 43 D N D Do Not Disturb 44 Shuttle Call 44 Universal Night Answer 44 Paging 44 Meet Me Paging 44 Flash To Line 44 Queuing 44 Call Park 44 Pre selected Messages 44 Voice Announcements Requires an Aria Voice Card 44 Off Hook Alarm 44 Authorisation Code...

Page 9: ... Buttons KD 24N No LCD Display 24 Flexible Buttons Large Digital Key Telephone KD 33LD KD E 36LD LDK 306LD KD E Series KD E 36EXE KD E 8BTN KD E 36EXE LCD Display 24 Flexible Buttons KD E 36ENH No LCD Display 24 Flexible Buttons KD E 24EXE LCD Display 12 Flexible Buttons KD E 24ENH No LCD Display 24 Flexible Buttons KD E 8 BTN No LCD Display 8 Flexible Buttons Digital Key Telephone Family ...

Page 10: ... LDK 30DS Series keysets have normal functions as KD KD E keysets and CTI function to connect PC RS 232C Interface Function Connecting CTI Module the KE C KD C keyset operates to transmit receive data to communicate with PC Installation Guide for Connection CTI Module to KE C KD C keyset 1 Connect KE C KD C keyset to KTU port of CTI module with 6 pin line cord 2 Connect KSU to KSU port of CTI modu...

Page 11: ...ened transfer When the called extension answers notice the call transfer and hang up to complete call transfer While the station you called rings hang up to complete call transfer To answer screened transfer When a station rings according to Intercom Answer Mode selection answer the intercom call The transferring party hangs up the call will be connected Range 700 827 Screened Transfer Unscreened ...

Page 12: ...retary Transfer Button Procedures When the Executive Station is busy or DND Do Not Disturb all calls will go to the Secretary Station The Secretary Station may signal the Executive Station that is in DND by using Call Wait feature Press key or dial the last digit of the number of Executive station or press the DSS button to operate Call Wait feature Range Range Button Procedures Range Dialing an e...

Page 13: ...ional Press HOLD SAVE button Range Button Procedures Press TRANS PGM button Press SPEED button and speed number bin Dial the desired phone number Press HOLD SAVE button Enter the name up to 16 letters using the code table Users for digital display phone can enter the called party s name so they can dial by name instead of dialing the phone number Press HOLD SAVE button Q 11 Z 12 13 1 10 A 21 B 22 ...

Page 14: ...nging 3 bursts of tone in HF Hands free or PV Privacy mode Begin your announcement after the tone Placing an Intercom Call Answering an Intercom Call Button Procedures With your intercom answer mode setting in TN mode intercom ring is heard Lift handset to talk in PV mode 3 bursts of tone and one way announcement is heard Lift handset to talk in HF mode 3 bursts of tone and announcement is heard R...

Page 15: ... first caller when the second caller hangs up Range Range Button Procedures You hear intercom or transferred outside line ring at a station Lift handset or press MON button Dial 42 and the ringing station number You will be connected to the calling party Range 700 827 Directed Call Pick up Call Wait Camp on Button Procedures After receiving intercom busy tone dial or last digit of called station n...

Page 16: ...n while on hook The LED is extinguished and DND at your phone is removed Range On LKD 2N S 8D S Dial 5 5 3 instead of pressing DND FWD button Toggle setting Do Not Disturb Button Procedures Lift handset or press MON button The MON button is illuminated Press DND FWD button Press the call forward type 0 Follow me 1 Unconditional 2 Busy calls 3 No answer calls 4 Busy no answer calls 5 Station off ne...

Page 17: ...ill hear warning tone After the tone speak your message Hang up Range All Call 6 Internal Zone 1 0 1 Internal Zone 2 0 2 to Internal Zone 15 1 5 Internal All Call 7 External Zone 1 4 1 External Zone 2 4 2 External Zone 3 4 3 External All Call 5 Meet Me Page Internal Zones 01 15 A station which is allowed to access page facilities can connect and transmit voice announcement to any or all of the sys...

Page 18: ...d to system hold Press HOLD SAVE button To retrieve the call Lift handset and press flashing outside line button Range Group Call Pick up Button Procedures Range You should be in the same pick up group as ringing phone You hear an unattended phone ringing Lift handset or press MON button Dial 1 System Features Conference Button Procedures Range To establish a conference Call desired party internal...

Page 19: ...ures To register access authorization code Press TRANS PGM button and dial 3 1 Dial your own 5 digits access authorization code Press HOLD SAVE button Confirmation tone is heard Access Authorization Code System Features To change access authorization code Press TRANS PGM button and dial 3 2 Dial your current access authorization code You will hear confirmation tone Dial your new 5 digits access au...

Page 20: ...he following DIAL BY NAME ICM 1 U_SPD 2 S_SPD 3 Select desired type 1 Intercom 2 User Station Speed Dial 3 System System Speed Dial Confirmation tone is heard and you will see the following 1 XXXX XXXX XXXXXX 2 YYYY YYYY YYYYYY Procedures Range Button Using Dial By Name Pressing VOLUME button the cursor will be moved to the next name When the cursor points a name or a dial number to call press HOL...

Page 21: ... See Creating Customized Message Button Procedures Range You can select a pre assigned message to be displayed on the LCD of the phone calling the station Pre selected Message System Features To turn off message display Press flashing DND FWD button User Custom Message Programming Button Procedures Press TRANS PGM button and dial 5 2 at the station Confirmation tone is heard Enter the message up t...

Page 22: ...e wait After user greeting is played Record your message prompt is heard After beep tone record your message with normal voice Hang up Button Procedures Range Voice Announcement This feature provides the station an audible system prompt and you can record your greeting to provide the caller when the call is not answered within the predefined time Listen to the recorded message Press the flashing C...

Page 23: ...irect Inward System Access Dial the CO access code after hearing dial tone or voice guide from DVU Or dial the CO access code after dialing the programmed authorization code when needed for outgoing call Button Procedures Outside caller can access a CO line which is programmed as DISA line Range LCD Language Change Button Procedures Range Press TRANS PGM button and dial 7 1 The language in LCD is ...

Page 24: ...s 2 to save the message Press 1 to delete the message The VMIB will hang up when all messages are deleted or hang up the station To Remove the Call Forward to the Voice Mail VMIB Press MON button Press DND FWD button Dial To Remove the Call Forward to the Voice Mail VMIB Press MON button Dial 5 5 4 Voice Mail VMIB Guide for SLT 2 Button Digital Key Telephones To Record Out Going Greeting Dial 5 6 ...

Page 25: ...e forward to your voice mail Dial to exit voice mail remote control mode Voice Mail VMIB Remote Access Quick Reference Guide VMIB Quick Ref Guide M ain M enu Sub M enu Sub M enu 2 Selection Rem ark 1 TYPE 1 2 3 4 DKTU 1 RING 2 ANSW ER MODE H 1 T 2 P 3 1 COS DOW N ICM COS7 2 COS RESTORE ENTER AUTHO CODE 2 COS 3 W ALKING COS ENTER AUTHO CODE 1 AUTH REGISTER 3 AUTHORIZATION 2 AUTH CHANGE 1 SET W AKE ...

Page 26: ...esired code Press HOLD SAVE button To erase a flexible button Press TRANS PGM button Press the flexible button to be erased Press HOLD SAVE button Button Procedures Range Code for Flexible Button Programming Ring Type Ring Answer Mode COS Down COS Restore Walking COS Auth Code Register Auth Code Change Set Wake up Time Wake up Disable Set Preselected MSG Set Customer MSG Record User Greeting Liste...

Page 27: ...tem Greetings To record system greetings Press TRANS PGM button Dial 0 6 Dial the announcement number 001 100 Press button to record is heard Then press button to start recording Record your greeting and press HOLD SAVE button to finish the recording To delete press SPEED button while the message is played The System Prompt messages are 071 100 as default 071 VMIB MOH 086 Reserved 072 Reserved 087...

Page 28: ...peed dial Name Press the MUTE key to edit the Name without changing the stored number A group of speed dial numbers can be stored within the system for access by allowed stations These numbers provide speedy access to often used outgoing CO dialing numbers System Speed Dial Range 2000 3499 System Speed Dial Range Attendant Intrusion Button Procedure To assign a flexible key as the Intrusion button...

Page 29: ...ogramming Day On demand Night Weekend Mode Service Attendant Operation Button Procedures To Print out Accumulated SMDR Records For station basis Dial TRANS PGM 0 1 1 1 Enter the desired station range Press HOLD SAVE button Accumulated SMDR records will be printed to SMDR port Station Message Detail Recording SMDR can provide details on both incoming and outgoing calls For account group basis Dial ...

Page 30: ...ress TRANS PGM button Dial 0 1 2 1 Select Measurement Time type Press HOLD SAVE button To print all summary traffic report periodically at system attendant Press TRANS PGM button Dial 0 1 2 2 Press HOLD SAVE button To cancel periodic printing of all summary traffic reports Press TRANS PGM button Dial 0 1 2 3 Press HOLD SAVE button To print the traffic report Press TRANS PGM button Dial 0 1 2 4 Att...

Page 31: ... Italian 0 2 Finnish 0 3 Dutch 0 4 Swedish 0 5 Danish 0 6 Norwegian 0 7 Hungarian 0 8 Germany 0 9 French 1 0 Portuguese 1 1 Spanish 1 2 Korean 1 3 Estonia 1 4 Russian Button Procedure To set ICM box music Press TRANS PGM button Dial 0 7 5 Dial the music channel 01 11 Press HOLD SAVE button The attendant can select the music channel source to an ICM box Intercom Box BGM Selection by Attendant Butto...

Page 32: ...ile connecting an outside line press the desired DSS station button You can wait to announce the transfer or hang up Button Procedure Lift handset or press MON button Press the programmed INTERCOM GROUP CALL button The call is connected to an idle station in the group Overriding a Key Telephone in Do Not Disturb Button Procedure Intercom Group Call Press DSS button of the station to be overridden ...

Page 33: ...Y Analysis Time Type MAIN ATD 2 PRINT ALL PERIODIC Analysis Time Type Print Time Hour MAIN ATD 3 ABORT PERI ODIC PRINT None MAIN ATD 4 PRINT ATD TRAFFIC Analysis Time Type MAIN ATD 5 PRINT CALL SUMMARY None MAIN ATD 6 PRINT CALL HOURLY None MAIN ATD 7 PRINT H W USAGE Analysis Time Type MAIN ATD 8 PRINT CO SUMMARY Analysis Time Type MAIN ATD 1 PRINT 2 TRAFFIC 9 PRINT CO HOURLY Enter CO Grp MAIN ATD...

Page 34: ...N 5 MESSAGE 5 ATD DEL ALL CLI MSG 6 REC VMIB ANNOUNCEMENT VMIB ANNC 01 70 SYSTEM ATD 1 CANCEL FEATURES STN END STN MAIN or GROUP ATD 2 REGISTER STA NAME STN NAME MAIN ATD 3 DISABLE CO OUTGOING PRESSING CO BTN MAIN ATD 4 AUTO RING MODE ATD AUTO 5 ICM BOX BGM CH SEL BGM CHANNEL 01 1 2 MAIN ATD 6 EXT PORT 1 BGM EN DI ENABLE DISABLE MAIN ATD 7 EXT PORT 2 BGM EN DI ENABLE DISABLE MAIN ATD 8 EXT PORT 3 ...

Page 35: ...me of hotel In check out or displaying room charge the registered hotel name is printed out in the headings Check In at Front Desk This feature allows the System Attendant to view the status of a room and check in a guest When checking in a guest without changing the Room Status the following default values will be applied to the room Guest Name Not assigned Room Day Night COS 22 Alarm Calls Not a...

Page 36: ... of Service Outside Call Restriction at Front Desk Room Status Type 2 When a guest is checked into a room the system will automatically remove any call barring restrictions that are set when the room is vacant The Class of Service is entered into the Room Status information as 2 digit the first digit represents the COS for day mode and the second digit the COS when the system is in night mode To c...

Page 37: ...sed for 3 types of operation 1 If restrictions have been set on the outside lines then staff and guest will have to dial 1 followed by a valid authorization code before they dial out 2 If you have Direct Inward System Access DISA configured on the system then outside callers into the switch could be allowed access to other outside lines for dialing out 3 It is possible to restrict outside calls fr...

Page 38: ... a guest with method of payment press SPEED button and dial bin no credit card no Press HOLD SAVE button If you wish to check out more than one guest dial the next room number Press MON button or hang up Button Procedures When the guests leave the hotel it is an easy operation to check them out The system will automatically calculate their bill and print it out on the printer Also any room status ...

Page 39: ... can enable one time CO call to intercom only station In this time calling station s COS is temporally changed to charged station s COS The guest can make only one external call for request To enable one time outside call Press TRANS PGM button Dial 4 3 Dial the room number that the call will be made from Dial the room number that the call will be charged to Press HOLD SAVE button Button Procedure...

Page 40: ...ked out of a room the maid status is automatically changed to Dirty Therefore when the maid has finished cleaning the room he she can change the maid status to Clean from the guest s extension Maid Status To register Clean by system attendant at Front Desk Press TRANS PGM button Dial 8 1 Enter the room range Press HOLD SAVE button To register Dirty by system attendant at Front Desk Press TRANS PGM...

Page 41: ...and on check out Room Rate Assign at Front Desk Hotel Operation Room Rate Assign Cont d To assign a range of rooms the same room rate Press TRANS PGM button Dial 5 2 Enter the room range Enter the room rate bin no Dial HOLD SAVE button Button Procedures This feature allows the system attendant to assign room rate among 20 different ones to individual rooms This information is included in the Total...

Page 42: ...l the name on line 1 or dial 2 and press HOLD SAVE button on line 2 Button Procedures This feature will automatically build an internal directory of registered service stations and guests staying at the hotel from the name information that is entered when they check in Once the name has been added to the list it is possible to choose a name from the list for dialing and transferring of calls Main ...

Page 43: ... NUMBER 1 ROOM RATE REGISTER RATE 00 0000000 Flex 1 00000 RATE COST 7 DGTS 5 ROOM RATE 2 ROOM RATE ASSIGN ROOM RATE SELECT ENTER ROOM RANGE ROOM xxx yyy 1 CALL RATE REGISTER CALL CHARGE RATE 0 2 CALL RATE ASSIGN SELECT CALL CHARGE RATE ENTER ROOM RANGE ROOM xxx yyy 3 PART TIME FEE PART TIME FEE 00 6 CALL RATE 4 BAR MINI BAR CHARGE BAR COST CHARGE ENTER ROOM NUMBER BAR COST CHARGE ENTER BAR CODE 00...

Page 44: ...registered before Follow Me Call Forward can be set Dial the extension number that will receive the call Hang up Placing an Outside Call Lift handset Dial 1 Dial the desired number Placing an Intercom Call Lift handset Dial intercom number Placing an Outside Call on Hold While connected to an extension call briefly depress and release the hook switch flash the hook switch OR Flash 5 6 0 for System...

Page 45: ...u if you need this feature While connected to an extension call flash the hook switch Dial 5 5 1 Hearing new dial tone from the other system dial the extension number on the required system When the station answers See Screened Transfer speak or hang up See Unscreened Transfer to transfer the call Analogue Single Line Telephone User Guide for aria Telephone Systems Single Line Analogue Telephone Q...

Page 46: ...ne Analogue Telephone Analogue Single Line Telephone User Guide for aria Telephone Systems Programming Your Name Lift handset Dial 5 6 3 Dial 7 4 Enter your name using the same codes as keysets Flash hook switch Confirmation tone is heard Hang up Entering an Account Code To identify a call system provides the user with an account code field in the Call Logging printout by entering an account code ...

Reviews: