background image

71

PICTURE CONTR

OL

• 1

16

6::9

9

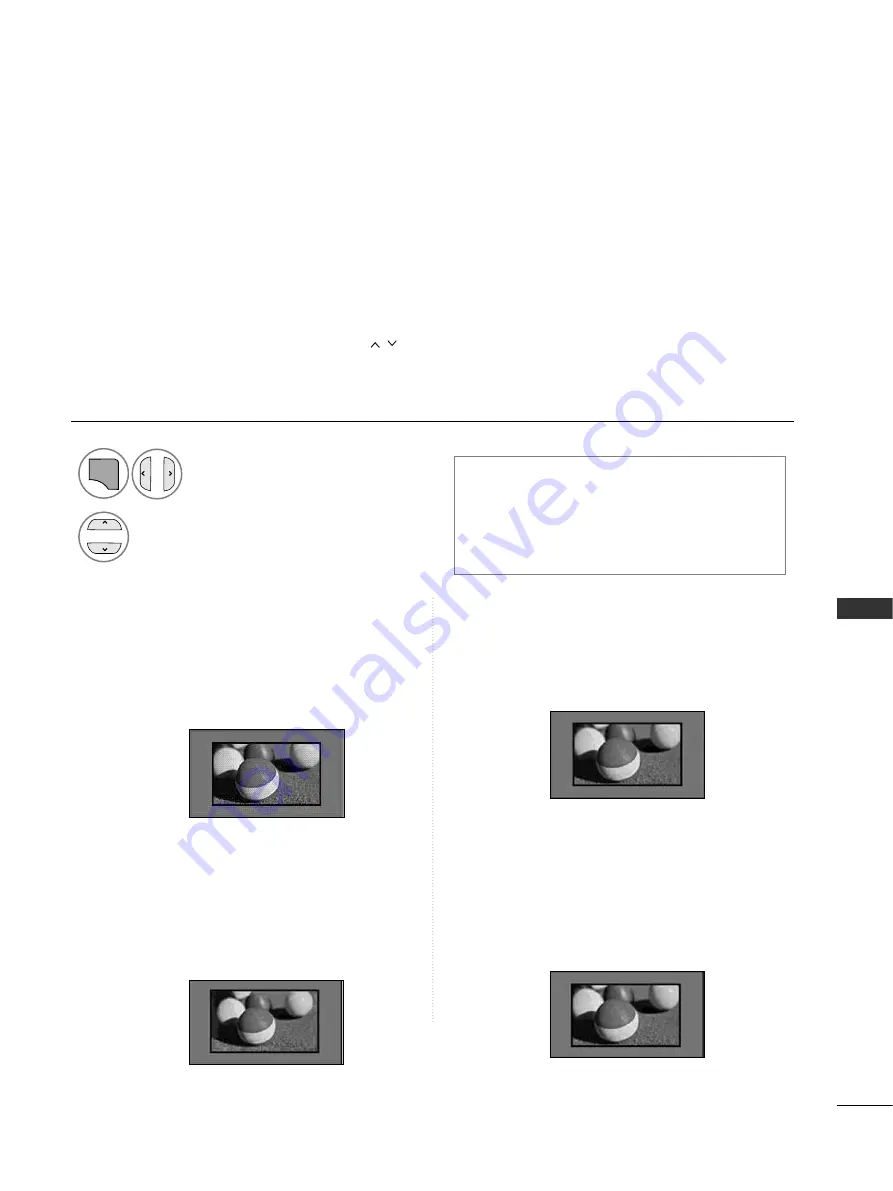
The following selection will allow you to
adjust the picture horizontally, in linear pro-
portion, to fill the entire screen(useful for
viewing 4:3 formatted DVDs).

• JJuusstt  SSccaann

Following Selection will lead to you view the
picture of best quality without loss of original
picture in high resolution image.
Note : If there is noise in original Picture, You
can see the noise at the edge.

• O

Orriig

giin

naall  

When your TV receives a wide screen signal it
will automatically change to the picture for-
mat  broadcast.

• FFu

ullll   W

Wiid

dee

When TV receives the wide screen signal,it will
lead you to adjust the picture horizontally or
vertically, in a linear proportion,to fill the entire
screen fully.

PICTURE CONTROL

PICTURE SIZE (ASPECT RATIO) CONTROL

You can watch the screen in various picture formats; 1

1 6

6 :: 9

9, JJu

usstt   S

Sccaan

n,

O

Orriig

giin

naall, FFu

ullll   W

Wiid

dee, 4

4 :: 3

3, 1

1 4

4 :: 9

9, Z

Z o

o o

o m

m and C

Ciin

neem

maa   Z

Zo

oo

om

m.

If a fixed image is displayed on the screen for a long time, that fixed image
may become imprinted on the screen and remain visible.

You can adjust the enlarge proportion using 

button.

This function works in the following signal.

• 

You can also adjust A

Assp

peecctt   R

Raattiio

o in the PPIIC

C--

T

TU

UR

RE

E

menu.

• 

For Zoom Setting, select 1

14

4::9

9,  Z

Zo

oo

om

m and

C

Ciin

neem

maa Z

Zo

oo

om

m   in Ratio Menu. After complet-

ing Zoom Setting, the display goes back to
Q.Menu.

Select A

Assp

peecctt   R

Raattiio

o. 

Select the desired picture format.

1

Q.MENU

Just Scan

2

Original 

Full Wide

Summary of Contents for 42PJ250-ZC

Page 1: ...www lge com OWNER S MANUAL PLASMA TV Please read this manual carefully before operating your set and retain it for future reference ENGLISH ...

Page 2: ...HDMI the HDMI logo and High Definition Multimedia Interface are trademarks or registered trademarks of HDMI Licensing LLC ...

Page 3: ...al Mode 20 Manual Programme Tuning In Analogue Mode 22 Programme Edit 24 Software Update 26 Diagnostics 28 CI Information 29 Selecting the Programme List 30 Favourite Programme Setup 31 Input List 32 Data Service 33 Input Label 33 Simple manual 34 35 AV Mode 38 Initializing Reset to original factory settings 39 TO USE A BLUETOOTH Precautions when using the Bluetooth 40 Setting the Bluetooth 41 Set...

Page 4: ...nd Mode 87 Sound Setting Adjustment User Mode 88 Infinite Sound 88 Balance 89 TV Speakers On Off Setup 90 DTV Audio setting In Digital Mode only 91 Selecting Digital Audio Out 92 Audio Reset 93 Audio Description In Digital Mode only 94 I II Stereo Dual Reception In Analogue Mode Only 95 NICAM Reception In Analogue Mode Only 96 Speaker Sound Output Selection 96 On Screen Menu Language Country Selec...

Page 5: ... for stand assembly Polishing Cloth Polishing cloth for use on the screen This item is not included for all models Lightly wipe any stains or fingerprints on the surface of the TV with the polishing cloth Do not use excessive force This may cause scratching or discoloura tion Ferrite Core Black This feature is not available for all models Ferrite core can be used to reduce the electromagnetic wave...

Page 6: ...ng cost INPUT MENU OK VOLUME PROGRAMME POWER Power Standby Indicator Illuminates red in standby mode Turn off red smoothly when the TV is switched on Intelligent Sensor Adjusts picture accord ing to the surround ing conditions 42 50PJ2 50 60PK2 Remote Control Sensor INPUT MENU OK VOLUME PROGRAMME POWER Power Standby Indicator Illuminates red in standby mode Turn off red smoothly when the TV is swi...

Page 7: ...tions 42 50PJ5 50 60PK5 Remote Control Sensor INPUT MENU OK VOLUME PROGRAMME POWER Power Standby Indicator Illuminates red in standby mode Turn off red smoothly when the TV is switched on Intelligent Sensor Adjusts picture according to the surrounding conditions Remote Control Sensor 42 50PJ6 50PK7 Touch Sensor You can use the desired but ton function by touching Touch Sensor You can use the desir...

Page 8: ...TROL SERVICE PORT Connect to the RS 232C port on a PC This port is used for Service or Hotel mode Component Input Connect a component video audio device to these jacks Antenna Input Connect antenna or cable to this jack SERVICE ONLY PORT PCMCIA Personal Computer Memory Card International Association Card Slot Insert the CI Module to P PC CM MC CI IA A C CA AR RD D S SL LO OT T This feature is not ...

Page 9: ... This port is used for Service or Hotel mode RGB IN Input Connect the output from a PC Component Input Connect a component video audio device to these jacks Antenna Input Connect antenna or cable to this jack USB Input Connect USB storage device to this jack PCMCIA Personal Computer Memory Card International Association Card Slot Insert the CI Module to P PC CM MC CI IA A C CA AR RD D S SL LO OT T...

Page 10: ... Optical audio cable RS 232C IN CONTROL SERVICE PORT Connect to the RS 232C port on a PC This port is used for Service or Hotel mode RGB IN Input Connect the output from a PC Component Input Connect a component video audio device to these jacks Antenna Input Connect antenna or cable to this jack USB Input Connect USB storage device to this jack PCMCIA Personal Computer Memory Card International As...

Page 11: ...ightening part of the bolt SWIVEL STAND Image shown may differ from your TV After installing the TV you can adjust the TV set manually to the left or right direction by 20 degrees to suit your viewing position BACK COVER FOR WIRE ARRANGEMENT Image shown may differ from your TV After Connecting the cables as necessary install Cable Holder as shown and bundle the cables Cable Holder Image shown may ...

Page 12: ...he TV NOTE G When moving the TV undo the cords first G Use a platform or cabinet strong and large enough to support the size and weight of the TV G To use the TV safely make sure that the height of the bracket on the wall and on the TV is the same 3 1 2 Use the eye bolts or TV brackets bolts to fix the product to the wall as shown in the picture If your TV has bolts in the eyebolts loosen then bol...

Page 13: ...rchase a wall mounting bracket which supports VESA standard A LG recommends that wall mounting be performed by a qualified professional installer 10 cm 10 cm 10 cm NOTE G Should Install wall mount on a solid wall perpen dicular to the floor G Should use a special wall mount if you want to install it to ceiling or slanted wall G The surface that wall mount is to be mounted on should be of sufficien...

Page 14: ...e used for teletext on T TE EL LE ET TE EX XT T models only P Pr ro og gr ra am mm me e e ed di it t TELETEXT BUTTONS SUBTITLE These buttons are used for teletext For further details see the Teletext section G G p p 1 10 07 7 Recalls your preferred subtitle in digital mode 1 1 A 10 PREPARATION PREPARATION MENU GUIDE Q MENU BACK INFO i EXIT THUMBSTICK Up Down Left Right OK Selects a menu Clears all...

Page 15: ...ces connected to TV When you toggle this button the Simplink menu appears at the screen G G p p 3 35 5 Switches the Audio Description On or Off Installing Batteries Open the battery compartment cover on the back and install the batteries matching correct polarity with with Install two 1 5 V AAA batteries Do not mix old or used batteries with new ones Close cover To remove the batteries perform the...

Page 16: ...uttons These buttons are used for teletext on T TE EL LE ET TE EX XT T models only P Pr ro og gr ra am mm me e e ed di it t TELETEXT BUTTONS SUBTITLE These buttons are used for teletext For further details see the Teletext section G G p p 1 10 07 7 Recalls your preferred subtitle in digital mode 1 1 MENU GUIDE Q MENU BACK INFO i EXIT THUMBSTICK Up Down Left Right OK Selects a menu Clears all on sc...

Page 17: ... full set of screen information to the next one See a list of AV devices connected to TV When you toggle this button the Simplink menu appears at the screen G G p p 3 35 5 Installing Batteries Open the battery compartment cover on the back and install the batteries matching correct polarity with with Install two 1 5 V AAA batteries Do not mix old or used batteries with new ones Close cover To remo...

Page 18: ......

Page 19: ... Multi family Dwellings Apartments Connect to wall antenna socket Single family Dwellings Houses Connect to wall jack for outdoor antenna Outdoor Antenna VHF UHF Wall Antenna Socket RF Coaxial Wire 75 Ω Antenna UHF Signal Amplifier VHF In poor signal areas to achieve better picture quality it may be necessary to install a signal amplifier to the antenna as shown above If signal needs to be split f...

Page 20: ...l device refer to the diagram as shown below Connect the video outputs Y PB PR of the external equipment digital set top box DVD etc to the C CO OM M P PO ON NE EN NT T I IN N V VI ID DE EO O jacks on the TV Connect the audio output of the external equipment digital set top box DVD etc to the C CO OM MP PO ON NE EN NT T I IN N A AU UD DI IO O jacks on the TV Turn on the external equipment Refer to...

Page 21: ...u must set the output resolution appropriately G G Check that your HDMI cable is version 1 3 or higher If the HDMI cables don t support HDMI version 1 3 flicker ing or no screen display can result Please use the latest cables that support at least HDMI version 1 3 NOTE COMPONENT IN COMPONENT COMPONENT IN HDMI DVI IN 1 HDMI IN 2 DVI PC OUTPUT AUDIO COMPONENT IN CONNECTING WITH AN HDMI TO DVI CABLE ...

Page 22: ...t AV1 AV2 Input Video Audio RGB Output Video Audio Analogue only Analogue DTV AV1 AV2 AV3 Except for 42 50PJ2 50 60PK2 output is available O O O O O X G G TV Out Outputs analogue TV signals Monitor Out Outputs the current screen image Digital TV Analogue TV AV1 AV3 Component RGB HDMI AV2 AV1 TV Out X O O O O O O X X X O O O AV2 Monitor Out AV2 When DTV scheduled recording is in progress using reco...

Page 23: ...ng guide Select A AV V3 3 input source using the I IN NP PU UT T button on the remote control 1 2 3 G G If you have a mono VCR connect the audio cable from the VCR to the A AU UD DI IO O L L M MO ON NO O jack of the TV NOTE 1 Camcorder Video Game Set or COMPONENT IN OUTPUT SWITCH ANT IN R S VIDEO VIDEO ANT OUT L CONNECTING WITH A RF CABLE To avoid picture noise interference allow adequate distance...

Page 24: ... inserted into the PCMCIA card slot in the right direction If the module is not inserted properly this can cause damage to the TV and the PCMCIA card slot NOTE Insert the CI Module to P PC CM MC CI IA A Personal Computer Memory Card International Association C CA AR RD D S SL LO OT T of TV as shown For further information see p 29 1 INSERTION OF CI MODULE T To o v vi ie ew w t th he e e en nc cr r...

Page 25: ... to the digi tal audio Optical input on the audio equipment Set the TV Speaker option Off in the AUDIO menu Gp p 9 90 0 Refer to the external audio equipment instruction manual for operation 2 3 1 1 2 DIGITAL AUDIO OUT SETUP Sending the TV s audio signal to external audio equipment via the Digital Audio Output Optical port If you want to enjoy digital broadcasting through 5 1 channel speakers conn...

Page 26: ...RGB PC HDMI DVI PC mode Except for 42 50PJ2 50 60PK2 HDMI DVI DTV mode 59 94 60 59 94 60 50 00 50 00 59 94 60 50 00 59 94 60 24 00 30 50 00 59 94 60 31 649 31 469 31 47 31 50 31 25 37 50 44 96 45 00 28 125 33 72 33 75 27 00 33 75 56 25 67 433 67 50 Resolution Horizontal Frequency kHz Vertical Frequency Hz 640x480 720x480 720x576 1280x720 1920x1080 720x400 640x480 800x600 1024x768 1280x768 1360x768...

Page 27: ... 50 60PK5 50PK7 for the PC mode they provide the best picture quality G Connect the signal cable from the monitor out put port of the PC to the RGB PC port of the TV or the signal cable from the HDMI output port of the PC to the HDMI IN or HDMI DVI IN port on the TV G Connect the audio cable from the PC to the Audio input on the TV Audio cables are not included with the TV G If using a sound card ...

Page 28: ...on Size and Phase to the factory default settings This function works in the following mode RGB PC Screen Reset Select P PI IC CT TU UR RE E Select S Sc cr re ee en n 3 Select R Re es se et t 2 OK OK Press the M ME EN NU U E EX XI IT T button to return to normal TV viewing Press the B BA AC CK K button to move to the previous menu screen Select Y Ye es s Run R Re es se et t 4 OK 5 OK To Set Auto C...

Page 29: ... for a few seconds while the auto configuration is in progress Auto Configure RGB PC mode only If the position of the image is still not correct try Auto adjustment again If picture needs to be adjusted again after Auto adjustment in RGB PC you can adjust the P Po os si it ti io on n S Si iz ze e or P Ph ha as se e Select P PI IC CT TU UR RE E Select S Sc cr re ee en n Select A Au ut to o C Co on ...

Page 30: ...PC mode This function works in the following mode RGB PC Selecting Resolution Select P PI IC CT TU UR RE E Select S Sc cr re ee en n Select R Re es so ol lu ut ti io on n Select the desired resolution 1 MENU 3 4 2 OK OK OK 5 OK Press the M ME EN NU U E EX XI IT T button to return to normal TV viewing Press the B BA AC CK K button to move to the previous menu screen Auto Config SCREEN Move Prev Res...

Page 31: ...hase manually This function works in the following mode RGB PC Adjustment for screen Position Size Phase Select P PI IC CT TU UR RE E Select S Sc cr re ee en n Select P Po os si it ti io on n S Si iz ze e or P Ph ha as se e Make appropriate adjustments 1 MENU 3 4 2 OK OK OK 5 OK Press the M ME EN NU U E EX XI IT T button to return to normal TV viewing Press the B BA AC CK K button to move to the p...

Page 32: ... be displayed again b Press the BACK button to change the current OSD to the previous OSD c For those countries without confirmed DTV broadcasting standards some DTV features might not work depending on the DTV broadcasting environment d Home Use mode is the optimal setting for home environments and is the TV s default mode e Store Demo mode is the optimal setting for store environments If a user ...

Page 33: ...u ud di io o Selects the sound output S Sl le ee ep p T Ti im me er r Sets the sleep timer F Fa av vo ou ur ri it te e Selects the favourite programme U US SB B D De ev vi ic ce e Selects Eject in order to eject USB device Except for 42 50PJ2 50 60PK2 E En ne er rg gy y S Sa av viin ng g Selects your desired Energy Saving mode Only 42 50PJ2 50 60PK2 QUICK MENU Display each menu Select your desired...

Page 34: ... PICTURE LOCK AUDIO TIME USB OK Move Aspect Ratio 16 9 Picture Wizard Energy Saving Intelligent Sensor Picture Mode Contrast 95 Brightness 50 Sharpness 65 Colour 60 PICTURE E OK Move Auto Volume Off Clear Voice II Off 3 Balance 0 Sound Mode Standard Infinite Sound Off Treble 50 Bass 50 Reset AUDIO E L R OK Move Photo List Music List Movie List DivX Reg Code Deactivation USB OK Move Set Password Lo...

Page 35: ...put a 4 digit pass word in L Lo oc ck k S Sy ys st te em m O On n If you wish to keep on auto tuning select S St ta ar rt t using the button Then press the OK button Otherwise select C Cl lo os se e A Au ut to om ma at ti ic c N Nu um mb be er ri in ng g Decide whether to use the programme numbers as sent by broad casting stations for tuning Select S SE ET TU UP P Select A Au ut to o T Tu un ni in...

Page 36: ...rogramme numbers as sent by broad casting stations for tuning Select S SE ET TU UP P Select A Au ut to o T Tu un ni in ng g Select A An nt te en nn na a Run A Au ut to o t tu un ni in ng g 1 MENU 3 2 OK OK 5 OK Press the M ME EN NU U E EX XI IT T button to return to normal TV viewing Press the B BA AC CK K button to move to the previous menu screen Check your antenna connection The previous channe...

Page 37: ... ym mb bo ol l r ra at te e Enter a user defined symbol rate Symbol rate Speed at which a device such as modem sends symbols to a channel M Mo od du ul la at ti io on n Enter a user defined modulation Modulation Loading of audio or video signals onto carrier N Ne et tw wo or rk k I ID D Sweden only Unique identifier allocated for each user N No ot te e G If you select C Ca ab bl le e after checkin...

Page 38: ...her than Finland and Sweden When selecting Antenna if Finland Sweden or country is chosen Use NUMBER buttons to input a 4 digit pass word in L Lo oc ck k S Sy ys st te em m O On n Select S SE ET TU UP P Select M Ma an nu ua al l T Tu un ni in ng g Select D DT TV V Select the desired channel number Manual Tuning Manual Tuning Your receiver will add this channel to your channel list UHF CH Bad Norma...

Page 39: ... SE ET TU UP P Select M Ma an nu ua al l T Tu un ni in ng g Select D DT TV V Make appropriate adjustments 1 MENU 3 2 OK OK 4 OK Press the M ME EN NU U E EX XI IT T button to return to normal TV viewing Press the B BA AC CK K button to move to the previous menu screen 1 2 3 4 5 0 6 7 8 9 When selecting Cable DVB cable mode if Finland Sweden or country is chosen Frequency kHz 362000 Symbol rate kS s...

Page 40: ...and M East Africa Australia I I PAL I II U K Ireland Hong Kong South Africa D DK K PAL D K SECAM D K East Europe China Africa CIS To store another channel repeat steps 4 to 9 Select S SE ET TU UP P Select M Ma an nu ua al l T Tu un ni in ng g Select T TV V Select the desired pro gramme number on Select a TV system Select V V U UH HF F or C Ca ab bl le e Commence searching Select the desired channe...

Page 41: ... A A to Z Z the number 0 0 to 9 9 and blank OK OK OK Press the M ME EN NU U E EX XI IT T button to return to normal TV viewing Press the B BA AC CK K button to move to the previous menu screen OK Select S St to or re e OK Move Auto Tuning Manual Tuning Programme Edit Software Update On Diagnostics CI Information SETUP OK Move Auto Tuning Manual Tuning Programme Edit Software Update On Diagnostics ...

Page 42: ...n if Automatic Numbering is unchecked when you start Auto Tuning Use NUMBER buttons to input a 4 digit pass word in L Lo oc ck k S Sy ys st te em m O On n Select S SE ET TU UP P Select P Pr ro og gr ra am mm me e E Ed di it t Enter the P Pr ro og gr ra am mm me e E Ed di it t Select a programme to be stored or skipped YLE TV1 1 Page Change P 1 YLE TV1 2 YLE TV2 4 TV4 Stockholm 5 YLE FST 6 CNN 8 YL...

Page 43: ...ou can no longer edit programmes A Skipping a programme number Select a programme number to be skipped 2 BLUE BLUE Turn the programme number to blue 3 BLUE BLUE Release 1 When programmes are to be skipped the skipped programme shows in blue and these programmes will not be selected by the P P buttons during TV viewing If you wish to select a skipped programme directly enter the programme number wi...

Page 44: ...Software Update On Diagnostics CI Information SETUP OK Move Auto Tuning Manual Tuning Programme Edit Software Update On Diagnostics CI Information SETUP Select S SE ET TU UP P Select S So of ft tw wa ar re e U Up pd da at te e Select O On n or O Of ff f If you select O On n a user confirm message box will be displayed to notify that new software is found Save Software Update On Software Update On ...

Page 45: ...for scheduled update stream After the Software Update is complete the System restarts Select the Y Ye es s using the button and you will see the follow ing picture When the Software Update menu is O Of ff f the message to change it to O On n appears When the power is turned off downloading starts When the power is turned on while updat ing the progress status is displayed Yes No Software update is...

Page 46: ...ed MUX MUX A higher directory of channels in digital broadcasting a single MUX contains multiple channels Select S SE ET TU UP P Select D Di ia ag gn no os st ti ic cs s Display the information of Channel Display Manufacturer Model Type Serial Number and Software Version Diagnostics 1 MENU 3 2 OK OK 4 OK Engineering Diagnostics Manufacturer LG Electronics Inc Model Type 50PJ550 ZD Serial No SKJY11...

Page 47: ...1 MENU 3 2 OK OK 4 OK Press the B BA AC CK K button to return to normal TV viewing i i Save This function enables you to watch some encrypted services pay services If you remove the CI Module you can not watch pay services When the module is inserted into the CI slot you can access the module menu To purchase a module and smart card contact your dealer Do not repeatedly insert or remove a CI modul...

Page 48: ...g programme LIST A Selecting a programme in the programme list You may find some blue programmes These have been set up to be skipped by auto pro gramming or in the programme edit mode Some programmes with the channel number shown in the programme LIST indicate there is no station name assigned Turn the pages 2 Return to normal TV viewing A Paging through a programme list PROGRAMME LIST 1 BBC 2 BB...

Page 49: ...playing the favourite programme list MARK FAV Select your desired programme Select F Fa av vo ou ur ri it te e A Selecting favourite programme 1 2 3 4 5 0 6 7 8 9 2Q MENU 4Q MENU 3 1 or Select F Fa av vo ou ur ri it te e Return to TV viewing This will automatically include the selected programme into your favourite programme list FAVOURITE LIST 1 BBC 2 BBC 3 BBC Exit P A G E P F F Favourite G G Fa...

Page 50: ...TV TV Digital cable input is available only at Finland Sweden and country A AV V1 1 A AV V2 2 3 3 Except for 42 50PJ2 50 60PK2 Select it when watching the VCR or external equipment C Co om mp po on ne en nt t Select it when using the DVD or the Digital set top box depends on connec tor R RG GB B Except for 42 50PJ2 50 60PK2 Select it when using PC depends on connec tor H HD DM MI I1 1 or H HD DM M...

Page 51: ... al l T Te el le et te ex xt t and T Te el le et te ex xt t if both exist at the same time If only one of them exists either M MH HE EG G or T Te el le et te ex xt t is enabled regardless of which option you selected Select O OP PT TI IO ON N Select D Da at ta a S Se er rv vi ic ce e Select M MH HE EG G or T Te el le et te ex xt t Save 1 MENU 3 2 OK OK 4 OK Press the M ME EN NU U E EX XI IT T butt...

Page 52: ...TION E SIMPLE MANUAL You can easily and effectively access the TV information by viewing a simple manual on the TV During the Simple Manual operation audio will be muted Simple Manual Select O OP PT TI IO ON N Select S Si im mp pl le e M Ma an nu ua al l Select the part of the manual you want to see 1 MENU 2 OK OK 3 Press the B BA AC CK K button to return to normal TV viewing Image shown may diffe...

Page 53: ...h the SIMPLINK logo Please check the SIMPLINK logo This TV might not function properly when using it with other products with HDMI CEC function This allows you to control and play other AV devices connected to the display through HDMI cable without addi tional cables and settings If you do not want SIMPLINK menu select O Of ff f Select O OP PT TI IO ON N Select S SI IM MP PL LI IN NK K Select O On...

Page 54: ...ables Select Home Theater in the Speaker menu by pushing the S SI IM MP PL LI IN NK K button NOTE G G Connect the HDMI DVI IN or HDMI IN terminal of the TV to the terminal HDMI terminal of the SIM PLINK device with the HDMI cable G G When you switch the Input source using the INPUT button on the remote control you can stop the oper ation of a device controlled by SIMPLINK ANTENNA IN L MONO R AUDIO...

Page 55: ...50PJ5 42 50PJ6 50 60PK2 50PK3 three 50 60PK5 50PK7 supported at a time VCR Only one supported at a time D Di is sc c p pl la ay yb ba ac ck k Control connected AV devices by pressing the O OK K G A l l l l FF and GG buttons D Di ir re ec ct t P Pl la ay y After connecting AV devices to the TV you can directly control the devices and play media without additional settings S Se el le ec ct t A AV V ...

Page 56: ... me e Optimizes video and audio for playing games 1 AV MODE 2 If you select C Ci in ne em ma a in AV mode C Ci in ne em ma a will be selected both for P Pi ic ct tu ur re e M Mo od de e and S So ou un nd d M Mo od de e in P PI IC CT TU UR RE E menu and A AU UD DI IO O menu respectively If you select O Of ff f in AV mode the picture and image which you initial ly set will be selected In the case of...

Page 57: ...e the product or when you move to other city or country When the Factory Reset is completed you must restart the Initializing setup When the L Lo oc ck k S Sy ys st te em m menu is O On n the message to enter the password appears In L Lo oc ck k S Sy ys st te em m O On n if you forget your password press 0 3 2 5 on the remote control handset 1 MENU 2 OK Press the M ME EN NU U E EX XI IT T button t...

Page 58: ...0 60PK5 50PK7 and Bluetooth will not be supported at the same time G G Operation is subject to the following two conditions 1 This device may not cause harmful interfer ence and 2 this device must accept any interference received including interference that may cause undesired operation of the device Bluetooth Bluetooth is a short distance networking technology using 2 4 GHz frequency to connect v...

Page 59: ...ten to music from cell phone Bluetooth device you can use the wireless communication without having to connect any cables You can use the BLUETOOTH menu by selecting O On n If you do not want to use the Bluetooth function select O Of ff f If it is connected to the external Bluetooth device you can select Off after disconnecting the device Select B BL LU UE ET TO OO OT TH H Select B Bl lu ue et to ...

Page 60: ...IN needs to be entered For details on how to set the PIN of the external Bluetooth device refer to the user manual of the applicable device The TV PIN is composed of numbers of up to 10 digits The TV PIN must have more than 1 digit Select B BL LU UE ET TO OO OT TH H Select T TV V P PI IN N 1 MENU 3 2 OK Press the M ME EN NU U E EX XI IT T button to return to normal TV viewing Press the B BA AC CK ...

Page 61: ...set other buttons except for the Stop OK button do not work Connecting a new Bluetooth headset Select B BL LU UE ET TO OO OT TH H Select B Bl lu ue et to oo ot th h H He ea ad ds se et t Search the Bluetooth headset 1 MENU 2 OK 4 OK 3 OK GREEN GREEN BLUETOOTH HEADSET 5 OK 1 2 3 4 5 0 6 7 8 9 Select Bluetooth headset PIN number Refer to the user manual of the applic able device for the PIN number B...

Page 62: ...e operating the headset G G Even if you choose simplink Home Theater after using the headset during Simplink operation the unit will not automatically switch to Home Theater speakers G G When the headset connection continuously fails pair the device one more time G G The audio quality of mono headsets will not be as good as that for stereo headsets G G Mono headsets may suffer from noise as the di...

Page 63: ... h D De ev vi ic ce e Check the registered Bluetooth device 1 MENU 3 2 OK OK Registered Bluetooth Device Registered Bluetooth Device Registered Bluetooth Device 00 0d 44 84 14 62 Delete Connect LG L600V FreePulse_Wireless A Deleting registered Bluetooth device Delete will be available when selecting the device that is not connected to the TV Select the Bluetooth device you want to remove 2 Message...

Page 64: ...ill be available when TV is not connected with any device You can edit the My Device Name You can check the My Device Address Select B BL LU UE ET TO OO OT TH H Select M My y B Bl lu ue et to oo ot th h I In nf fo o You can use an the alphabet A A to Z Z the number 0 0 to 9 9 and blank Save 1 MENU 3 2 OK OK 4 OK Press the M ME EN NU U E EX XI IT T button to return to normal TV viewing Press the B ...

Page 65: ...splay setting is connected to the Set Video function of the USB photo Refer to p 54 for the Set Video Menu For details on how to send photos only JPEG from the external Bluetooth device to TV refer to the user manual of the applicable device For details on how to listen to the musics from the external Bluetooth device to TV refer to the user manual of the applicable device You should use the Bluet...

Page 66: ...do not guarantee an USB cable for an external power source G G Data in a USB storage device cannot be deleted in the NTFS file system G G If your USB memory device has multiple partitions or if you use a USB multi card reader you can use up to 4 partitions or USB memory devices G G Only the FAT FAT16 FAT32 file system supports the delete function G G If a USB memory device is connected to a USB mu...

Page 67: ...ut Port USB Connector sold separately Fix the one end of the USB connector to the USB memory stick and the other end to the USB connector holder USB connector holder Image shown may differ from your TV This feature is not available for all models Screen Components Moves to upper level folder Current page Total pages Total number of marked photos Corresponding buttons on the remote control 1 3 4 2 ...

Page 68: ...lder 1366x768 125KB View Mark All Delete Close G G V Vi ie ew w Display the selected item G G M Ma ar rk k A Al ll l Mark all photos on the screen G G U Un nm ma ar rk k A Al ll l Deselect all marked photos G G D De el le et te e or D De el le et te e M Ma ar rk ke ed d Delete the select ed photo item G G C Cl lo os se e Close the pop up menu Select the target folder or drive Select the desired ph...

Page 69: ...9 10 2008 KR102 09 10 2008 JMJ001 09 10 2008 JMJ002 09 10 2008 JMJ003 09 10 2008 JMJ004 09 10 2008 KR103 09 10 2008 KR104 09 10 2008 KR105 09 10 2008 JMJ005 09 10 2008 JMJ006 09 10 2008 JMJ007 09 10 2008 JMJ008 09 10 2008 Up Folder Drive1 JMJ001 E E Popup Menu Navigation Page Change Mark Exit P MARK Page 2 3 No Marked Photo List Up Folder 1366x768 125KB KR101 09 10 2008 KR102 09 10 2008 JMJ001 09 ...

Page 70: ...wise It can not be rotate when the width of a picture is bigger than supported height G G D De el le et te e Delete photos G G O Op pt ti io on n Set values for S Sl li id de e S Sp pe ee ed d and M Mu us si ic c F Fo ol ld de er r for B BG GM M Use button and O OK K button to set values Press O OK K to save the settings You cannot change M Mu us si ic c F Fo ol ld de er r while BGM is playing G G...

Page 71: ... ie ew w Slide Speed Set Photo View F F Fast G G Music Folder Repeat On Random Off Previous F F F F F F F F F F F F Show the S Sl li id de e S Sp pe ee ed d or M Mu us si ic c F Fo ol ld de er r Make appropriate adjustments 2 1 When O Of ff f is selected in R Re ep pe ea at t menu replay will stop once the last file in the list finishes playing But when G GG G button is pressed while the last fine...

Page 72: ...F F F F F F F 100 50 70 70 0 0 R G F F F F F F F F W C Make appropriate adjustments Refer to p 76 79 81 1 G G When you select the S Se et t A Au ud di io o Show the S So ou un nd d M Mo od de e A Au ut to o V Vo ol lu um me e C Cl le ea ar r V Vo oi ic ce e I II I B Ba al la an nc ce e Make appropriate adjustments Refer to p 85 to 89 2 1 Sound Mode Set Audio Standrd Auto Volume Clear Voice II Off ...

Page 73: ... can be played by this unit The On Screen Display may be different from your TV Images are an example to assist with the TV opera tion Screen Components MUSIC MP3 supporting file Bit rate 32 to 320 Sampling rate MPEG1 Layer3 32 kHz 44 1 kHz 48 kHz Sampling rate MPEG2 Layer3 16 kHz 22 05 kHz 24 Hz Sampling rate MPEG2 5 Layer3 8 kHz 1 1 025 kHz 12 kHz Page 2 3 No Marked Music List Up Folder 00 00 01...

Page 74: ...to List G G M Ma ar rk k A Al ll l Mark all music titles in the folder G G U Un nm ma ar rk k A Al ll l Deselect all marked music titles G G D De el le et te e or D De el le et te e M Ma ar rk ke ed d Delete the selected music titles G G C Cl lo os se e Close the pop up menu Use the P P button to navigate up down in the music page Use M MA AR RK K button to mark or unmark a music When one or more ...

Page 75: ...ayed behind the title G G A damaged or corrupted music does not play but displays 00 00 in playtime G G A music downloaded from a paid service with copyright protection does not start but displays inappropri ate information in playtime G G If you press O OK K A A buttons screen saver is stopped G G The P PL LA AY Y G G P Pa au us se e I II I A A G GG G F FF F buttons on the remote control are also...

Page 76: ... ud di io o P Pl la ay y or S Se et t A Au ud di io o 2 1 Q MENU OK G G When you select the S Se et t A Au ud di io o P Pl la ay y Set Audio Play Repeat F F On G G Random Off Previous Show the S Se et t A Au ud di io o P Pl la ay y Make appropriate adjustments 2 1 When O Of ff f is selected in R Re ep pe ea at t menu replay will stop once the last file in the list finishes playing But when G GG G ...

Page 77: ...ou un nd d M Mo od de e A Au ut to o V Vo ol lu um me e C Cl le ea ar r V Vo oi ic ce e I II I B Ba al la an nc ce e Make appropriate adjustments Refer to p 85 to 89 2 1 Sound Mode Set Audio Standrd Auto Volume Clear Voice II Off Balance Off Previous F F F F F F F F F F F F 0 F F F F L R ...

Page 78: ...ge faster playback etc when the audio lan guage is changed A damaged movie file may not be played correctly or some player functions may not be usable Movie files produced with some encoders may not be played correctly If the video and audio structure of recorded file is not interleaved either video or audio is outputted HD videos with a maximum of 1920 x 1080 25 30P or 1280x720 50 60P are support...

Page 79: ... Xvid 1 03 Xvid 1 10 beta 1 Xvid 1 10 beta 2 H 264 AVC H 264 AVC MPEG1 MPEG2 MPEG4SP MPEG4ASP MPEG 2 MPEG 4 SP MPEG4 ASP DivX 3 1 1 DivX 4 DivX 5 DivX 6 Xvid 1 00 Xvid 1 01 Xvid 1 02 Xvid 1 03 Xvid 1 10 beta 1 Xvid 1 10 beta 2 H 264 AVC Dolby Digital MPEG MP3 LPCM Dolby Digital MPEG MP3 LPCM Dolby Digital AAC MPEG Dolby Digital HE AAC AAC MPEG MP3 LPCM Dolby Digital HE AAC AAC MPEG MP3 LPCM DolbyD...

Page 80: ...r or drive Select the desired movie title Show the PopUp menu Select the desired PopUp menu 2 3 1 4 OK OK OK Press the B BA AC CK K button to return to normal TV viewing NOTE G G In the case of files not supported a message regarding non supported file is displayed G G P Pl la ay y Play the selected movie DivX Play is executed while screen changes G G M Ma ar rk k A Al ll l Mark all Movie in the f...

Page 81: ...sh Croatian Czech Slovak Slovenian Serbian Hungarian Estonian Latvian Lithuanian Bulgarian Macedonian Russian Ukrainian Kazakh Greek Turkish Latin1 Latin2 Latin4 Cyrillic Greek Turkish G G P Pi ic ct tu ur re e S Si iz ze e Selects your desired picture format during movie play G G A Au ud di io o L La an ng gu ua ag ge e S Su ub bt ti it tl le e L La an ng gu ua ag ge e Changes the Language Group ...

Page 82: ...F F F F F F F 100 50 70 70 0 0 R G F F F F F F F F W C Make appropriate adjustments Refer to p 76 79 81 1 G G When you select the S Se et t A Au ud di io o Show the S So ou un nd d M Mo od de e A Au ut to o V Vo ol lu um me e C Cl le ea ar r V Vo oi ic ce e I II I B Ba al la an nc ce e Make appropriate adjustments Refer to p 85 to 89 2 1 Sound Mode Set Audio Standrd Auto Volume Clear Voice II Off ...

Page 83: ...till screen is displayed If no buttons are pressed on the remote control for 10 minutes after pausing the TV returns to the playback state Press the P Pa au us se e I II I button and then use the F FF F G GG G button for slow motion When using the or button during playback a cursor indicating the position can be viewed on the screen Press the P PL LA AY Y G G button to return to normal playback Pr...

Page 84: ...n Demand Your registration Code is xxxxxxxxxx To learn more visit www divx com vod Close NOTE G G Movie files are supported as follows Resolution under 1920x1080 WxH pixels Frame rate under 30 frames sec 1920x1080 under 60 frames sec under 1280x720 G G Video Codec MPEG 1 MPEG 2 MPEG 4 H 264 AVC DivX 3 1 1 DivX 4 12 DivX 5 x DivX 6 Xvid 1 00 Xvid 1 01 Xvid 1 02 Xvid 1 03 Xvid 1 10 beta1 Xvid 1 10 b...

Page 85: ... of deactivation is to allow deactivation of devices for users who have activated all the available devices through the web_server and are blocked from activating more devices DivX VOD allowed the consumer to activate up to 6 devices under one account but to replace or deactivate any of those devices the consumer had to contact DivX Support and request deletion Now with this added feature consumer...

Page 86: ...mme Displayed with a Subtitle Programme Displayed with a Scramble Programme Displayed with a Dolby Programme Displayed with a Dolby Digital PLUS Programme Broadcasted programme with the icon may not be displayed in Monitor Out depending on the infor mation of the programme DTV Shows the present screen information INFO Button Function in NOW NEXT Guide Mode Programme Guide ALL NOW NEXT 1 YLE TV1 Ke...

Page 87: ...oissa 5 YLE FST 6 CNN 8 YLE24 E Date Antigues Roadshow 1 YLE TV1 DTV 6 Apr 2007 15 09 E DTV DTV DTV DTV DTV DTV DTV DTV DTV DTV DTV DTV DTV DTV DTV DTV DTV DTV Button Function in Date Change Mode Switch off Date setting mode GREEN GREEN Change to the selected date Select a date Switch off Date setting mode GUIDE OK Programme Guide ALL Fri 6 Apr 14 00 15 00 1 YLE TV1 Kungskonsumente 2 YLE TV2 Mint ...

Page 88: ...ng a SCART cable Information Schedule 6 Apr 2007 6 Apr 2007 15 09 Text Up Down Enter Timer Record Remind setting mode YELL YELLO OW W Switch off EPG GUIDE INFO Select Record or Remind Function setting Change to Guide or Schedule mode Save Timer Record Remind Select Date Start End time or Programme OK Add new Timer Watching setting mode GREEN GREEN Add new Manual Recording setting mode RED RED Sele...

Page 89: ...r proportion to fill the entire screen fully PICTURE CONTROL PICTURE SIZE ASPECT RATIO CONTROL You can watch the screen in various picture formats 1 16 6 9 9 J Ju us st t S Sc ca an n O Or ri ig gi in na al l F Fu ul ll l W Wi id de e 4 4 3 3 1 14 4 9 9 Z Zo oo om m and C Ci in ne em ma a Z Zo oo om m If a fixed image is displayed on the screen for a long time that fixed image may become imprinted...

Page 90: ...pped C Ci in ne em ma a Z Zo oo om m Choose Cinema Zoom when you want to enlarge the picture in correct proportion Note When enlarging or reducing the picture the image may become distorted F or G button Adjust enlarge proportion of Cinema Zoom The adjustment range is 1 to 16 E or D button Move the screen NOTE G G You can only select 4 4 3 3 1 16 6 9 9 Wide 1 14 4 9 9 Z Zo oo om m C Ci in ne em ma...

Page 91: ... image to Low Recommended or High you can see the changed result as an example In RGB PC HDMI PC DVI PC mode the changed Colour Tint and H V Sharpness values are not applied Picture Wizard With Picture Wizard you can adjust the picture quality of the original image Next Previous Adjust B Bl la ac ck k l le ev ve el l W Wh hi it te e l le ev ve el l C Co ol lo ou ur r T Ti in nt t H Ho or ri iz zo ...

Page 92: ...d to a radio station channel will reduce power consumption Select P PI IC CT TU UR RE E Select E En ne er rg gy y S Sa av vi in ng g Select I In nt te el ll li ig ge en nt t S Se en ns so or r O Of ff f M Mi in ni im mu um m M Me ed di iu um m M Ma ax xi im mu um m or S Sc cr re ee en n O Of ff f 1 MENU 3 2 OK OK Press the M ME EN NU U E EX XI IT T button to return to normal TV viewing Press the B...

Page 93: ...g the picture quality Press the M ME EN NU U E EX XI IT T button to return to nor mal TV viewing Press the B BA AC CK K button to move to the previous menu screen C Ci in ne em ma a B Br ri ig gh ht t R Ro oo om m Only 50 60PK5 50PK7 This is cinema quality mode to provide you the experience of watching a movie at home The user will be able enjoy the best level of satisfactory screen quality in any...

Page 94: ...ignal in the picture S Sh ha ar rp pn ne es ss s Adjusts the level of crispness in the edges between the light and dark areas of the picture The lower the level the softer the image C Co ol lo ou ur r Adjusts intensity of all colours T Ti in nt t Adjusts the balance between red and green levels C Co ol lo ou ur r T Te em mp pe er ra at tu ur re e Set to warm to enhance hotter colours such as red o...

Page 95: ... Source D Dy yn na am mi ic c C Co on nt tr ra as st t D Dy yn na am mi ic c C Co ol lo ou ur r N No oi is se e R Re ed du uc ct ti io on n G Ga am mm ma a B Bl la ac ck k L Le ev ve el l F Fi il lm m M Mo od de e C Co ol lo ou ur r G Ga am mu ut t E Ed dg ge e E En nh ha an nc ce er r x xv vY YC CC C R Re ef fe er r t to o p p 7 79 9 t to o 8 80 0 Make appropriate adjustments 1 MENU 3 2 OK OK 4 P...

Page 96: ...ing specific videos 1 MENU 3 2 OK OK 4 OK 5 OK 6 Press the M ME EN NU U E EX XI IT T button to return to normal TV viewing Press the B BA AC CK K button to move to the previous menu screen OK Move Brightness 50 H Sharpness 50 V Sharpness 50 Colour 60 Tint 0 Expert Control Picture Reset Screen PICTURE E R G Expert Control R G R G F F Off G G Dynamic Contrast Noise Reduction Off Gamma Medium Black L...

Page 97: ...ure of the screen gets darker H Hi ig gh h The picture of the screen gets brighter A Au ut to o Realizing the black level of the screen and set it to High or Low automatically Set black level of the screen to proper level This function enables to select Low or High in the following mode AV NTSC M HDMI or Component Otherwise Black level is set to Auto You can watch a cinema like video by eliminatin...

Page 98: ...Colour The adjustment range is 30 to 30 Red Green Blue Yellow Cyan Magenta Tint The adjustment range is 30 to 30 This feature is disable in RGB PC and HDMI PC mode This is the function to adjust the overall colour of the screen to the feeling you want a Method 2 Points Pattern Inner Outer Red Green Blue Contrast Red Green Blue Brightness The adjustment range is 50 to 50 b Method 20 Point IRE Patte...

Page 99: ... Picture Reset 81 PICTURE CONTROL E PICTURE RESET Settings of the selected picture modes return to the default factory settings Select P PI IC CT TU UR RE E Select P Pi ic ct tu ur re e R Re es se et t Select Y Ye es s or N No o 1 MENU 3 2 OK OK Initialize the adjusted value 4 OK All picture setting will be resetted continue Yes No Press the M ME EN NU U E EX XI IT T button to return to normal TV ...

Page 100: ...he screen will move every 2 minutes C Co ol lo ou ur r W Wa as sh h The colour block with the screen moved a little and the white pattern are alternately displayed It is difficult to sense the afterimage occurred while the temporary afterimage is removed and the colour pattern is operating W Wh hi it te e W Wa as sh h White wash removes permanent images from the screen Note An excessive permanent ...

Page 101: ...mo o M Mo od de e is automatically set to O On n Once D De em mo o M Mo od de e is set to O Of ff f in S St to or re e D De em mo o D De em mo o M Mo od de e does not run and only the screen is reset The screen is reset automatically after 5 minutes in D De em mo o M Mo od de e Select O OP PT TI IO ON N 1 MENU 2 OK DEMO MODE Select D De em mo o M Mo od de e Press the M ME EN NU U E EX XI IT T butt...

Page 102: ...r home environment S St to or re e D De em mo o mode is an optimal setting for displaying at stores Select O OP PT TI IO ON N Select M Mo od de e S Se et tt ti in ng g Select S St to or re e D De em mo o or H Ho om me e U Us se e 1 MENU 2 OK OK 3 Press the M ME EN NU U E EX XI IT T button to return to normal TV viewing Press the B BA AC CK K button to move to the previous menu screen Mode Setting ...

Page 103: ...able volume levels by making automatic adjustments for each program If sound quality or volume is not at the level you want it is recommended to use a separate home theater system or amp to cope with different user environments Select A AU UD DI IO O Select A Au ut to o V Vo ol lu um me e Select O On n or O Of ff f 1 MENU 3 2 OK OK Press the M ME EN NU U E EX XI IT T button to return to normal TV ...

Page 104: ... I 1 MENU 2 OK Press the M ME EN NU U E EX XI IT T button to return to normal TV viewing Press the B BA AC CK K button to move to the previous menu screen If you select O On n for C Cl le ea ar r V Vo oi ic ce e I II I I In nf fi in ni it te e S So ou un nd d feature will not work Select levels from 6 to 6 Adjustment for Clear Voice Level With selecting On 4 OK SOUND LANGUAGE CONTROL OK Move Auto ...

Page 105: ...imum sound quality at the factory S St ta an nd da ar rd d Offers standard quality sound M Mu us si ic c Optimizes sound for listening to music C Ci in ne em ma a Optimizes sound for watching movies S Sp po or rt t Optimizes sound for watching sports events G Ga am me e Optimizes sound for playing games Select A AU UD DI IO O Select S So ou un nd d M Mo od de e Select S St ta an nd da ar rd d M Mu...

Page 106: ...l TV viewing Press the B BA AC CK K button to move to the previous menu screen Press the M ME EN NU U E EX XI IT T button to return to normal TV viewing Press the B BA AC CK K button to move to the previous menu screen OK Move Auto Volume Off Clear Voice II Off 3 Balance 0 Sound Mode Standard Infinite Sound Off Treble 50 Bass 50 Reset AUDIO E L R Sound Mode Standard User OK Move Auto Volume Off Cl...

Page 107: ...s to preferred levels Select A AU UD DI IO O Select B Ba al la an nc ce e Make desired adjustment 1 MENU 3 2 OK OK Press the M ME EN NU U E EX XI IT T button to return to normal TV viewing Press the B BA AC CK K button to move to the previous menu screen Close Balance 0 L R F F G G OK Move Auto Volume Off Clear Voice II Off 3 Balance 0 Sound Mode Standard Infinite Sound Off Treble 50 Bass 50 Reset...

Page 108: ...o DVI cable the TV speaker can be operational even when there is no video signal If you wish to use an external Hi Fi system turn off the TV s internal speakers Select A AU UD DI IO O Select T TV V S Sp pe ea ak ke er r Select O On n or O Of ff f 1 MENU 3 2 OK OK Press the M ME EN NU U E EX XI IT T button to return to normal TV viewing Press the B BA AC CK K button to move to the previous menu scr...

Page 109: ...Digital Audio Out PCM TV Speaker On DTV Audio Setting Auto AUDIO E OK Move Sound Mode Standard Infinite Sound Off Treble 50 Bass 50 Reset Digital Audio Out PCM TV Speaker On DTV Audio Setting Auto AUDIO E DTV AUDIO SETTING IN DIGITAL MODE ONLY When different audio types exist in an input signal this function allows you to select the audio type you want Select A AU UD DI IO O Select D DT TV V A Au ...

Page 110: ...Dolby Digital and Audio language have been set in a channel which broadcast Dolby Digital Audio only Dolby Digital will be played Manufactured under license from Dolby Laboratories Dolby and the double D symbol are trademarks of Dolby Laboratories 1 MENU 3 2 OK OK Press the M ME EN NU U E EX XI IT T button to return to normal TV viewing Press the B BA AC CK K button to move to the previous menu sc...

Page 111: ...50 Reset Digital Audio Out PCM TV Speaker On AUDIO E Reset Settings of the selected Sound Mode return to the default factory settings Select A AU UD DI IO O Select R Re es se et t Initialize the adjusted value AUDIO RESET 1 MENU 3 2 OK OK Press the M ME EN NU U E EX XI IT T button to return to normal TV viewing Press the B BA AC CK K button to move to the previous menu screen Reset Resetting sound...

Page 112: ...NU U E EX XI IT T button to return to normal TV viewing Press the B BA AC CK K button to move to the previous menu screen Select V Vo ol lu um me e Make desired adjustment 5 OK Adjustment for Audio Description Volume With selecting On 6 OK OK Move Menu Language English Audio Language English Subtitle Language English Disabled Assistance Country UK Input Label SIMPLINK On Simple Manual OPTION E Dis...

Page 113: ... or DUAL I II D DU UA AL L I I Sends the primary broadcast language to the loudspeakers D DU UA AL L I II I Sends the secondary broadcast language to the loudspeakers D DU UA AL L I I I II I Sends a separate language to each loudspeaker B Br ro oa ad dc ca as st t Mono Stereo Dual O On n S Sc cr re ee en n D Di is sp pl la ay y M MO ON NO O S ST TE ER RE EO O D DU UA AL L I I D DU UA AL L I II I D...

Page 114: ... NO O If the TV is equipped with a receiver for NICAM reception high quality NICAM Near Instantaneous Companding Audio Multiplex digital sound can be received Sound output can be selected according to the type of broadcast received Speaker Sound Output Selection In AV Component RGB and HDMI mode you can select output sound for the left and right loud speakers Select the sound output L L R R Audio ...

Page 115: ... on digital broadcasting circumstances G G The Country Setting UK should only be activated in UK G G If the country setting is set to European terrestrial cable digital standard broadcasting programmes are available but some DTV functions may not work properly 97 SOUND LANGUAGE CONTROL ON SCREEN MENU LANGUAGE COUNTRY SELECTION The installation guide menu appears on the TV screen when it is switche...

Page 116: ...the Main audio Subtitle Language Selection G G When two or more subtitle languages are broadcast you can select the subtitle language with the SUBTITLE button on the remote control G G Press the button to select a subtitle language Subtitle Language OSD Information Status Not Available Teletext Subtitle Subtitle for Hard of Hearing Display N A Select O OP PT TI IO ON N Select A Au ud di io o L La ...

Page 117: ...nd GMT Greenwich Mean Time which is received with the broadcast signal and the time is set automatically by a digital signal Once Clock is set in DTV mode you cannot change time but if the city name in Time Zone is changed into off set you can change time by 1 hour Select T TI IM ME E Select C Cl lo oc ck k Select either the year month date time or Time Zone option Set the year month date time or ...

Page 118: ...o work Select T TI IM ME E Select O Of ff f T Ti im me e or O On n T Ti im me e Select R Re ep pe ea at t Set the hour Set the minutes Select O Of ff f O On nc ce e D Da ai il ly y M Mo on n F Fr ri i M Mo on n S Sa at t S Sa at t S Su un n or S Su un n To cancel O On n O Of ff f T Ti im me e function select O Of ff f For On Time function only Select I In np pu ut t Select the input source Set the...

Page 119: ...itches the TV to standby after the preset time has elapsed When you switch the TV off the preset sleep timer is cancelled You can also adjust S Sl le ee ep p T Ti im me er r in the T TI IM ME E menu Select S Sl le ee ep p T Ti im me er r Select O Of ff f 1 10 0 2 20 0 3 30 0 6 60 0 9 90 0 1 12 20 0 1 18 80 0 or 2 24 40 0 m mi in n 1Q MENU 2 ...

Page 120: ...t O On n Set the password Input a 4 digit password Be sure to remember this number Re enter new password for confirm If you forget your password press 0 3 2 5 on the remote control handset 1 MENU 3 2 OK OK 4 5 OK OK 1 2 3 4 5 0 6 7 8 9 Press the M ME EN NU U E EX XI IT T button to return to normal TV viewing Press the B BA AC CK K button to move to the previous menu screen OK Move Set Password Loc...

Page 121: ... me e Select a programme to be locked 1 MENU 3 2 OK OK 4 Press the M ME EN NU U E EX XI IT T button to return to normal TV viewing Press the B BA AC CK K button to move to the previous menu screen GREEN GREEN OK Move Set Password Lock System On Block Programme Parental Guidance Input Block Key Lock Off LOCK Block Programme YLE TV1 1 1 YLE TV1 2 YLE TV2 4 TV4 Stockholm 5 YLE FST 6 CNN 8 YLE24 9 YLE...

Page 122: ...set Enter a password to watch a blocked programme Select L LO OC CK K Select P Pa ar re en nt ta al l G Gu ui id da an nc ce e Make appropriate adjustments Save 1 MENU 3 2 OK OK 4 OK Press the M ME EN NU U E EX XI IT T button to return to normal TV viewing Press the B BA AC CK K button to move to the previous menu screen Blocking Off Permits all programmes 10 and above 11 and above 12 and above 13...

Page 123: ...nction in L Lo oc ck k S Sy ys st te em m O On n Select L LO OC CK K Select I In np pu ut t B Bl lo oc ck k Select input source Select O On n or O Of ff f Save 1 MENU 4 2 OK 3 OK OK 5 OK Press the M ME EN NU U E EX XI IT T button to return to normal TV viewing Press the B BA AC CK K button to move to the previous menu screen Input Block Input Block AV1 AV2 AV3 Component RGB HDMI1 HDMI2 HDMI3 F F G...

Page 124: ...the remote control then the set will be turned on With the K Ke ey y L Lo oc ck k O On n the display K Ke ey y L Lo oc ck k O On n appears on the screen if any button on the front panel is pressed while viewing the TV 1 MENU 3 2 OK OK 4 OK Press the M ME EN NU U E EX XI IT T button to return to normal TV viewing Press the B BA AC CK K button to move to the previous menu screen OK Move Set Password...

Page 125: ...creen Two page numbers TV station name date and time are displayed on the screen headline The first page number indicates your selection while the second shows the current page displayed Press the T TE EX XT T button to switch off teletext The previous mode reap pears SWITCH ON OFF A A Page selection Enter the desired page number as a three digit number with the NUMBER buttons If during selection ...

Page 126: ...as solutions to riddles or puzzles A A U Up pd da at te e Displays the TV picture on the screen while waiting for a new teletext page The display will appear at the top left hand corner of the screen When the updated page is available then display will change to the page number Select this menu again to view the updated teletext page FASTEXT The teletext pages are colour coded along the bottom of ...

Page 127: ...n digital teletext and move onto the next step by pressing OK RED GREEN YELLOW BLUE or NUMBER buttons and so on Press the TEXT or colour button to switch off digital tele text and return to TV viewing Some services may allow you to access text services by pressing the RED button This function works in UK Ireland only The TV gives you access to digital teletext which is greatly improved in various ...

Page 128: ...power cord inserted correctly into the mains A Check your antenna direction and or location A Test the mains outlet by plugging another TV into the same outlet A This is normal the image is muted during the TV startup process Please contact your service centre if the picture has not appeared after five minutes A Adjust Colour in menu option A Allow a sufficient distance between the TV and the VCR ...

Page 129: ... e in menu option A A change in ambient humidity or temperature may result in an unusual noise when the TV is switched on or off and does not indicate a fault with the TV A Check HDMI cable over version 1 3 A Check USB cable over version 2 0 Picture OK No sound Unusual sound from inside the TV No sound when connecting HDMI or USB No output from one of the speakers This feature is not available for...

Page 130: ...er and a little fabric softener or dish washing detergent Wring the cloth until it is almost dry and then use it to wipe the screen Ensure there is no excess water on the screen Allow any water or dampness to evaporate before switching on Cleaning the Cabinet A To remove dirt or dust wipe the cabinet with a soft dry lint free cloth A Do not to use a wet cloth Extended Absence G If you expect to le...

Page 131: ...dity Environment condition 0 C to 40 C Less than 80 20 C to 60 C Less than 85 Dimensions Width x Height x Depth Weight with stand without stand with stand without stand Dimensions Width x Height x Depth Weight with stand without stand with stand without stand 988 0mmx678 7mmx260 0mm 988 0mmx617 8mmx55 3mm 21 6kg 20 0kg 42PJ2 42PJ250 ZC 42PJ250N ZC 42PJ3 42PJ350 ZA 42PJ350N ZA MODELS MODELS 50PK2 5...

Page 132: ... Temperature Operating Humidity Storage Temperature Storage Humidity Environment condition 0 C to 40 C Less than 80 20 C to 60 C Less than 85 Dimensions Width x Height x Depth Weight with stand without stand with stand without stand 42PJ6 42PJ650 ZA 42PJ650N ZA MODELS Dimensions Width x Height x Depth Weight with stand without stand with stand without stand 50PK3 50PK350 ZB 50PK350N ZB 60PK5 60PK5...

Page 133: ... C BUTTON R C BUTTON R C BUTTON R C BUTTON R C BUTTON R C BUTTON R C BUTTON R C BUTTON R C BUTTON R C BUTTON R C BUTTON R C BUTTON R C BUTTON R C BUTTON R C BUTTON R C BUTTON R C BUTTON R C BUTTON R C BUTTON R C BUTTON R C BUTTON R C BUTTON R C BUTTON R C BUTTON R C BUTTON R C BUTTON R C BUTTON R C BUTTON R C BUTTON R C BUTTON R C BUTTON 95 08 0B 79 F0 45 43 AB 40 41 07 06 44 28 AA 30 02 03 1E 09 ...

Page 134: ...ed with the product Type of Connector D Sub 9 Pin Male No Pin Name 1 No connection 2 RXD Receive data 3 TXD Transmit data 4 DTR DTE side ready 5 GND 6 DSR DCE side ready 7 RTS Ready to send 8 CTS Clear to send 9 No Connection COMPONENT IN IN N 1 1 5 6 9 RS 232C Configurations 7 Wire Configurations Standard RS 232C cable PC TV RXD 2 3 TXD TXD 3 2 RXD GND 5 5 GND DTR 4 6 DSR DSR 6 4 DTR RTS 7 8 CTS ...

Page 135: ...emo Mode Off Mode Setting Home Use Factory Reset OPTION E Set ID Use this function to specify a set ID number Refer to Real Data Mapping G p p 1 12 21 1 Press the B BA AC CK K button to move to the previous menu screen Select O OP PT TI IO ON N Select S Se et t I ID D Adjust S Se et t I ID D to choose the desired TV ID number The adjustment range of SET ID is 1 to 99 Set ID 1 Set ID 1 F F 1 G G Cl...

Page 136: ...t the set ID to choose desired monitor ID number in option menu Adjustment range is 1 to 99 When selecting Set ID 0 every connect ed set is controlled Set ID is indicated as decimal 1 to 99 on menu and as Hexa decimal 0x0 to 0x63 on transmission receiving proto col DATA To transmit command data Transmit FF data to read status of com mand Cr Carriage Return ASCII code 0x0D ASCII code space 0x20 Com...

Page 137: ... To select screen mute on off Transmission Data 00 Screen mute off Picture on Video mute off 01 Screen mute on Picture off 10 Video mute on In case of video mute on only TV will display On Screen Display OSD But in case of Screen mute on TV will not display OSD k d Set ID Data Cr Ack d Set ID OK NG Data x 0 05 5 V Vo ol lu um me e C Co on nt tr ro ol l C Co om mm ma an nd d k k f f G To adjust vol...

Page 138: ...o adjust the screen sharpness You can also adjust sharpness in the PICTURE menu Transmission 1 10 0 S Sh ha ar rp pn ne es ss s C Co om mm ma an nd d k k k k Data Min 00 to Max 64 Refer to Real data mapping 1 See page 121 k k Set ID Data Cr Ack k Set ID OK NG Data x 1 15 5 B Ba al la an nc ce e C Co om mm ma an nd d k k t t G To adjust balance You can also adjust balance in the AUDIO menu Transmis...

Page 139: ... skip status for the current Programme Transmission Data 00 Skip 01 Add m b Set ID Data Cr Ack b Set ID OK NG Data x 1 18 8 E En ne er rg gy y S Sa av vi in ng g C Co om mm ma an nd d j j q q G To reduce the power consumption of the TV You can also adjust Energy Saving in OPTION menu Transmission j q Set ID Data Cr Ack q Set ID OK NG Data x 1 19 9 A Au ut to o C Co on nf fi ig gu ur re e C Co om m...

Page 140: ... 0 0 0 0 0 0 0 External Input Input Number Ack b Set ID OK NG Data x External Input Data 0 0 0 1 Analogue 0 0 0 0 DTV 0 0 1 0 AV 0 1 0 0 Component 0 1 1 0 RGB 1 0 0 1 HDMI Input Number Data 0 0 0 0 Input1 0 0 1 1 Input4 0 0 1 0 Input3 0 0 0 1 Input2 2 22 2 K Ke ey y C Co om mm ma an nd d m m c c G To send IR remote key code Transmission Data Key code Refer to page 1 15 m c Set ID Data Cr Ack c Set...

Page 141: ...g and handling upon e mail request to LG Electronics at opensource lge com This offer is valid for a period of three 3 years from the date of the distribution of this product by LG Electronics You can obtain a copy of the GPL LGPL and MPL licenses on the CD ROM provided with this product Also you can obtain the translation of GPL LGPL licenses from http www gnu org licenses old licenses gpl 2 0 tr...

Page 142: ...ect your rights with two steps 1 copyright the software and 2 offer you this license which gives you legal permission to copy distribute and or modify the software Also for each author s protection and ours we want to make certain that everyone understands that there is no war ranty for this free software If the software is modified by someone else and passed on we want its recipients to know that...

Page 143: ... is a work based on the Program the distribution of the whole must be on the terms of this License whose permissions for other licensees extend to the entire whole and thus to each and every part regard less of who wrote it Thus it is not the intent of this section to claim rights or contest your rights to work written entirely by you rather the intent is to exercise the right to control the distr...

Page 144: ...tirely from distribution of the Program If any portion of this section is held invalid or unenforceable under any particular circumstance the balance of the sec tion is intended to apply and the section as a whole is intended to apply in other circumstances It is not the purpose of this section to induce you to infringe any patents or other property right claims or to contest validity of any such ...

Page 145: ...ar name of author This program is free software you can redistribute it and or modify it under the terms of the GNU General Public License as published by the Free Software Foundation either version 2 of the License or at your option any later version This program is distributed in the hope that it will be useful but WITHOUT ANY WARRANTY without even the implied warranty of MERCHANTABILITY or FITN...

Page 146: ...ibutor we want to make it very clear that there is no warranty for the free library Also if the library is modified by someone else and passed on the recipients should know that what they have is not the original version so that the original author s reputation will not be affected by problems that might be introduced by others Finally software patents pose a constant threat to the existence of an...

Page 147: ...does and what the program that uses the Library does 1 You may copy and distribute verbatim copies of the Library s complete source code as you receive it in any medi um provided that you conspicuously and appropriately publish on each copy an appropriate copyright notice and dis claimer of warranty keep intact all the notices that refer to this License and to the absence of any warranty and distr...

Page 148: ...ial from a header file that is part of the Library the object code for the work may be a derivative work of the Library even though the source code is not Whether this is true is especially significant if the work can be linked without the Library or if the work is itself a library The threshold for this to be true is not precisely defined by law If such an object file uses only numerical paramete...

Page 149: ...not accept this License Therefore by modifying or distributing the Library or any work based on the Library you indicate your acceptance of this License to do so and all its terms and conditions for copying distributing or modifying the Library or works based on it 10 Each time you redistribute the Library or any work based on the Library the recipient automatically receives a license from the ori...

Page 150: ...INCIDENTAL OR CONSEQUENTIAL DAMAGES ARISING OUT OF THE USE OR INABILITY TO USE THE LIBRARY INCLUDING BUT NOT LIMITED TO LOSS OF DATA OR DATA BEING RENDERED INACCURATE OR LOSSES SUSTAINED BY YOU OR THIRD PARTIES OR A FAILURE OF THE LIBRARY TO OPERATE WITH ANY OTHER SOFTWARE EVEN IF SUCH HOLDER OR OTHER PARTY HAS BEEN ADVISED OF THE POSSIBILITY OF SUCH DAMAGES END OF TERMS AND CONDITIONS How to Appl...

Page 151: ... which is described in the Source Code notice required by Exhibit A as Original Code and which at the time of its release under this License is not already Covered Code governed by this License 1 10 1 Patent Claims means any patent claim s now owned or hereafter acquired including without limitation method process and apparatus claims in any patent Licensable by grantor 1 11 Source Code means the ...

Page 152: ...The Source Code version of Covered Code may be distributed only under the terms of this License or a future version of this License released under Section 6 1 and You must include a copy of this License with every copy of the Source Code You distribute You may not offer or impose any terms on any Source Code version that alters or restricts the applicable version of this License or the recipients ...

Page 153: ... distribute the Executable version of Covered Code or ownership rights under a license of Your choice which may contain terms different from this License provided that You are in compliance with the terms of this License and that the license for the Executable version does not attempt to limit or alter the recipient s rights in the Source Code version from the rights set forth in this License If Y...

Page 154: ... if within 60 days after receipt of notice You either i agree in writing to pay Participant a mutually agreeable reasonable royalty for Your past and future use of Modifications made by such Participant or ii withdraw Your litigation claim with respect to the Contributor Version against such Participant If within 60 days of notice a reasonable royalty and payment arrangement are not mutually agree...

Page 155: ... an equitable basis Nothing herein is intended or shall be deemed to constitute any admission of liability 13 MULTIPLE LICENSED CODE Initial Developer may designate portions of the Covered Code as Multiple Licensed Multiple Licensed means that the Initial Developer permits you to utilize portions of the Covered Code under Your choice of the NPL or the alter native licenses if any specified by the ...

Page 156: ...er and serial number of the TV Refer to the label on the back cover and quote this information to your dealer when requiring any service Model Serial No Trade Mark of the DVB Digital Video Broadcasting Project 1991 to 1996 ...

Reviews: