Instruction / Safety Information
11
WARNING
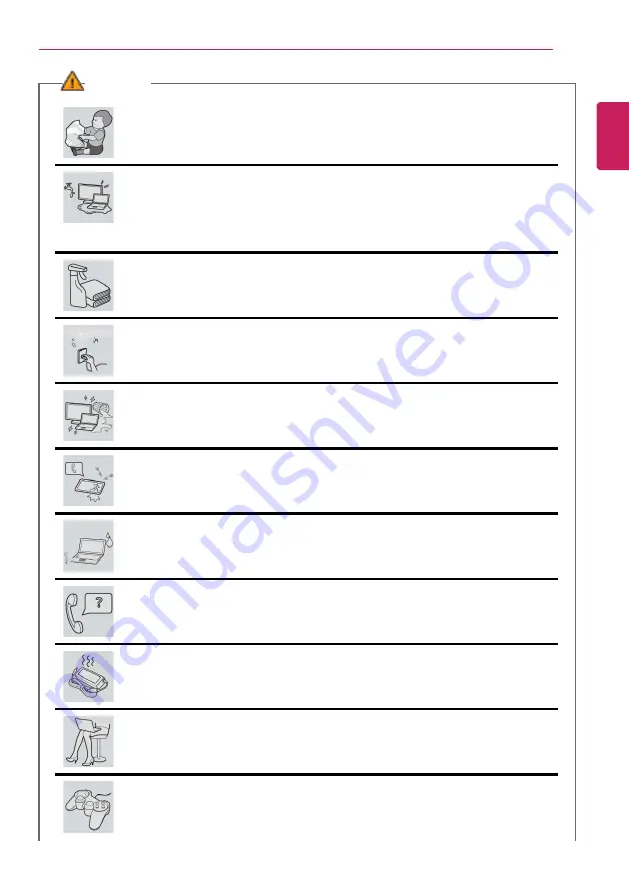
Dispose of the desiccating agent and plastic wrap properly.
•
The desiccating agent and plastic wrap may cause suffocation.
Do not use the machine in damp places like a laundry room or bathroom.
•
Moisture may cause a glitch or electric shock.
•
Please use the machine within the appropriate temperature range (50 °F to
95 °F) and humidity range (20% RH to 80% RH).
Clean the PC with a proper agent and dry it completely before using it again.
•
If the PC is wet while used, an electric shock or fire may occur.
When lightning flashes in your area, disconnect the power, wired LAN and
other connections.
•
An electric shock or fire may occur.
Do not leave a cup or other containers filled with watery substance near the
PC.
•
In the case that liquid goes inside the PC, a fire or electric shock may occur.
If you have dropped or damaged the PC, disconnect the power and contact
the local service center for a safety check.
•
If a damaged PC is used continuously, an electric shock or fire may occur.
Do not put a lit candle or live cigarette on the PC.
•
A fire may occur.
If you detect or smell smoke from the PC, stop use immediately and
disconnect the power source before contacting your local service center.
•
A fire may occur.
As the AC adapter can be hot, do not touch it with bare skin while using it.
•
Extended period of exposure may cause burn.
The bottom of the PC gets hot when the system is in operation. Do not
touch or put it on your lap.
•
Extended period of exposure may cause burn.
Do not play PC games excessively.
•
Playing a PC game for an extended period of time may cause a mental
disorder. It may also inflict physical impairments on the elderly and children.
ENGLISH
Summary of Contents for 17Z990 Series
Page 22: ...22 Instruction Safety Information Regulatory Notices ENGLISH ...
Page 23: ...Instruction Safety Information 23 ENGLISH ...
Page 24: ...24 Instruction Safety Information ENGLISH ...
Page 25: ...Instruction Safety Information 25 ENGLISH ...
Page 26: ...26 Instruction Safety Information ENGLISH ...
Page 27: ...Instruction Safety Information 27 ENGLISH ...
Page 28: ...28 Instruction Safety Information ENGLISH ...
Page 29: ...Instruction Safety Information 29 ENGLISH ...
Page 30: ...30 Instruction Safety Information ENGLISH ...
Page 31: ...Instruction Safety Information 31 ENGLISH ...
Page 32: ...32 Instruction Safety Information ENGLISH ...
Page 33: ...Instruction Safety Information 33 ENGLISH ...
Page 34: ...34 Instruction Safety Information ENGLISH ...
Page 35: ...Instruction Safety Information 35 ENGLISH ...
Page 36: ...36 Instruction Safety Information ENGLISH ...
Page 37: ...Instruction Safety Information 37 ENGLISH ...
Page 38: ...38 Instruction Safety Information ENGLISH ...
Page 39: ...Instruction Safety Information 39 ENGLISH ...
Page 40: ...40 Instruction Safety Information ENGLISH ...
Page 41: ...Instruction Safety Information 41 ENGLISH ...
Page 42: ...42 Instruction Safety Information ENGLISH ...
Page 43: ...Instruction Safety Information 43 ENGLISH ...
Page 44: ...44 Instruction Safety Information ENGLISH ...
Page 45: ...Instruction Safety Information 45 ENGLISH ...
Page 46: ...46 Instruction Safety Information ENGLISH ...
Page 47: ...Instruction Safety Information 47 ENGLISH ...
Page 48: ...48 Instruction Safety Information ENGLISH ...
Page 49: ...Instruction Safety Information 49 ENGLISH ...
Page 50: ...50 Instruction Safety Information ENGLISH ...
Page 51: ...Instruction Safety Information 51 ENGLISH ...
Page 52: ...52 Instruction Safety Information ENGLISH ...
Page 53: ...Instruction Safety Information 53 ENGLISH ...
Page 54: ...54 Instruction Safety Information ENGLISH ...
Page 55: ...Instruction Safety Information 55 ENGLISH ...
Page 56: ...56 Instruction Safety Information ENGLISH ...
Page 101: ...Using the PC 101 3 Go to Keyboard Backlight and select your desired options ENGLISH ...
Page 133: ...Using the PC 133 2 When the Settings screen appears select Devices ENGLISH ...
Page 137: ...Using the PC 137 2 Connect the wired LAN cable to the LAN port ENGLISH ...
Page 139: ...Using the PC 139 4 Select Network Internet Status Change adapter options ENGLISH ...
Page 140: ...140 Using the PC 5 Right click Ethernet and select the Properties menu ENGLISH ...
Page 145: ...Using the PC 145 3 Select the Access Point you want to connect to and press Connect ENGLISH ...
Page 159: ...Using Software 159 1 Select the All List Update needed menu item ENGLISH ...
Page 164: ...164 Using Software 1 Press the icon on the taskbar ENGLISH ...
Page 174: ...174 Restoring the System 1 Select Keep my files ENGLISH ...
Page 175: ...Restoring the System 175 2 Check the current settings ENGLISH ...
Page 178: ...178 Restoring the System 1 Select Remove everything ENGLISH ...
Page 179: ...Restoring the System 179 2 Check the current settings ENGLISH ...
Page 181: ...Restoring the System 181 4 Press Next to proceed with installation as guided ENGLISH ...
Page 206: ...206 Setup and Upgrade 3 Boots using the selected device ENGLISH ...
Page 208: ...208 Setup and Upgrade 2 Select System Display ENGLISH ...
Page 213: ...FAQ 213 2 Select System Display ENGLISH ...
Page 218: ...218 FAQ 1 Select Keep my files ENGLISH ...
Page 219: ...FAQ 219 2 Check the current settings ENGLISH ...
Page 222: ...222 FAQ 1 Select Remove everything ENGLISH ...
Page 223: ...FAQ 223 2 Check the current settings ENGLISH ...
Page 225: ...FAQ 225 4 Press Next to proceed with installation as guided ENGLISH ...
Page 231: ...FAQ 231 3 Select the Access Point you want to connect to and press Connect ENGLISH ...


