26
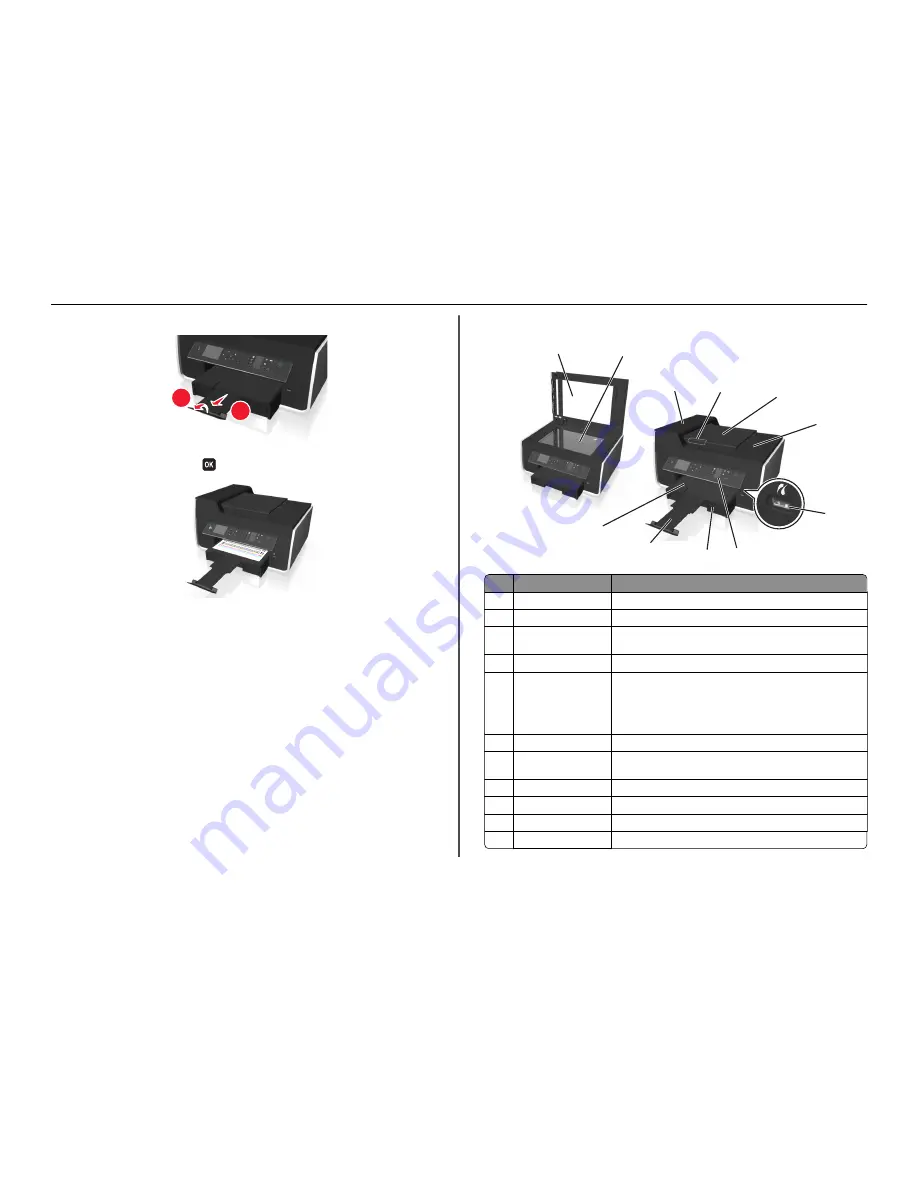
Extend and flip out the paper stop.
1
2
27
From the printer control panel, press
to print an alignment page.
Notes:
•
The alignment page prints.
•
Do not remove the page until printing is finished. The alignment page may take a while to print.
•
Streaks on the alignment page are normal and not an indication of a problem.
•
The alignment page that prints may differ from the one shown.
•
Recycle the alignment page.
Understanding the parts of the printer
1
2
3
4
5
6
8
9
10
11
7
Use the
To
1
Scanner cover
Access the scanner glass.
2
Scanner glass
Scan, copy or fax photos and documents.
3
Automatic Document
Feeder (ADF)
Scan, copy, or fax multiple
‑
page letter
‑
, legal
‑
, and A4
‑
size documents.
4
ADF paper guide
Keep paper straight when feeding into the ADF.
5
ADF tray
Load original documents into the ADF. This is recommended for scanning,
copying, or faxing multiple-page documents.
Note:
Do not load postcards, photos, small items, or thin media (such
as magazine clippings) into the ADF. Place these items on the scanner
glass.
6
ADF output tray
Hold documents as they exit from the ADF.
7
PictBridge and USB port
Connect a PictBridge
‑
enabled digital camera or a flash drive to the
printer.
8
Printer control panel
Operate the printer.
9
Paper tray
Load paper.
10
Paper stop
Catch the paper as it exits.
11
Paper exit tray
Hold paper as it exits.
About your printer
12


