


IP CamSecure
3. Schedule
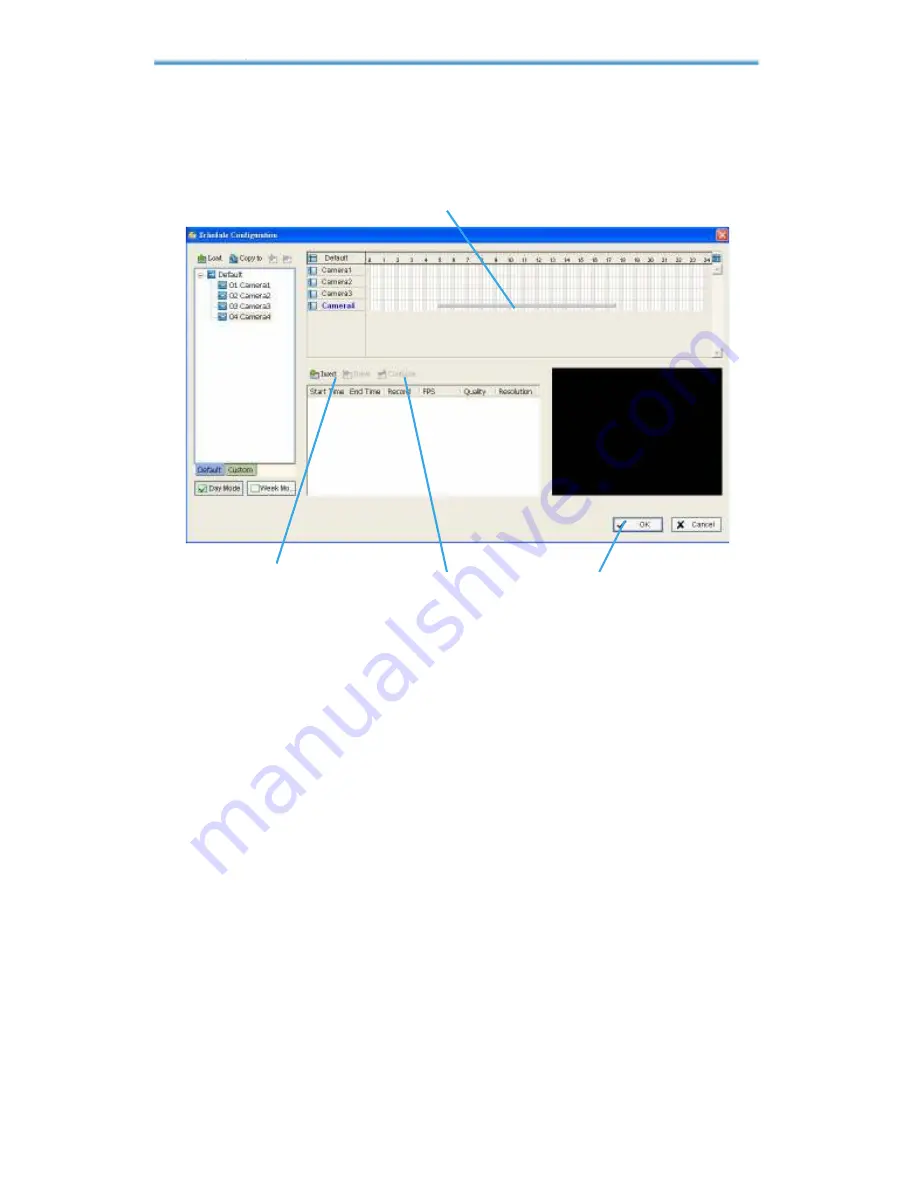
3.1.2 Insert a New Schedule Manually
Step 1:
Left-click and draw the bar you want add to the time table. The
scheduled time will show as a grey bar.
Step 1
Step 2
Step 3
Step 4
Step 2:
Click the
Insert
icon and add a new schedule in the Regular
Mode, i.e. to record video during the time period you set with 30 FPS,
Normal video quality, and Normal resolution.
Step 3:
Change the setting if wished by clicking on the
Configure
icon
(See 3.7 Encoding Option Panel) or double click the
schedule
information
.
Step 4:
Click OK.
3.1.3 Copy Schedule
You may set up the schedule for each channel/camera by repeating the
process above, or simply apply the setting of a single camera to all the
others by click the
Copy to
icon on the top of the display window.