Symptom
Action
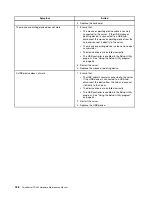
The optical drive is not recognized.
1. Ensure that:
• The signal cable and connector are not damaged
and the connector pins are not bent.
• The optical drive is securely connected to the
correct SATA connector on the system board and
the SATA connector is enabled in the Setup Utility
program. See “Using the Setup Utility program”
on page 53.
• All cables and jumpers (if any) are installed
correctly.
• The correct device driver is installed for the optical
drive.
2. Run any optical drive diagnostic programs if you
have.
3. Reinstall the optical drive and reconnect cables.
4. Replace the signal cable for the optical drive.
5. Replace the optical drive.
6. (Trained service technician only) Replace the system
board.
A disc is not working correctly.
1. Ensure that the disc is in the optical drive with the
shiny side facing down.
2. Ensure that the disc surface is clean and not
scratched.
3. Check the disc or package for regional coding. You
might need to purchase a disc with coding for the
region where you are using the product.
4. Restart the disc player program.
5. Restart the server.
6. Run any optical drive diagnostic programs if you
have.
7. Reinstall the optical drive and reconnect cables.
8. Replace the signal cable for the optical drive.
9. Replace the optical drive.
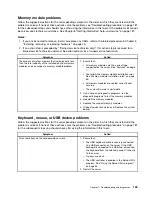
Hard disk drive problems
Follow the suggested actions for the corresponding symptom in the order in which they are listed until the
problem is solved. If none of these actions solve the problem, see “Troubleshooting procedure” on page 181
for the subsequent steps you should check after using the information in this topic. If the problem still cannot
be solved, seek technical assistance. See Chapter 8 “Getting information, help, and service” on page 187.
Notes:
1. If you are instructed to remove, install, or replace any CRUs, refer to the related procedure in Chapter 6
“Installing, removing, or replacing hardware” on page 75.
2. If the server model comes with hot-swap hard disk drives, the status LEDs on each hot-swap hard disk
drive help you easily identify a problem. See “Hot-swap hard disk drive status LEDs” on page 31.
Chapter 7
.
Troubleshooting and diagnostics
183
Summary of Contents for ThinkServer TD330
Page 14: ...xii ThinkServer TD330 Hardware Maintenance Manual ...
Page 18: ...4 ThinkServer TD330 Hardware Maintenance Manual ...
Page 20: ...6 ThinkServer TD330 Hardware Maintenance Manual ...
Page 64: ...50 ThinkServer TD330 Hardware Maintenance Manual ...
Page 88: ...74 ThinkServer TD330 Hardware Maintenance Manual ...
Page 204: ...190 ThinkServer TD330 Hardware Maintenance Manual ...
Page 216: ...202 ThinkServer TD330 Hardware Maintenance Manual ...
Page 217: ......
Page 218: ......

