


Using the cameras
Depending on models, your computer might be equipped with a conventional camera with ThinkShutter or
an infrared camera.
Using the conventional camera with ThinkShutter
To use the conventional camera with ThinkShutter to take pictures and record videos, slide the ThinkShutter
to the left to unveil the camera lens first. Then open the Start menu and click
Camera
from the program list. If
you use other programs that provide features such as photographing, video capturing, and video
conferencing, the camera starts automatically when you enable the camera-required feature. When the
camera starts, the camera status indicator nearby turns on, indicating that the camera is in use. If you want
to cover the camera lens, slide the ThinkShutter to the right.
If you want to configure the camera settings, open the Start menu and then click
Lenovo Vantage
➙
Hardware Settings
➙
Audio/Visual
. Locate the
Camera
section and then follow the instructions on the
screen to configure the camera settings.
Using the infrared camera
The infrared camera provides a personal and secure way for you to sign in to your computer with face
authentication. After setting the infrared camera for face authentication, you can unlock your computer by
scanning your face instead of using a password.
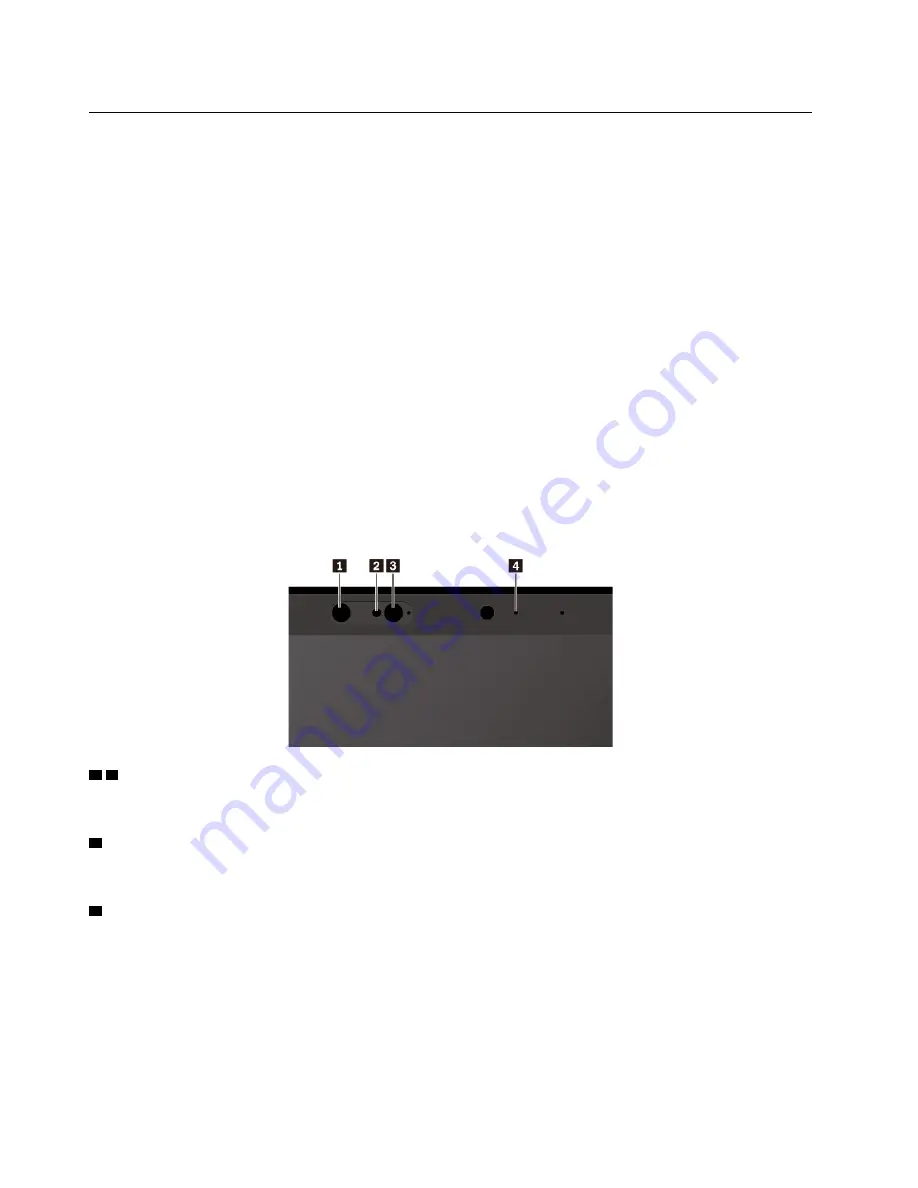
The infrared camera has the following components:
1 3
Infrared light-emitting diode (LED)
The infrared LED emits infrared light. Normally the infrared light is invisible to the naked eyes.
2
Infrared camera lens
The infrared camera lens is used for creating the facial image of a user.
4
Camera indicator
When the camera indicator is on, the infrared camera is in the recognition mode.
To set the infrared camera for face authentication, do the following:
1. Open the Start menu and click
Settings
➙
Accounts
➙
Sign-in options
.
2. Scroll down to the
Password
section and click
Add
to create a password.
3. Follow the instructions on the screen to create a Personal Identification Number (PIN).
4. Locate the
Windows Hello
section and click
Set up
under
Face Recognition
. Then click
Get Started
.
30
A285 User Guide
Summary of Contents for ThinkPad A285
Page 1: ...A285 User Guide ...
Page 6: ...iv A285 User Guide ...
Page 18: ...xvi A285 User Guide ...
Page 32: ...14 A285 User Guide ...
Page 54: ...36 A285 User Guide ...
Page 66: ...48 A285 User Guide ...
Page 74: ...56 A285 User Guide ...
Page 108: ...90 A285 User Guide ...
Page 128: ...110 A285 User Guide ...
Page 130: ...112 A285 User Guide ...
Page 136: ...118 A285 User Guide ...
Page 142: ...124 A285 User Guide ...
Page 144: ...126 A285 User Guide ...
Page 150: ...132 A285 User Guide ...
Page 151: ......
Page 152: ......