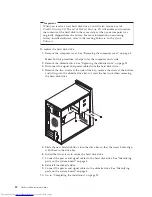
3.
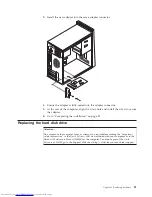
Position
the
computer
cover
on
the
chassis
so
that
the
rail
guides
on
the
bottom
of
the
computer
cover
engage
the
rails.
Then,
push
the
computer
cover
closed
and
install
the
screws.
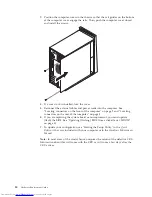
4.
If
a
cover
lock
is
installed,
lock
the
cover.
5.
Reconnect
the
external
cables
and
power
cords
into
the
computer.
See
“Locating
connectors
on
the
front
of
the
computer”
on
page
2
and
“Locating
connectors
on
the
rear
of
the
computer”
on
page
3.
6.
If
you
are
replacing
the
system
board
or
microprocessor,
you
must
update
(flash)
the
BIOS.
See
“Updating
(flashing)
BIOS
from
a
diskette
or
CD-ROM”
on
page
31.
7.
To
update
your
configuration,
see
″
Starting
the
Setup
Utility
″
in
the
Quick
Reference
that
was
included
with
your
computer
or
in
the
Hardware
Maintenance
Manual
.
Note:
In
most
areas
of
the
world,
Lenovo
requires
the
return
of
the
defective
CRU.
Information
about
this
will
come
with
the
CRU
or
will
come
a
few
days
after
the
CRU
arrives.
30
Hardware
Replacement
Guide
Summary of Contents for ThinkCentre Types 8288
Page 1: ...Hardware Replacement Guide Types 8288 8297 8326 Types 8329 8342 8380 ...
Page 2: ......
Page 3: ...Hardware Replacement Guide Types 8288 8297 8326 Types 8329 8342 8380 ...
Page 6: ...iv Hardware Replacement Guide ...
Page 40: ...32 Hardware Replacement Guide ...
Page 43: ......
Page 44: ...Part Number 41D4474 Printed in USA 1P P N 41D4474 ...

