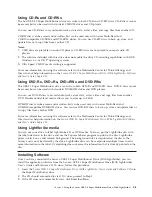
Starting
WinDVD
To
start
WinDVD,
complete
the
following
procedure:
1.
Click
Start
.
2.
Click
Programs
.
3.
Click
InterVideo
WinDVD
to
open
the
DVD
movie
player
window.
For
more
information
on
how
to
play
the
DVD
movie
player,
refer
to
the
WinDVD
help
information
on
the
USB
2.0
Super
Multi-Burner
Software
and
User’s
Guide
Super
CD
.
If
you
want
to
watch
a
DVD
movie
on
your
TV,
refer
to
the
online
information
provided
with
your
computer.
Notes:
1.
Your
computer
has
been
configured
to
provide
the
highest
quality
audio
and
video
playback
obtainable
with
the
available
system
resources.
You
can
alter
the
default
settings
by
changing
the
video
resolution
setting
within
the
Control
Panel.
Some
systems
do
not
have
enough
resources
to
provide
full-quality
audio
and
video
playback
at
all
resolution
settings.
If
you
experience
poor
playback
performance,
adjust
the
resolution
to
a
lower
setting.
2.
Audio
or
video
streams
are
decoded
by
software.
The
audio
and
video
subsystems
need
to
be
fully
functional
and
enabled.
Copying
and
imaging
You
can
use
the
Multimedia
Center
for
Think
Offerings
to
make
copies
and
save
images
of
your
CDs
and
DVDs.
You
can
also
create
CDs
and
DVDs
from
images
that
you
have
previously
saved
on
your
hard
disk.
The
Multimedia
Center
can
only
save
images
in
ISO
and
GI
formats.
ISO
formats
can
only
be
used
for
data
CDs.
All
other
disc
formats
require
GI
images.
Saved
DVD
images
can
be
as
large
as
9GB,
and
CD
images
as
large
as
730MB.
Ensure
that
you
have
adequate
hard
disk
space
before
proceeding.
To
make
a
CD
or
DVD
image:
1.
To
start
the
Multimedia
Center
for
Think
Offerings.
2.
Select
the
Copy
page.
3.
Select
the
task
Save
Image
to
Hard
Disk
.
4.
Give
your
image
file
a
name.
A
random
name
is
created
for
you.
5.
Insert
the
disc
which
you
are
imaging.
6.
Press
the
Record
button.
Note:
Direct-to-disc
CDs
cannot
be
saved
as
image
files.
Note:
Copy
protected
commercial
DVDs
cannot
be
imaged
or
copied.
To
burn
previously
saved
image:
1.
Start
the
Multimedia
Center
for
Think
Offerings.
2.
Select
the
Copy
page.
3.
Select
the
task
Burn
Image
to
CD
or
DVD
.
4.
Explore
to
the
image
which
you
would
like
to
burn.
5.
Insert
a
blank
or
erasable
disc.
6.
Press
the
Record
button.
To
copy
a
disc:
1.
Start
the
Multimedia
Center
for
Think
Offerings.
2.
Select
the
Copy
page.
3.
Select
the
task
Copy
a
disc
.
Chapter
5.
Using
the
Lenovo
USB
2.0
Super
Multi-Burner
Drive
(With
LightScribe)
5-11
Summary of Contents for 41N5631
Page 1: ...Lenovo USB 2 0 Super Multi Burner Drive With LightScribe User s Guide ...
Page 2: ......
Page 3: ...Lenovo USB 2 0 Super Multi Burner Drive With LightScribe User s Guide ...
Page 6: ...iv Lenovo USB 2 0 Super Multi Burner Drive With LightScribe User s Guide ...
Page 12: ...x Lenovo USB 2 0 Super Multi Burner Drive With LightScribe User s Guide ...
Page 24: ...3 2 Lenovo USB 2 0 Super Multi Burner Drive With LightScribe User s Guide ...
Page 44: ...B 2 Lenovo USB 2 0 Super Multi Burner Drive With LightScribe User s Guide ...
Page 62: ...D 16 Lenovo USB 2 0 Super Multi Burner Drive With LightScribe User s Guide ...
Page 66: ...E 4 Lenovo USB 2 0 Super Multi Burner Drive With LightScribe User s Guide ...
Page 67: ......
Page 68: ...Part Number 41N5631 Printed in Malaysia a 1P P N 41N5631 ...


