Bauer
5 Mounting and connection
Preparing mounting
GEL 2444
53
E
nglis
h
5.1 Preparing mounting
To ensure the correct function of the measuring system, MiniCODER and tar-
get wheel must be exactly aligned and the tolerances met.
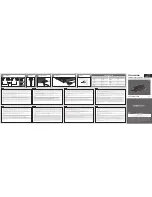
Hole pattern and installation dimensions
d
b
a
g
90°
± 5.7ʹ
T
Ref
T
Sig
A
A
0.01
4 H7 (2 tief/deep)
27
± 0.1
18
7
M 4
r a
- 1
r a
All dimensions stated in mm
a
Width of the signal track:
≥
4.0 mm
b
Mounting surface to tooth wheel distance: dependent on the geometry of the target
wheel (e.g. width of the signal track)
d
Air gap: dependent on the module (see air gap table)
g
Width of the target wheel
r
a
= d
a
/2 (with d
a
= Outside diameter of the tooth wheel)
T
Ref
Reference track
T
Sig
Signal track
Installation dimensions for standard
target wheels
Dimen
sion
ZA-
ZAN
ZAZ
g
4
10
10
a
1/2
4
4
6
a
N
-
4
4
b
7.5 ± 0.5 7.5 ± 0.5 7.5 ± 0.5
Position of the sensor elements:
c
1
= 9.5 mm; c
2
= 6 mm
All dimensions stated in mm
General tolerance ISO 2768-m
ZA-
ZAN
ZAZ
a
1/2
g
a
1/2
a
N
a
N
a
1/2
c
1
c
2
g
g
b
b
b
c
1
c
2
c
1


