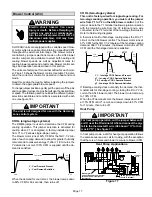
Page 20
Burner Start−Up
1 − Set thermostat for heating demand and turn on electri-
cal supply to unit.
2 − Open all shut−off valves in the oil supply line to the
burner.
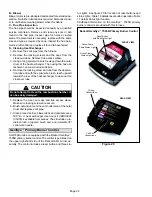
3 − While the ignition is on, press and release the reset
button on the burner control (hold 1/2 second or less).
4 − Bleed the pump until all froth and bubbles are purged.
The bleed port is located on the bottom of the fuel
pump. To bleed, attach a clear plastic hose over the
vent plug. Loosen the plug and catch the oil in an
empty container. Tighten the plug when all the air has
been purged.
NOTE − A two−line fuel system will normally bleed itself
by forcing air back to the tank through the return line.
This type of bleeding procedure is not necessary.
5 − If burner fails to start within the set time, the burner
control will lock out operation. Press the reset button to
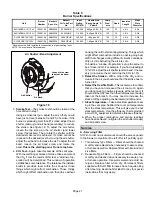
reset the control as in step 3. See figure 2 for burner
parts arrangement.
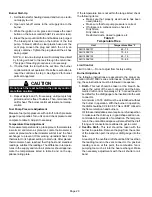
CAUTION
Do not push the reset button on the primary control
more than one time.
6 − Repeat steps 4 and 5, if necessary, until pump is fully
primed and oil is free of bubbles. Then, terminate the
call for heat. The burner control will resume normal op-
eration
Fuel Pump Pressure Adjustment
Measure fuel pump pressure with unit off. Attach pressure
gauge to pump outlet. Turn unit on and check pressure and
compare to table 9. Adjust if necessary.
Temperature Rise Adjustment
To measure temperature rise, place plenum thermometers
in warm air and return air plenums. Locate thermometer in
warm air plenum where thermometer will not see" the heat
exchanger to prevent it from picking up radiant heat. Set
thermostat to its highest setting to start unit. After plenum
thermometers have reached their highest and steadiest
readings, subtract the readings. The difference in tempera-
tures in the supply and return air plenums should approxi-
mate the temperatures listed in table 8 and on the ap-
pliance rating plate.
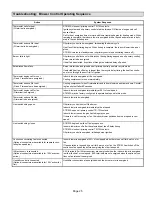
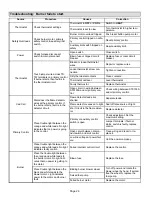
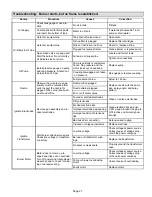
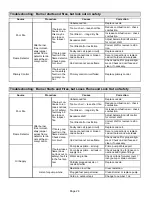
If the temperature rise is not within the range listed, check
the following items:
D
Make sure that properly sized nozzle has been
used (table 9).
D
Make sure that fuel pump pressure is correct.
D
If furnace is in cutback mode, check for:
Dirty filters,
Dirty indoor coil,
Restricted ducts, closed registers, etc.
Table 8
Temperature Rise
Unit
Temperature Rise °F
SLO183BV101
65 − 75
SLO183BV114
70 − 80
SLO183BV135
65 − 75
SLO183BV150
70 − 80
Limit Control
Limit Control Do not adjust from factory setting.
Burner Adjustment
The following instructions are essential to the proper op-
eration of SLO183BV series oil furnaces. To prevent soot-
ing, these instructions must be followed in sequence:
1.
Draft
This test should be taken at the breach be-
tween the outlet of the vent connector and the baro-
metric draft control. Generally a 1/4" hole will need to
be drilled for the draft gauge to be inserted into the vent
connector.
A minimum of 0.03 draft must be established without
the burner in operation. With the burner in operation,
the draft should be 0.04 to 0.05. This is VERY critical to
the flame retention head burners.
Oil furnace installations also require careful inspection
to make sure the chimney is in good shape and can ac-
commodate the products of combustion. The tempera-
ture in the unconditioned space will also affect the draft
if long vent connectors are allowed to get too cold.
2.
Overfire Draft
This test should be taken with the
burner in operation. Remove the plug from the center
of the inspection port. Insert your draft gauge into the
hole.
A reading of the overfire draft should be 0.02 less than
the reading found in the vent connector. If a positive
reading is seen at this point, the combustion fan is
pumping too much air into the heat exchanger. Make
the necessary adjustments with the air shutter or air
band.


