11
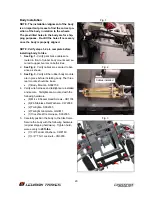
Align and Tension Drive Belt
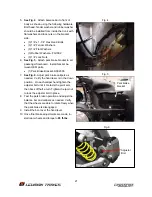
1. Set the belt tension and alignment by moving the independent drive train unit forward or rearward as
necessary using the adjuster bolts. Belt tension can be measured by total vertical movement and
should be approximately ¾”-1” with a new belt.
Tip
: Measure from the bracket to the face of the drive train on each side to get the alignment
close. Then perform the next step.
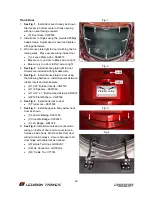
2. To check the alignment, turn the sprocket by hand in the forward direction, noting whether the belt
runs in the center of the pulley. If the pulley runs on the right side plate of the pulley, use the right
hand adjuster bolts to move the right wheel rearward until the belt runs in the center. If the belt runs
on the left side plate of the pulley, use the left adjuster bolts to move the left wheel rearward. Make
small adjustments and recheck the alignment.
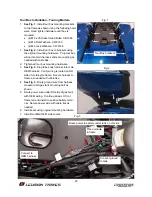
3. Once the belt is aligned, torque the four front 1/2" fasteners to 70 ft-lbs and double check belt align-
ment. If alignment is off, please repeat alignment process.
Tighten all fasteners left loose for belt adjustment.
Torque the four rear ½” fasteners to 70 ft-lbs.
4. Recheck belt tension and alignment after tightening the fasteners.
5. If belt is off to right or left go back to step 2.
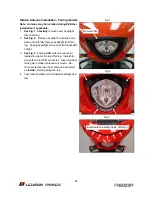
Belt Centered


