Installation Instructions
KITXWXSM1U
9
WARNING:
IMPROPER INSTALLATION CAN LEAD TO
DISPLAY FALLING CAUSING SERIOUS PERSONAL
INJURY OR DAMAGE TO EQUIPMENT! Using screws of
improper size may damage your display. Properly sized
screws will easily and completely thread into display
mounting holes. If spacers are required, be sure to use longer
screws of the same diameter.
2.
Select correct screws, nesting spacers (if necessary) and
universal washers from the hardware bag (A-H) and attach
brackets to back of screen. (See Figure 8)
NOTE:
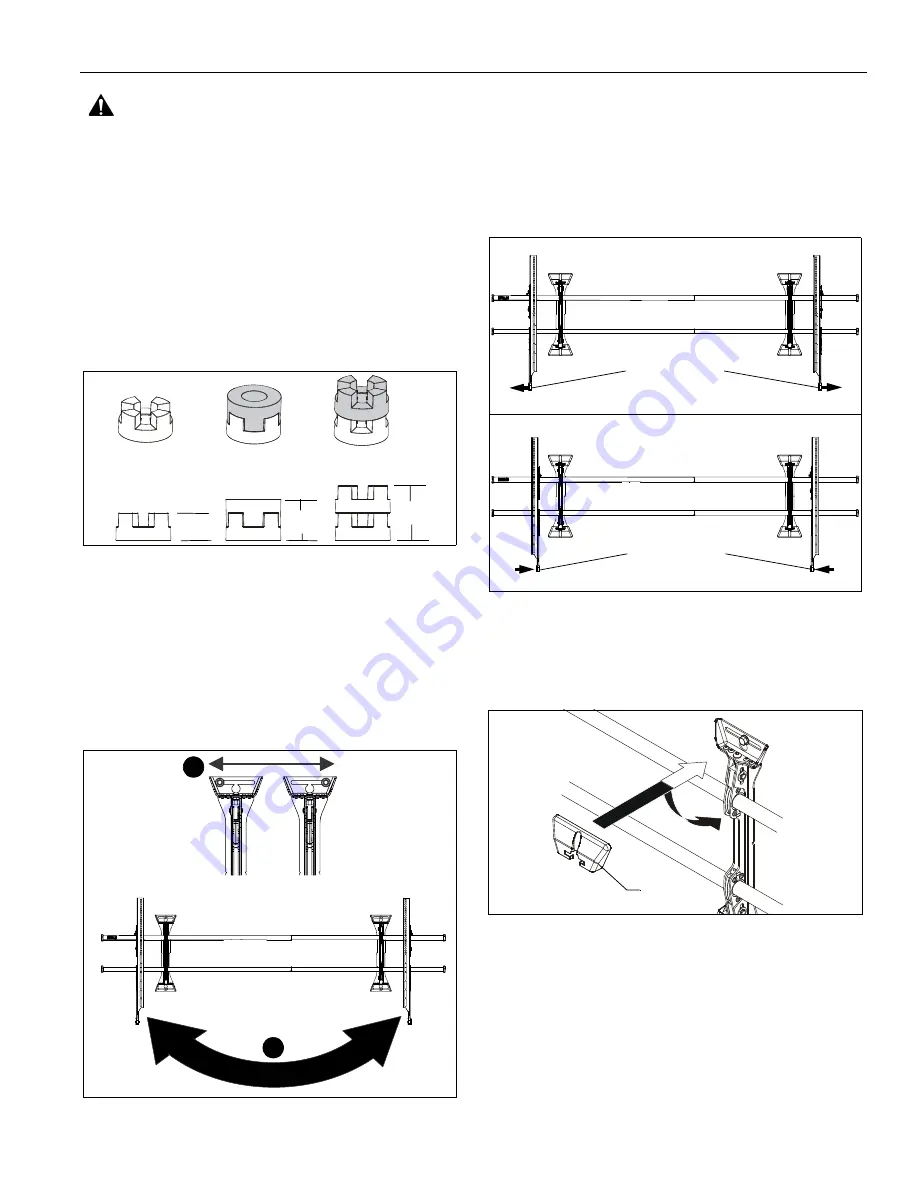
The nesting spacers (G) may be used separately, or put
two together in different configurations to create
different size spacers. (See Figure 9)
Figure 9
Switching Interface Brackets (Optional)
If an installation situation makes adjusting the location of
interface brackets necessary, there are several options.
1.
The wall brackets may be adjusted side to side at the point
of attachment. (See Figure 10)
2.
The location of the left and right interface brackets (W and
X) may be switched. (See Figure 10)
Figure 10
3.
If necessary, the interface brackets may be reversed. (See
Figure 11)
a. Remove display from mount.
b. Remove interface brackets from display.
c. Switch the interface brackets to the opposite sides of the
wall mount.
Figure 11
Attaching Screen to Wall Mount
1.
Attach wall covers (V) to top and bottom of both wall
brackets. (See Figure 12)
Figure 12
NOTE:
NEVER place both interface brackets (W and X) to one
side of the wall mount center line! (See Figure 13)
NOTE:
Do NOT allow both interface brackets (W and X) to be
located on same side of wall bracket. (See Figure 13)
(Single)
(Nested)
(Stacked)
0.375
[9.5]
0.563
[14.3]
0.750
[19.1]
1
2
Standard position
Reversed position
Bottom tabs out
Bottom tabs in
(U) x 4


