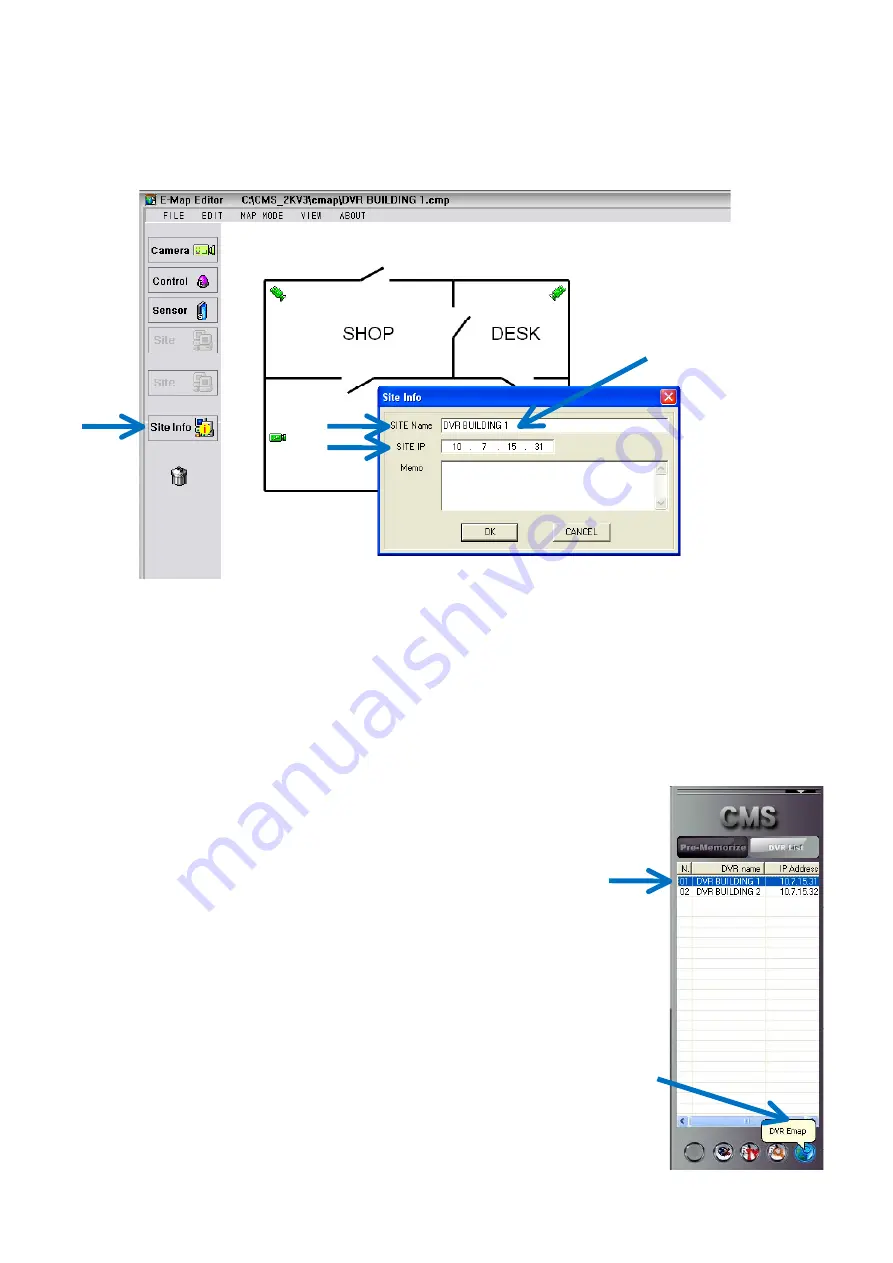
2.4. Enter DVR information
Click on ‘Site Info’, and fill ‘SITE Name’, and ‘SITE IP’:
Must be the same
as DVR name
Click on ‘OK’.
2.5 Save the map
Click on ‘FILE / SAVE AS’ to record the file.
The map has to be recorded in CMS_2KV3 folder, with the name of related DVR
(ex : C\CMS_2KV3\emap\DVR BUILDING 1.emp)
Click on ‘FILE / SAVE’.
Click on ‘FILE / EXIT’.
2.6 Check that the map is linked to the DVR
1. Choose the DVR
2. Click on DVR E-map button
57
Summary of Contents for 430 557
Page 4: ...Chapter 2 Display Mode 4...
Page 16: ...Chapter 3 CMS Setup Mode To enter in this menu Click on start Click on Setup 16...
Page 23: ...PTZ info check the information of PTZ SETUP OF EACH DVR 23...
Page 43: ...2 Select the date and click on Data Backup button 43...
Page 46: ...5 Chose the file and open it Refer to the DVR Manual to use the Backup Viewer 46...
Page 58: ...The map is shown Click on one camera The video will be displayed for this camera 58...


