36
37
1. Set the selector switch (Fig. 2, No. 8) to to switch to manual sealing
mode.
2. Hold the smooth vacuum bag with your thumb and index finger on the
left and right sides of the bag opening.
Fig. A
Fig. B
6. Place the open side of the bag all the way under the bag stop bar (Fig.
1, No. 6) and make sure the bag does not have any wrinkles (for smooth
vacuum bags, please follow the instructions below). Close the device’s lid
and firmly press down on both sides until the lid securely tightens itself.
7. During the welding process, the indicator light (Fig. 2, No. 4) illuminates.
8. At the end of the welding process, the device automatically shuts off.
9. Lift the device cover and remove the sealed vacuum bag.
Vacuuming smooth seal edge vacuum bags (Lava G-Vac)
To create an optimal vacuum, smooth vacuum bags (minimum 120 μm) need to
be inserted into the Lava vacuum sealer using a special bag folding technique.
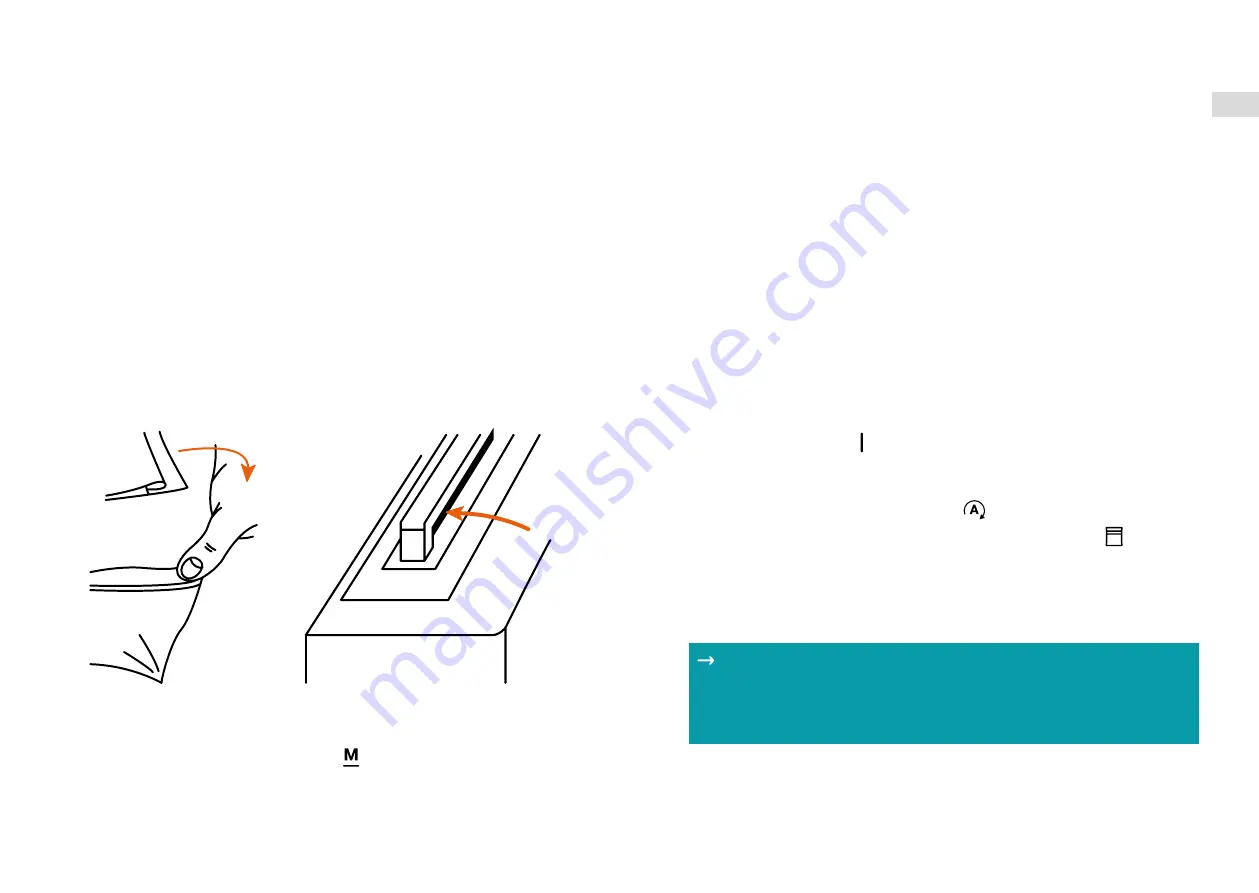
3. Then, simultaneously slide both thumbs to the left without changing the
position of the index fingers. The bag foil will slide over the left side seam
and automatically over the right seam as well (see Fig. A). An overlap will
be formed at the edges of the bag opening.
4. Place the bag with the overlap under the stop bar (Fig. B). The bar will
hold the edge of the bag in this position, and the air can be suctioned out
through the overlap on the left and right sides.
5. Now, in manual mode, start suctioning the air by pressing on the device
flap with enough force until a vacuum is created and the flap stays closed
on its own. The process may take a bit longer than with textured bags
since the air is only suctioned out from the sides.
6. Once the maximum vacuum is reached, the manual welding process can
be initiated.
7.2 Use of vacuum rolls
1. Connect the device to a 230-volt power outlet and switch the ON/OFF
switch (Fig. 2, No. 1) to . The selector switch will now light up, indicating
that the device is ready for operation.
2. Set the desired sealing time on the control dial (Fig. 2, No. 6) (see 6.3) and
switch the device to automatic mode
(Fig. 2, No. 7).
3. Set the selector switch for containers/bags (Fig. 2, No. 2) to .
4. Open the device flap and place the open side of the roll under the bag
stop bar (Fig. 1, No. 6) until it reaches the stop. Make sure that the foil does
not have any waves.
Tip
Do not separate the bag from the roll in advance and place the end
of the continuous roll into the bag stop bar for sealing. The vacuum
will create a perfect seal.
5. The device flap should be closed and pressed firmly downwards on both
sides until the flap closes automatically.
EN


