Laserworld CS-1000RGB
Laserworld CS-1000RGB
8 / 45
9 / 45
8. Operation
8.1. Turn on the Laser system
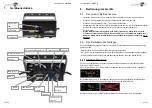
• Connect the power cable to the device and then to the mains
• Insert key and turn it to „ON“
• Press the „ON“ switch to turn on the device
• An
Interlock
bridge adapter is included in delivery (small network plug). Attach an E-Stop to the
interlock interface or use the bridge connector to enable laser output
• Safety Presets
This device has an integrated Scan Safety. Is the Scan Safety active (on), single beams
are prevented. Only disable the Scan Safety for testing purposes. Do not switch off the
Scan Safety for productive use of the laser! Read more: 8.2.5. Settings
8.2. Set Operation Modes:
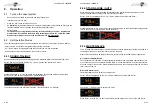
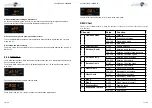
The different operation modes can be selected via the four buttons around the „Settings“ display.
„Enter“ confirms a selection or navigates to the selected menu item
„Up“ / „Down“ allows for stepping through the current menu or make a selection
„Exit“ exits the current menu item and moves one level higher.
8.2.1. SOUND-TO-LIGHT
Sound-to-light operation allows for playing back the integrated patterns to the beat of the music.
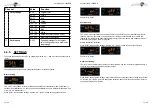
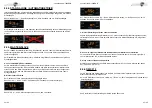
Select „SoUd“ by navigating with the „Up“ / „Down“ buttons and confirm with „Enter“:
Standard Selection is „All“, which means that all patterns saved on the main board are played
back. L001 & L002 have no functional use, please select ALL:
To set the sensitivity of the internal microphone, refer to chapter „8.2.5. Settings“
8.2.2. STAND-ALONE / AUTO
Stand-alone, or Auto, operation allows for playback of the internal patterns without any control.
They are played back according to the internal system settings.
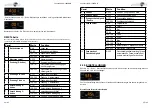
Select „AUto“ by navigating with the „Up“ / „Down“ buttons and confirm with „Enter“:
Standard Selection is „All“, which means that all patterns saved on the main board are played back.
L001 & L002 have no functional use, please select ALL:
8.2.3. MASTER-SLAVE
The CS-1000RGB is Master-Slave capable. this means that the Master laser system can hand on a
control signal to one or more Slave lasers, so all do the same.
Master-Slave only works with lasers of the same product series of the same product generation.
A: Link lasers with DMX cable
To use Master-Slave operation, link the Master with the Slave lasers with DMX cable. Make sure to
use the „DMX out“ port on the Master and the „DMX in“ on the Slave lasers. If several Slave lasers
are used, link the first one to the Master laser and daisy-chain the control signal from the first Slave
laser to the second etc..
B: Activate Master Laser
The Master laser needs to be set as control source.
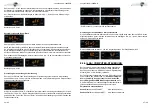
Select „SEt“ by navigating with the „Up“ / „Down“ buttons and confirm with „Enter“:
use the „Up“ / „Down“ buttons to navigate to „uASt“
Press „Enter“, use the „Up“ / „Down“ buttons to switch the option to „on“ and confirm with „Enter“


