background image

Laserworld CS-1000RGB

Laserworld CS-1000RGB

4 / 45

5 / 45

1.  Product and package contents

Please check if all listed parts are included and undamaged. Included in delivery:

Laser system, power cable, keys, interlock bridge plug, manual

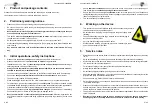
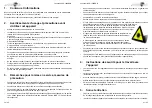
2.  Preliminary warning notices

•  Please use this device only according to these operating instructions. 
•  Do not use the device if there are any visible damages on housing, connector panels, power 

supplies or power cords. 

• 

Never look directly into the light source of a laser projector. Danger of damage to the eyes 

or even blindness in extreme circumstances!

•  This device 

must not be permanently connected to mains

. Disconnect it from mains or use 

the power button to switch if off if not in use.

•  Do not operate the device at high humidity, in the rain or in dusty environments.
• 

Protect device against dripping or splashing water. Do not place any liquid filled containers near 

to this device.

•  Any warranty claims are void if the warranty label is removed or tampered with in any 

way.

3.  Initial operations, safety instructions

•  Make sure to use 

correct voltage

; see information on device & in this manual.

•  Make sure that the device is 

not connected to mains 

during installation.

•  Installation has to be done by 

technical  experienced  and  qualified  persons 

according to 

safety regulations of the respective country.

•  Always ensure that maximum permissible exposure (MPE) is not exceeded in areas ac-

cessible to the public or members of staff. 

•  In some countries an additional  inspection by technical control institutes could be necessary.
•  Connect an 

easily accessible interlock connector or circuit breaker

 to the projector. 

•  The power supply should be easily accessible. 
•  When installing the laser mount it with a minimum distance of 15 cm from walls and objects.
•  For safe setup e.g. on walls or ceilings please use a 

safety cord.

 The safety cord should be able 

to withstand tenfold the weight of the device. Please follow the accident prevention regulations of 

professional associations and/or comparable regulations for accident prevention.

•  If the device has been exposed to 

great temperature changes

, do not switch it on immediately. 

Condensation (or any moisture / water formed) may damage device.

•  Never use dimmer, RC or other electronically switched sockets

. Whenever possible, do not 

use the laser projector together with large appliances (especially fog machines) on the same 

mains!

•  Ensure 

sufficient ventilation

 and do not place the device on any warm or heat radiating sur-

face. Especially the 

ventilation openings must not be covered

!

•  Ensure that device does 

not get overheated.

 Make sure that the device is not exposed to 

spotlights (especially moving heads). Heat of spotlights could overheat laser in a little while and 

leads to a degradation of performance.

•  This unit is intended for indoor use only.

4.  Working on the device

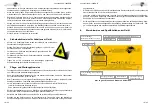
•  This product has no user serviceable parts inside and should only be main-

tained and serviced by a qualified engineer.

•  Be sure that the mains plug is not connected to the power supply while 

installing.

• 

Take off all reflecting things like rings, watches etc. before starting to 

work with or at the projector.

• 

Only use non-reflecting tools to work on device.

•  Wear protective clothing (like glasses, gloves etc.) according to laser 

power and wavelength of the laser. 

5.  Service notes

•  Moisture and heat can reduce lifetime of the laser system dramatically and expires any warranty 

claim.

• 

Quick on/off switching of this device will reduce durability of the laser diode dramatically.

• 

Avoid sharp knocks and shocks to this device and ensure sufficient protection during transporta

-

tion. Look after your Laserworld product.

•  To increase durability of your laser, protect device against overheating: 
• 

Always ensure sufficient ventilation.

•  Do not face spotlights (especially moving heads) to the device.
•  Check temperature after approx. 30 minutes with each new installation. If necessary install the 

projector at a place with different temperature.

•  Keep the device dry. Protect it from moisture, rain and damp.                                                                            
• 

Switch off device when it is not needed. Diodes are switched on and can wear out even if there 

is no visible laser output.

•  Please ensure the fans and heatsinks are clear from dust and debris otherwise the risk of over-

heating may occur. If the unit and airways appear to be blocked then please contact a qualified 

service engineer to maintain and service the product.

•  The devices of the Club Series are not meant for professional applications. They are not suitable 

for 24/7 operation.                                                                

•  Removal of the warranty label as well as damages to the device caused by improper 

handling, neglect of the safety instructions and service notes will void the warranty

Summary of Contents for CS-1000

Page 1: ...tes to read this manual fully before operating this laser Bitte lesen Sie diese Bedienungsanleitung sorgf ltig vor Inbetriebnahme dieses Showlasersystems Avant d utiliser cet appareil pour la premi re...

Page 2: ...r Information juridique L entreprise Laserworld Switzerland AG se r serve le droit d effectuer des modifications concernant leurs produits et ainsi de r pondre au d veloppement technique Ces modifi ca...

Page 3: ...tronically switched sockets Whenever possible do not use the laser projector together with large appliances especially fog machines on the same mains Ensure sufficient ventilation and do not place the...

Page 4: ...ution of radiation if cover is removed Laser radiation Avoid exposure to beam Power supply consumption Model type Wavelength Output power Production year Mains connection Operation mode settings Fuse...

Page 5: ...played back L001 L002 have no functional use please select ALL To set the sensitivity of the internal microphone refer to chapter 8 2 5 Settings 8 2 2 STAND ALONE AUTO Stand alone or Auto operation a...

Page 6: ...ress Enter and the Up Down buttons to set the desired DMX address Confirm with enter and press Exit to return to the main menu DMX Chart The laser uses 13 DMX channels so make sure that the next devic...

Page 7: ...aster Slave Press Enter to change the settings Use the Up Down button to change the selection Confirm with Enter Safety Setting The bEAu menu can switch the beam block safety on and off The beam block...

Page 8: ...ith ShowNET www showcontroller com Final statement Laserworld products are tested and product packaging is inspected before leaving our warehouse Users must to follow the local safety regulations and...

Page 9: ...gaben auf dem Ger t bzw in dieser Bedienungsanleitung Stellen Sie sicher dass das Ger t w hrend der Installation nicht mit dem Stromnetz verbunden ist Der Laser darf nur von technisch versiertem Fachp...

Page 10: ...en zum Erl schen des Gew hrleistungsanspruchs Das Ger t nicht schnell hintereinander Ein und Ausstecken schalten da dies die Lebensdauer der Laserdiode erheblich verk rzen kann Beim Transport des Lase...

Page 11: ...aktiv on wird ein stehener Laserstrahl verhindert Das Sacn Safety nur zu Testzwecken deaktivieren Das Scan Safety darf im produktiveinsatz nicht deaktiviert sein Mehr zum Safety 8 2 5 Optionen 8 2 De...

Page 12: ...Laser angeschlos sen werden sollen wird das Steuersignal ber das DMX Kabel zu den weiteren Slave Lasern durchgeschliffen B Master Laser aktivieren Der master Laser muss als Ansteuersystem festgelegt...

Page 13: ...Drehung Y automatisch 6 Verschiebung X Achse 0 127 Verschiebungsschritte X 128 255 Automatische Bewegung X 7 Verschiebung Y Achse 0 127 Verschiebungsschritte Y 128 255 Automatische Bewegung Y 8 Gr e...

Page 14: ...ojektionssitu ation des Lasercontents anzupassen Mit Enter das Men ffnen Ein Test Bild wird projiziert das die derzeitige Ausrichtung der Projek tion zeigt Durch die Up Down Steuerkn pfe k nnen die ve...

Page 15: ...geben werden Laserworld Switzerland AG Kreuzlingerstrasse 5 CH 8574 Lengwil Schweiz Sitz der Gesellschaft Lengwil Schweiz Firmennummer CH 440 3 020 548 6 Verwaltungsrat Martin Werner MWSt Nummer Schwe...

Page 16: ...is sible exposure Dans certains pays il est n cessaire de faire certifier l installation laser par un organisme de v rification agr Connectez une fiche interlock ou un interrupteur d urgence facilemen...

Page 17: ...pour une utilisation professionnelle Veuillez laisser refroidir les appareils pendant env 15 minutes chaque heure d utilisation Les ventilateurs et radiateurs aillettes etc doivent tre exemptes de pou...

Page 18: ...Enter La s lection standard est All ce qui signifie que tous les motifs sauvegard s sur la carte m re sont affich s L001 L002 n ont pas d utilisation fonctionnelle veuillez s lectionner ALL Pour r gle...

Page 19: ...p Down et confirmez avec Enter Le sous menu de r glage des adresse DMX est affich Appuyez sur Enter utilisez les boutons Up Down pour r gler l adresse DMX souhait e Confirmez avec enter et appuyez sur...

Page 20: ...Pour en savoir plus voir 8 2 3 Ma tre esclave Appuyez sur Enter pour changer les param tres Utilisez les boutons Up Down pour changer la s lection Confirmez avec Enter R glage s curit Le menu bEAu pe...

Page 21: ...m Explication finale Ce produit de m me que son emballage sont en parfait tat lors de l envoi Celui qui utilise cet appareil laser doit respecter les r glements de s curit s locales ainsi que les aver...

Page 22: ...supply Stromversorgung Alimentation 85 V 250 V AC Power consumption Stromaufnahme Consommation 60 W Operating temperature Betriebstempe ratur temp rature d op ration 10 to 35 C Dimensions Abmessungen...

Page 23: ...Laserworld CS 1000RGB Laserworld CS 1000RGB 44 45 45 45...

Reviews: