Lanzar SD34MIP Owner'S Manual Download Page 16

05

29

DVD

Installation

16

02

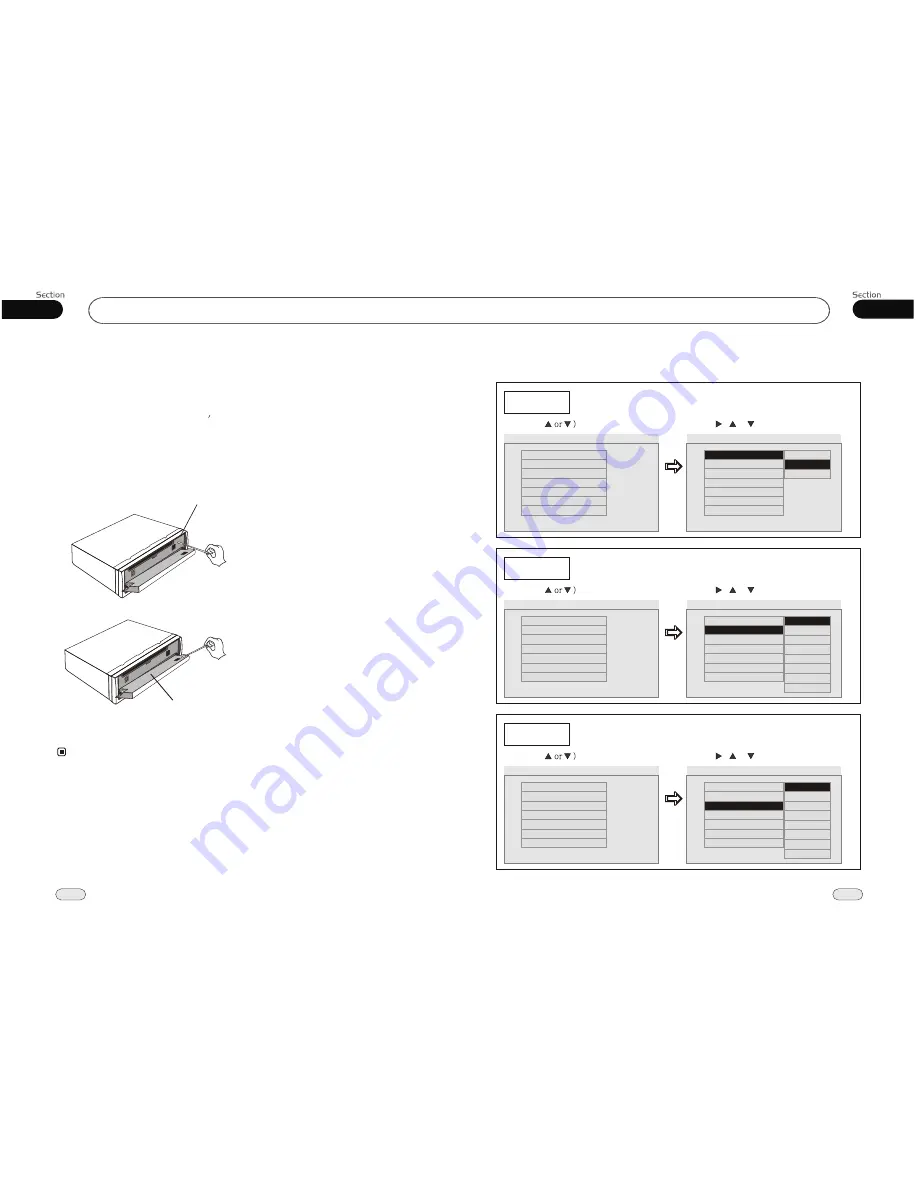
Cleaning the Connector

If the connector between the main unit and the 
front panel is dirty, it may result in unit s ab-
normal working condition. To avoid such pro-
blems happening, please detach the front panel, 
and clean the connector with  an 

swab. 

Gently clean and avoid damaging the connector.

alcohol 


     *   For safekeeping, always shut down the generator 

          and take out the key 

 ignition before cle-

          aning.

          Never keep your finger or any metal

touch 

          the connector directly.

from the

 device 

Notes:


The main unit

The backside of the front panel

---Preference page---

TV Type

Example showing how to set TV type:

(Press      ,      or     , then press ENTER)

(Press

--Preference Page--

Go To Preference Page

Set TV Standard

TV Type
Audio 
Subtitle 
Disc Menu
Parental 
Password 
Default 

Auto 
Eng 
Eng 

Eng 

--Preference Page--

TV Type

Audio 
Subtitle 
Disc Menu
Parental 
Password 
Default 

Auto 

Eng 
Eng 
Eng 

PAL

Auto

Audio 

Example showing how to set Audio language:

(Press      ,      or     , then press ENTER)

(Press

--Preference Page--

Go To Preference Page

Preferred Audio Language

TV Type
Audio 
Subtitle 
Disc Menu
Parental 
Password 
Default 

Auto 
Eng 
Eng 

Eng 

--Preference Page--

TV Type

Audio 

Subtitle 
Disc Menu
Parental 
Password 
Default 

Auto 

Eng 

Eng 
Eng 

Subtitle 

Example showing how to set subtitle language:

(Press      ,      or     , then press ENTER)

(Press

--Preference Page--

Go To Preference Page

Preferred subtitle Language

TV Type
Audio 
Subtitle 
Disc Menu
Parental 
Password 
Default 

Auto 
Eng 
Eng 

Eng 

--Preference Page--

TV Type
Audio 

Subtitle 

Disc Menu
Parental 
Password 
Default 

Auto 
Eng 

Eng 

Eng 

NTSC

English 

French 
Spanish 
Chinese 
Japanese 

Russian 
Others

Korean 

English 

French 
Spanish 
Chinese 
Japanese 

Russian 

Korean 

Others

Summary of Contents for SD34MIP

Page 1: ...SD34MIP R CAR DVD VCD CD MP3 MPEG 4 PLAYER WITH USB PORT I POD AND AM FM TUNER...

Page 2: ...n 18 Force Disc Out 18 18 Main Menu Main Menu Setup 19 Audio Adjust 19 Video Adjust 20 Source Setup 21 Others 22 DVD Basic Operation of DVD Playing the Previous Next Track Playing the Track F F F REW...

Page 3: ...ng the Station DX LOC Selector MO ST Selector On screen Display Scanning Memorizing Stations Automatically Number Buttons Selecting Station Directly 38 38 38 38 38 38 39 39 39 Radio Menu 40 8 9 Additi...

Page 4: ...ated by the remote control there are also functions can be operated by the buttons provided for the main unit 41 Additional Information Simple Troubleshooting Guide No power Check and make sure whethe...

Page 5: ...button the monitor shows the radio setup menu you can press to select your desired item then press ENTER on the remote control Press or to select EXIT then press ENTER to exit the setup 22 21 Note Ro...

Page 6: ...rownintoafire This function is only operated by using rem ote control Scanning Memorizing Stations Automatically During radio status you can press AMS button on the remote control to scan each stored...

Page 7: ...rol Mono mode or Stereo to select mode DX LOC Selector During radio status press LOC button on the remote control to select or weak station reception strong Notes MO ST Selector Stereo reception is ch...

Page 8: ...can not be operated in this mode you can just operate IPOD to select video and picture Video or Picture Mode 6 This function is operated by using remote control only Note The IPOD TV should be set ON...

Page 9: ...Note This function is operated by using the remote control only Repeat Playing During playback press Press it again to cancel this function RPT to track repeat disc repeat off Pressing AMS on the head...

Page 10: ...OUD loudness button 0 9 number button CLEAR clear button LOC SUB T long distant or local station in radio mode back to last level in IPOD mode subtitle display button ZOOM briefly press it to zoom in...

Page 11: ...ack Number and then press to move the cursor to START press ENTER to start program playing move the cursor to EXIT and press ENTER to exit the program playing Move the cursor to and press ENTER to the...

Page 12: ...ction with the button 22 On screen display During VCD CD playback briefly press OSD the monitor shows This function is operated by using remote control the Note 8 Single elapsed time Total elapsed tim...

Page 13: ...tion performs Playing the Previous Next Track 12 Note Press or toplaythetrackfastforward orfastrewind Eachpressing willchange as following Playing Track F F F REW 20 Note 2X Stop the playback DuringMP...

Page 14: ...2 places on each side And then fasten them to the car screw become aligned tighten the 4 Outer Trim Frame Hook Mounting Sleeve are not used and for installa tion method 5 1 9 2 NOTE Bracket supplied t...

Page 15: ...edMenuLanguage TVType Audio Subtitle DiscMenu Parental Password Default Auto Eng Eng Eng PreferencePage TVType Audio Subtitle DiscMenu Parental Password Default Auto Eng Eng Eng Parental Example showi...

Page 16: ...dio Subtitle DiscMenu Parental Password Default Auto Eng Eng Eng PreferencePage TVType Audio Subtitle DiscMenu Parental Password Default Auto Eng Eng Eng PAL Auto Audio Example showing how to set Audi...

Page 17: ...ly start playing Keep pressing it to turn off the unit completely the the 1 During waiting status briefly press PWR on the head unit to turn on the unit press and hold it to turn off the unit Note 15...

Page 18: ...LEAR to clear the mistake input CLEAR Note This function is operated by using the remote control only 23 Turning Loudness On Off Witheout bluetooth briefly press LOUD activate LOUD function You can th...

Page 19: ...D BASS TREBLE AUDIO SETUP EQUALIZER BACK LOUDNESS 00 00 00 FLAT OFF 00 Example showing howto set picture mode Press Press or thenpressENTER Captions OSDLang OSDLang AngleMark TVDisplay GeneralSetupPag...

Page 20: ...o can set it as needed by moving he cursor and using buttons and then press ENTER to t execute the selecting or enter ing item The selections are the preferred options that will be chosen if they are...

Page 21: ...r pause is canceled and normal playback resumes but the viewing angle does not change Press and hold this button to display the current source information Setting the Playing Time During DVD mode pres...

Page 22: ...head unit also performs the same function 25 Note DuringDVDplayback firstpress to returntothebeginningofthecurrenttrack press againwithin3secondstoplay previoustrack press toplaynexttrack Briefly pre...

Reviews: