Concept
6/8
Quick
Start
Guide
This is a quick start guide so you can be using you mixer sooner rather than later - you can
then refer to the detailed description later in this manual when you need.
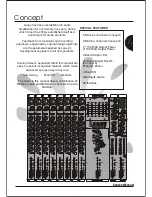
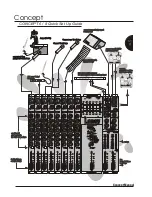
2 diagrams are provided to supplement this information following these tips
Plugging
in
!
Connect power to your mixer - always a good start !
Switch On -
Connect all you input signals Mics/DI's/Keyboards/Tape machines to there relevant input
channels
Connect your condenser Mics before enabling Phantom power
**Do not connect dynamic Mics or unbalanced sources to mic inputs when Phantom power is
enabled otherwise damage may occur to your them or your mixer**
Its a good idea to label up each channel strip, so you know what is connected where - this can
be done in chinagraph in the `write on' areas or use a piece of masking tape along the front
edge of the mixer (the old favourite)
Its always good practice to start work on mixer with all gain controls at minimum ,all faders at
minimum and all EQ set flat.
Input
Channel
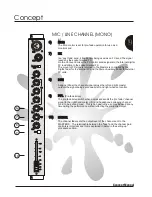
Do not be intimidated by the input channels on your mixer as it's function is very simple:-
1)The gain control - makes little signals big, so they are as far above noise as possible but not
so high that the signal is clipped - the peak led illuminates when clipping is near.
2)The EQ section - tonally changes the input signal , this is just like the tone controls on your
Hi -Fi but with more knobs. The controls are labelled-Hi , Mid(gain + Frequency) and Lo
controls
3)It lets you send the signal to places of use e.g. A Monitor send for a vocalists/Musician
Aux 1 and Digifx if you want to add echo/reverb to a signal. These send controls are labelled
Mon, Aux 1 and Digifx
4)You can adjust the signals position in the stereo image using the Pan control.
5)Fader - this controls the signal level being sent to Masters
Setting
the
gain
on
an
Input
Channel
By now you will have connected your input signals to your mixer and be ready to set your input
gain controls.
1)Enable Pfl on the channel which you wish to set up - the right meter shows the signal level in
that channel and the channels signal appears on the headphones
2)Tell the vocalist/musician to play - while he plays you should set the channel gain control so
that 0dB to +6dB will illuminate on signal peaks
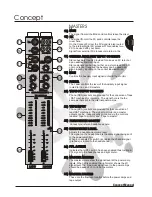
3)Increase the channel fader to between -10 and OdB and then increase the masters faders to
a level which is a satisfactory volume - power amp level control should be about -6db.
4)This point is a good time to set the EQ - remember if you boost a lot you will have to reset
the input gain control as described in 2)
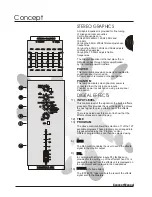
FX
Certain instruments will benefit from the addition of some form of effect for instance snares can
be made sound `bigger' with the addition of a reverb or maybe a vocal could be thickened up
with a bit of delay.
Concept
Concept Manual
5
5


