Section 2: Adjustment
FC10 C-Tine Field Cultivator 335-043M
1/14/19
10
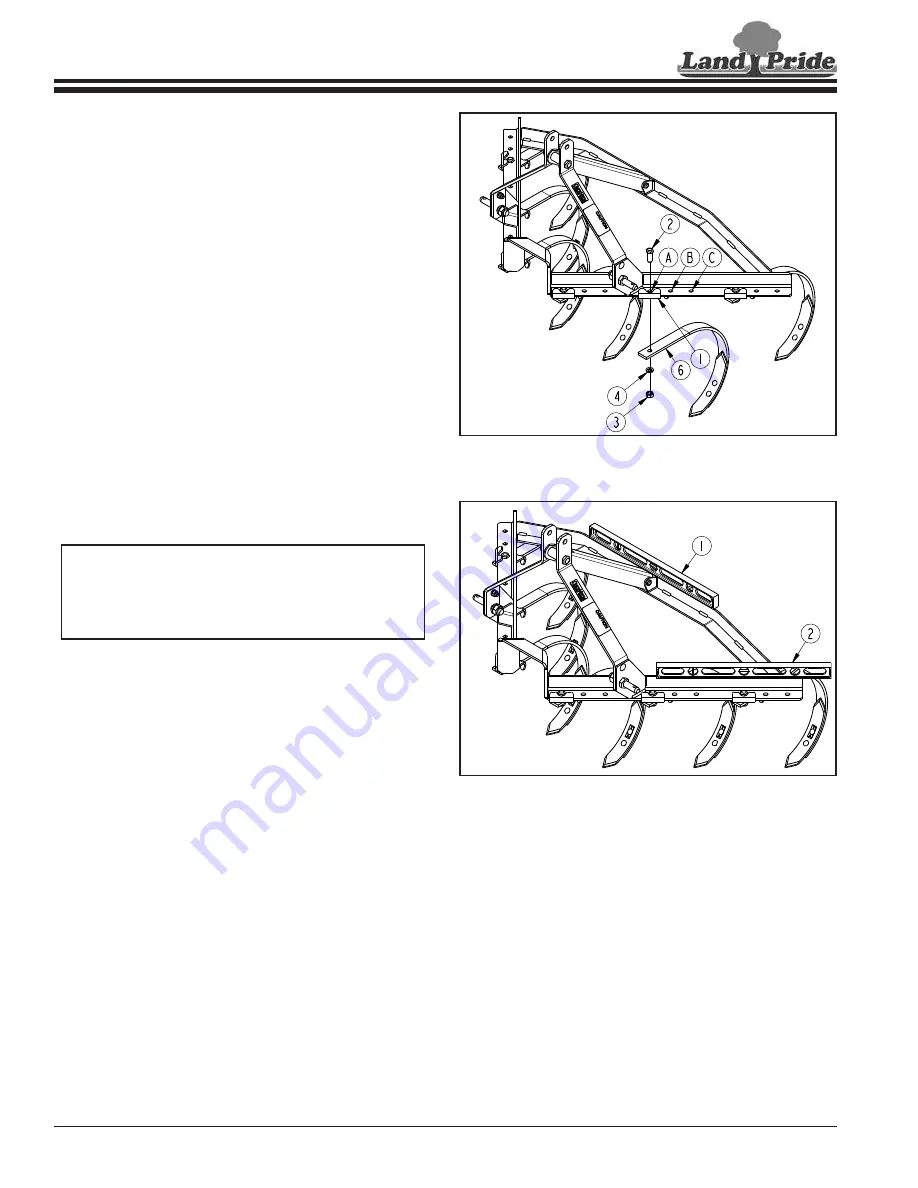
C-Tine Shank Spacing
The cultivator is setup from the factory with C-tine shanks
attached to holes “A” in the angle frame. The operator can
move C-tine shanks to holes “B” or “C” as needed.
If readjusting shank spacing, make sure the shanks are
symmetrical about the center of the frame. For example,
if you move the second shank on the left side to hole “C”,
you should also move the second shank on the right side
to hole “C”.
1.
On the left side, remove nut (#3), lock washer (#4),
C-tine shank (#6), and hex head bolt (#2).
2. Slide left-hand tine support bracket (#1) to hole
“A”, “B”, or “C” as needed and reattach C-tine (#6) with
5/8"-11 GR5 hex bolt (#2), lock washer (#4) and hex
nut (#3). Tighten hex nut to the correct torque.
3. Repeat steps 1 & 2 for the same tine on the right-
hand side of the cultivator.
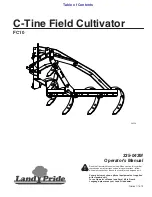
Level Cultivator
1.
Shut tractor down according to
on page 8. Make sure the ground is
level.
2. Place a level on the back of the cultivator as shown in
position (#1).
3. Adjust one of the lower 3-point arms up or down as
needed to level the cultivator left to right.
4. Move the level to position (#2) and adjust the center
3-point link to level the cultivator from front to back.
•
Shorten 3-point center link if the cultivator is low at
the back.
•
Lengthen 3-point center link if the cultivator is high
at the back.
NOTE:
When leveling is complete, the cultivator
should be parallel with the ground from front to back
and side to side. If leveling is done on ground with a
small incline, then use a tape measure to ensure the
cultivator frame is parallel to the ground.
C-Tine Spacing
Figure 2-1
C-Tine Spacing
Figure 2-2
39553
39567
Section 2: Adjustment


