background image

5.2  Surface Preparation 

Plaster Board and Cement Sheet

The wall area must be a dry and clean surface, free from any crumbling plasterwork, 
grease or major surface damage. Crumbling plasterwork should be removed with 
a scraper blade or sanded off, or if severe, it must be repaired with plaster filler 
or patched with a suitable piece of plasterboard. Grease should be removed with 
isopropanol (IPO) or thinners and wiped dry. All nail heads must be punched in. 
Residual glue or plaster filler should be sanded or scraped off. 

Bricks or Cement Blocks, Grey Coat Render or White Coat Plaster

The wall area must be a dry and clean surface, free from any crumbling plaster, 
mortar, sand, grease or major surface damage. Crumbling plaster should be 
removed with a scraper blade or sanded off, or if severe, it must be repaired with 
plaster filler. Grease should be removed with isopropanol (IPO) or thinners and 
wiped dry. Residual mortar or plaster filler should be sanded or scraped off. Sandy 
or loose render on brickwork or cement blockwork must be sealed with appropriate 
sealer/primer. (Laminex recommends ArdexP51 Porous Substrate Primer. Follow 
manufacturer’s application instructions.)

Installation over ceramic tiles is not recommended. The flatness of the wall and 
condition of the tile adhesive cannot be controlled. It is recommended that the tiles 
are removed and the wall is relined for flatness.

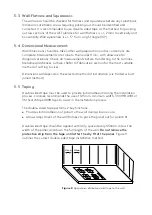
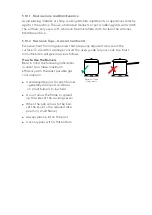
Any holes larger than 100mm across must patched or filled. Electrical or plumbing 
penetrations should be cut to 
slightly oversized for ease of 
installation, however they should 
not be excessively oversized to 
ensure wall integrity.

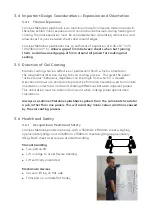
Figure 8 should be used as a 
reference for the recommended 
repair method for any damage  
to the wall.

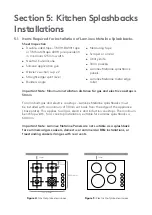
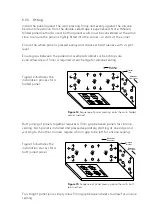
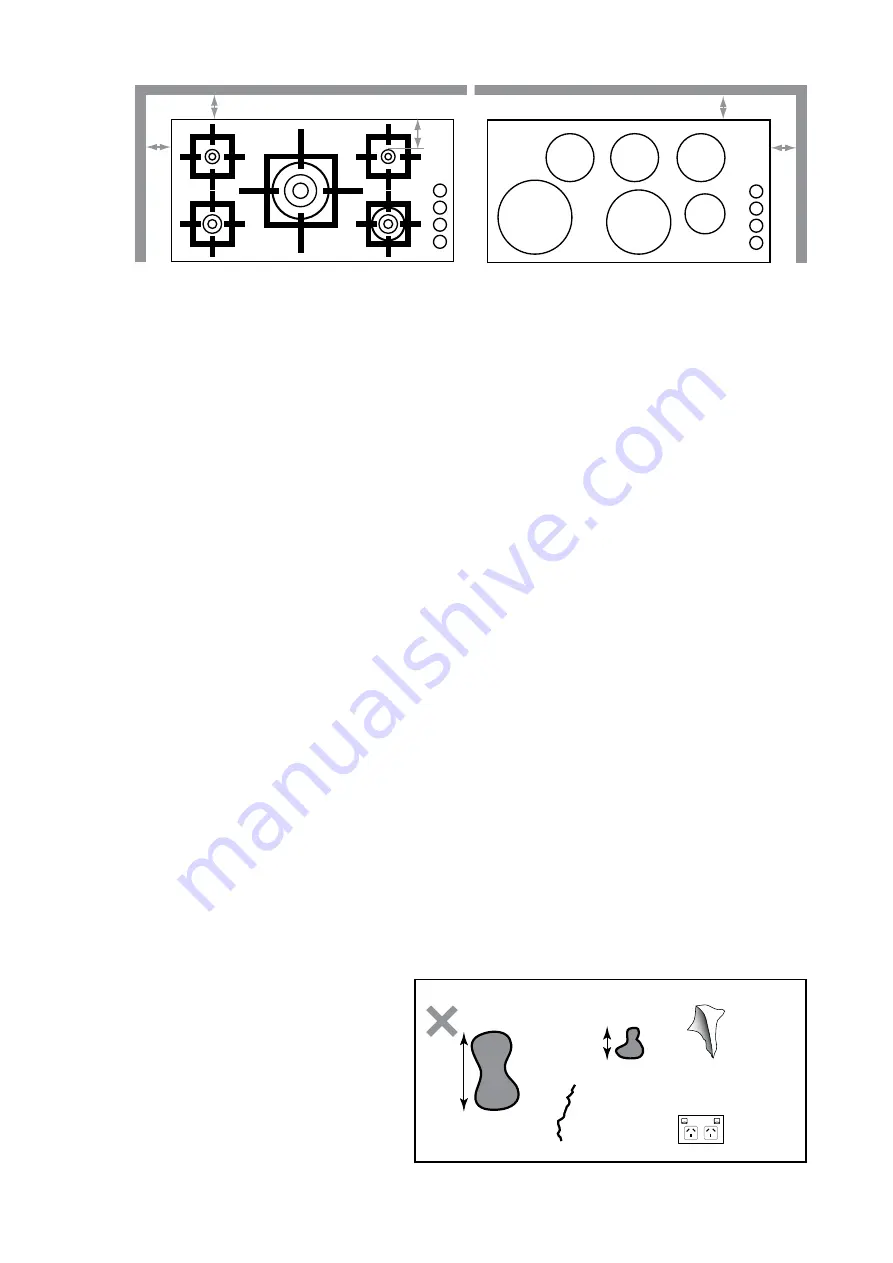
Installations where these minimum distances are not observed creates a risk of 
impact damage and blistering of the panel and surface from the use of oversized 
cooking pots and will void the Laminex Metaline splashbacks limited warranty.

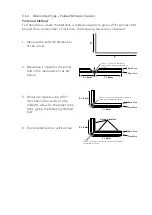
Figure 6:

 Larger Gas Hotplate clearances

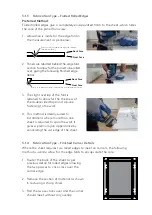
Figure 7:

 Larger Electric Hotplate clearances

30mm

30mm

30mm

30mm

85-
105mm

30mm

30mm

30mm

30mm

85-
105mm

>100mm

Needs patching

Large hole

75-100mm

Hole

Cracked

plaster

Paper

tear

Power

point

Figure 8:

 Wall damage and recommended repair 

requirements

Summary of Contents for Metaline

Page 1: ...Metaline Splashbacks Panels Fabrication Manual ...

Page 2: ...n 3 Planning Your Installation Important Design Considerations Types Of Fabrication 3 1 Folded Internal Corners Rolled Edges 3 1 1 Fabrication Type Folded Internal Corners 3 1 2 Fabrication Type Folded External Corners 3 1 3 Fabrication Type Folded Rolled Edges 3 1 4 Fabrication Type Finished Corner Details 3 2 Fabrication Type Butt Joined Sheets 3 2 1 Butt Joined Corners Straight Cut Edges 3 3 Ot...

Page 3: ...Handsaw 4 5 7 Hole Saw and Drills Section 5 Kitchen Splashbacks Installations 5 1 Items Required for Installation of Laminex Metaline Splashbacks 5 2 Surface Preparation 5 3 Wall Flatness and Squareness 5 4 Dimensional Measurement 5 5 Taping 5 6 Dry Fit 5 7 Final Fitting 5 7 1 Silicone Adhesive Application 5 7 2 Double Sided Tape Protective Strip Removal 5 7 3 Fitting 5 8 Sealing with Silicone 5 9...

Page 4: ...as a proprietary coating that allows it to be cleaned easily Cleaning of Metaline splashbacks and panels should follow the Care and Maintenance section which is contained later in this manual and also on the consumer warranty card Deep gouges caused by abrasive cleaners or scouring pads will not be warranted 4 Laminex Metaline splashbacks have been assessed for fire safety properties Laminex Metal...

Page 5: ...rature is not less than 16ºC before folding occurs for optimum edge apearance 13 Roll bending Laminex Metaline splashbacks and panels can be roll formed to a minimum radius of 120mm using mandrel rolling 14 Butt joining Laminex Metaline splashbacks and panels can be butt joined together or into corners to give a simpler installation Allowance for a 3mm gap for silicone sealing and thermal expansio...

Page 6: ...n that is easy to clean mark and stain resistant and fire resistant It has a minimum gloss measurement of 80 gloss units Printed onto the back surface are the product name product colour ASW code and manufacturing batch code 2 2 Product Applications Laminex Metaline splashback panels are suitable for installation in all domestic applications and most commercial installations They are not suitable ...

Page 7: ... use of neutral cure silicone adhesive The use of acid cure silicone is not warranted Laminex Metaline double sided tape has been developed for the installation Double sided tape is available in rolls from your local Laminex sales branch 2 5 Warranty Laminex Metaline splashbacks have a 7 year limited warranty when installed according to this Installation Guide 2 6 Product Technical Specification R...

Page 8: ...Internal Corners Rolled Edges Preferred Method This method gives a premium finish with no exposed cut edges and more professional corner detail Utilises Metaline s unique forming characteristics to produce an internal or external folded corner No joins and seamless finish No joins directly behind cooktop Panel temperature needs to be above 16ºC to ensure optimum edge appearance External folded cor...

Page 9: ...ther the following sequence is observed X Y X Y X 6mm Y 6mm X 6mm Back Face Front Face Y 6mm X 6mm Back Face Front Face Y 6mm Back Face Front Face X 6mm Y 6mm Back Face Double Sided Tape Front Face X Y X 6mm Y 6mm Back Face Front Face X 6mm Y 6mm Back Face Front Face Double Sided Tape Some core must remail in routered channel maximum 1mm X Y X Y X 6mm Y 6mm Back Face Front Face X 6mm Y 6mm Back Fa...

Page 10: ...annel maximum 1mm X Y X 6mm Y 6mm Front Face X 6mm Y 6mm Back Face Front Face Back Face Front Face Some core must remail in routered channel maximum 1mm X X Y X 6mm Y 6mm X 6mm Y 6mm Back Face Front Face X 6mm Back Face Front Face Y 6mm Back Face Front Face X 6mm Y 6mm Back Face Double Sided Tape Front Face X Y X 6mm Y 6mm Back Face Front Face Back Face Front Face X 6mm Y 6mm Back Face Front Face ...

Page 11: ...mum 1mm 1 Router the back of the sheet as per previous detail for rolled edges allowing the two passes to criss cross over the corner edge 2 Remove the section of material as shown in red using a sharp chisel 3 Roll the two sections over and the corner should meet without any overlap 1 Allowance is made for the edge fold in the measurement as per below 2 Panels are rebated behind the edge fold sec...

Page 12: ... around walls or seamless joins in corners Ensure that all gaps are maintained at 3mm with packers to allow for silicone sealing and product expansion The method of installation is explained in Section 5 3 2 1 Butt Joined Corners Straight Cut Edges Alternative Method This method is the same as glass splashback installation and offers a less sophisticated installation without sacrificing the benefi...

Page 13: ...ocess This gives the panel active colour behaviour dependent on the angle from which it is viewed Directional arrows are printed onto protective film and should be used to maintain orientation correctness and avoid shading differences between adjacent panels This orientation must be taken into account when making panel optimisation calculations Always use Laminex Metaline splashbacks panels from t...

Page 14: ... traditional tools fitted with a suitable aluminium cutting blade either tungsten carbide or high speed steel The following cutting equipment can be used for cutting Metaline panels Panel or table saw using aluminium cutting blade e g Leitz 68800 Circular saw using aluminium cutting blade Hand router high speed TC blade Milling machine or CNC high speed TC blade Jigsaw using aluminium blade only H...

Page 15: ...t may penetrate into the coated surface Check that all sheets of the same colour are from the same batch code printed onto the back of the sheet to ensure that colour differences are minimised Remember to note down the product batch code for completion of the warranty and installation checklist 4 5 Cutting Metaline Sheets Laminex Metaline splashback sheets are best fabricated on a solid work platf...

Page 16: ...around the collet If vacuum is not available stop regularly and clear the swarf 4 5 4 CNC or Milling Machine Same as hand held router 4 5 5 Jigsaw A jigsaw cuts with an upward action so the panel should be cut with the decorated face down Note that a fine metal cutting blade must be used to prevent chipping and burring of the cut edge Clean up with a file 4 5 6 Handsaw A handsaw can be used for cu...

Page 17: ...splashbacks must be installed with a minimum of 30mm set back from the edge of the appliance base plate This applies to all gas electric and induction cooktops The minimum benchtop width for a cooktop installation suitable for Laminex splashbacks is 600mm Important Note Laminex Metaline Panels are not suitable as a splashback for commercial gas cookers domestic or commercial BBQ installations or f...

Page 18: ...work must be sealed with appropriate sealer primer Laminex recommends ArdexP51 Porous Substrate Primer Follow manufacturer s application instructions Installation over ceramic tiles is not recommended The flatness of the wall and condition of the tile adhesive cannot be controlled It is recommended that the tiles are removed and the wall is relined for flatness Any holes larger than 100mm across m...

Page 19: ... cutting to size Dimensions will depend on the selected method of installation viz folded vs butt joined method 5 5 Taping Double sided tape must be used to provide initial adhesion during the installation process Laminex recommends the use of 12 5mm minimum width 3M VHB 4991 or 3M Scotchtape 4008 tape to assist in the installation process The double sided tape performs 2 key functions Provides in...

Page 20: ...cups will assist in the handling of the Metaline panels Once a satisfactory fit is achieved the panel should be removed to allow for silicone application Once the dry fit is deemed satisfactory remove the protective film to check for surface defects before final installation Extreme care must be taken from this point to ensure the decorative surface is not damaged in the final stages of installati...

Page 21: ...he panel and overhead cabinets or benchtops are even Allowance of 3mm is required at each edge for silicone sealing Figure 13 Sequence of panel pressing onto the wall butt join method m Work away from corner 5 6 1 2 3 4 9 1 0 Work away from corner Fit corner first Work away from corner 5 6 3 4 1 2 7 8 9 10 Work away from corner 3mm gap in corner Figure 12 illustrates the installation process for a...

Page 22: ...rated surface before it cures 5 10 Care and Maintenance Laminex Metaline splashbacks require very little maintenance if installed according to the instructions above and cleaned according to the following guidelines DO use a soft micro fibre cloth with a mild detergent DO clean the surface regularly DO NOT allow food stuffs to build up on the surface DO NOT use abrasive cleaners or pot scrubbing p...

Page 23: ...orch the surface To avoid this damage consult the users guide for your cook top Most manufacturers will give advice as follows How to Use the Burners Bear in mind the following indications in order to achieve maximum efficiency with the least possible gas consumption Optimum flame usage above Use adequate pans for each burner generally small pots and pans on small burners to low heat Do not allow ...

Page 24: ... Cover Benchtops Essastone Nero Assoluto Gloss finish Splashback Laminex Metaline in Black Ice Cabinetry and panels and drop down Island table Laminex Impressions in Burnished Wood Nuance finish Germancraft Kitchens ...

Reviews: