11
9.0 ARM REMOVAL
Warning:
Strictly comply with the steps described when removing the arms. Only remove the screw that fixes the tapering pin and
tighten the puller nut when specified in the instructions. Removal of the screw that fixes the tapered pin and use of the puller
nut may cause the pulleys and gears in the actuator to move unless the closing spring has been previously locked.
Keep your fingers and other parts of the body well away from the moving parts during this operation!
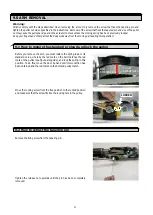
9.1 How to restore the standard preload and lock the spring
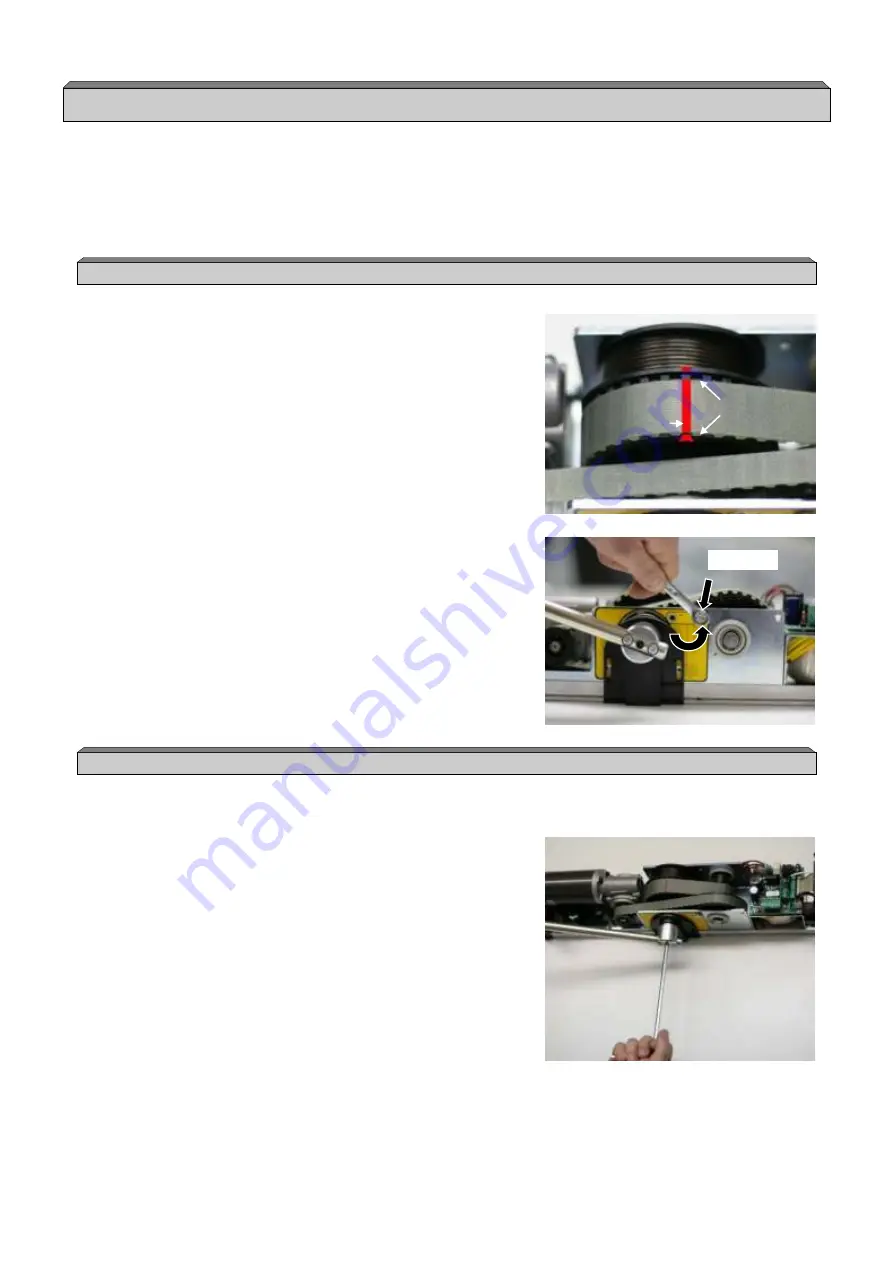
Before you remove the arm, you must restore the spring load to its
standard value, whereby the red mark on the belt matches the red
mark on the pulley (see figure alongside), and lock the spring in this
position. To do this, move the door by hand until this condition has
been obtained and the red marks on the belt and pulley match.
Move the locking screw from the free position to the locked position
and make sure that the screw fits into the locking hole in the pulley.
9.2 How to extract the tapering pin
Remove the fixing screw from the tapering pin.
Tighten the release nut upwards until the pin has been completely
removed.
LOCKED
BELT
REFERENCE
PULLEY
REFERENCES
Summary of Contents for NEPTIS/LE
Page 4: ...MECHANICAL SECTION NEPTIS LE 550 110 120 Nepti N e p t i S ...
Page 14: ...notes ...
Page 15: ...ELECTRONIC SECTION NEPTIS LE Nepti N e p t i S ...
Page 38: ...notes ...
Page 39: ......


