background image

Chapter 4: Performance Features & Safety Precautions 


Product Service 1-800-522-7658 

24 

Original instructions 

Le correct fonctionnement de la hotte d'aspiration dépend 
principalement de son emplacement et les habitudes de travail 
de l'opérateur. Consulter le Manuel de Référence dans 
l'Annexe E. 

 
If the unit is not operated as specified in this manual it may 
impair the protection provided by the unit. 
 
Si l'unité n'est pas utilisée comme spécifié dans ce manuel il 
peut diminuer la protection fournie par l'unité.  


Do not touch the blower motor.  The surfaces of the motor can 
become hot and could cause burns. 
 
Ne pas toucher le moteur de soufflerie. Les surfaces du moteur 
peuvent devenir chaudes et pourrait causer des brûlures. 


Do not position the fume hood so that it is difficult to operate 
the main disconnect device. 
 
Ne pas positionner la hotte de sorte qu'il est difficile de faire 
fonctionner le dispositif principal de déconnexion. 


To prevent the possibility of minor injury keep hands and 
fingers clear of sprockets at the top of the four corners. 

 
Pour éviter les risques de blessures mineures garder les mains 
et les doigts de pignons en haut de la quatre coins. 


Summary of Contents for Protector Premier 10040 Series

Page 1: ...Original instructions Protector Premier Laboratory Fume Hoods Models 10040 Series 10050 Series 10060 Series 10080 Series ...

Page 2: ...hours of 7 30 a m and 5 30 p m Central Standard Time Part 9410500 Rev L ECO N065 Warranty Labconco Corporation provides a warranty to the original buyer for the repair or replacement of parts and reasonable labor as a result of normal and proper use of the equipment with compatible chemicals Broken glassware and maintenance items such as filters gaskets light bulbs finishes and lubrication are not...

Page 3: ...Requirements 8 CHAPTER 3 GETTING STARTED 9 Unpacking Your Fume Hood 10 Removing the Shipping Skid 10 Sash Weight Release 11 Installing the Hood on a Supporting Structure Work Surface 11 Connecting to the Hood Exhaust System 13 Connecting the Electrical Supply Source 13 Connecting the Service Lines to the Protector Hood 16 Sealing the Protector Hood to the Work Surface 17 Certifying the Protector F...

Page 4: ...ls Behind the Fume Hood 34 Installing Additional Service Fixtures 35 Installing Guardian Airflow Monitors 35 Distillation Grids Field Installation 35 Sash Stop Kit Field Installation 36 Upper Bypass Field Installation 36 Installing an Electrical Duplex Outlet 36 Installation d une sortie Duplex électrique 8 Dual Exhaust Adapter 36 CHAPTER 8 TROUBLESHOOTING 37 APPENDIX A PROTECTOR PREMIER COMPONENT...

Page 5: ...n a laboratory and effectively contain toxic noxious or other harmful materials when properly installed The Protector Premier offers many unique features to enhance safety performance and visibility To take full advantage of them please acquaint yourself with this manual and keep it handy for future reference If you are unfamiliar with how fume hoods operate please review Chapter 4 Performance Fea...

Page 6: ...ake when using the fume hood Chapter 5 Using Your Protector Premier discusses the basic operation of your fume hood Information on how to prepare use and shut down your Protector Hood are included Chapter 6 Maintaining Your Protector Premier explains how to perform routine maintenance on your fume hood Chapter 7 Modifying Your Protector Premier explains how to modify the fume hood or add accessori...

Page 7: ...e d exclamation Ne pas se conformer aux informations qui suivent une icône d exclamation peut résulter à la blessure de l utilisateur ou à des dommages irréversibles de la hotte aspirante Critical information is presented in boldface type in paragraphs that are preceded by the wrench icon These operations should only be performed by a trained certifier or contractor Failure to comply with the info...

Page 8: ...t Step If your Fume Hood needs to be installed proceed to Chapter 2 Prerequisites to ensure your installation site meets all of the requirements Then go to Chapter 3 Getting Started for instructions on how to install your laboratory fume hood and make all of the necessary connections If you would like to review how laboratory fume hoods operate go to Chapter 4 Performance Features and Safety Preca...

Page 9: ...electrical power must be located near the installation site Carefully read this chapter to learn the requirements for your installation site The location requirements The support requirements The exhaust requirements The electrical power requirements The service line requirements The space requirements Refer to Appendix B Protector Premier Dimensions for complete fume hood dimensions Refer to Appe...

Page 10: ...y or mobile bench ALL Protector Hood installations must be permanent and stationary The supporting structure usually consists of a base cabinet and chemically resistant work surface NE PAS installer la hotte aspirante sur un chariot ou un banc mobile TOUTES les installations de la Hotte Protecteur doivent être permanentes et fixes La structure de soutien consiste habituellement en un meuble doté d...

Page 11: ...0 04 400 0 05 495 0 07 685 0 05 Eco Energy Saving Air Foil Flush Air Foil Hood Type Face Velocity fpm Airflow Volumetric Rate CFM Airflow Volumetric Rate CFM Sash at Sash at Static Pressure inches of water Static Pressure inches of water 62 50 Full open 4 5 6 8 4 5 6 8 open at 18 at 28 Hood Hood Hood Hood Hood Hood Hood Hood PREMIER 100 62 450 0 09 595 0 12 735 0 16 1025 0 11 485 0 09 640 0 13 790...

Page 12: ...lifié Reportez vous au Chapitre 3 Mise en route et à l Annexe C Spécifications Premier Protector pour le schéma de câblage pour l installation électrique correcte Service Line Requirements All service lines to the laboratory fume hood should be inch outside diameter copper brass for natural gas and equipped with an easily accessible shut off valve should disconnection be required Recommended opera...

Page 13: ...lips screwdriver and a carpenter level to complete the instructions in the chapter The Protector Premier Hood models weigh between 400 to 800 lbs 182 363 kg The shipping skid allows for lifting with a mechanical lift truck or floor jack If you must lift the fume hood manually follow safe lifting guidelines Normally the fume hood can be slid off a hydraulic lift table and be placed into position on...

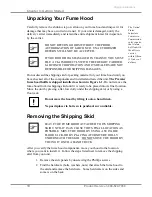
Page 14: ...from its shipping skid until it is ready to be placed into its final location Move the unit by placing a flat low dolly under the shipping skid or by using a floor jack Do not move the hood by tilting it onto a hand truck Ne pas déplacer la hotte en le penchant sur un diable Removing the Shipping Skid LEAVE THE FUME HOOD ATTACHED TO ITS SHIPPING SKID UNTIL IT IS AS CLOSE TO ITS FINAL LOCATION AS P...

Page 15: ...jet When installing the Protector Hood onto a chemically resistant work surface or benchtop ensure that the structure can safely support the combined weight of the fume hood and any related equipment The 30 work surface should be at least as wide as the hood to properly support it The work surface is aligned flush with the back of the fume hood for good airflow this will provide the correct spacin...

Page 16: ...unt the support by attaching it to the wall or base cabinet 4 Place the hood on top of the work surface and cross support The work surface should be smooth and durable such as a chemically resistant epoxy resin The surface should be nonporous and resistant to the acids solvents and chemicals used in conjunction with the Protector Fume Hood The work surface should also contain a dished recessed are...

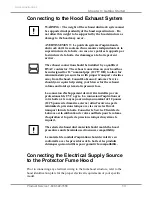
Page 17: ...g your blower for the exhaust volume and total system static pressure loss La connexion d échappement devrait être installée par un professionnel de CVC agrée La connexion d aspiration sur votre hotte a été conçue pour un tuyau nominal de 12 pouces 12 75 pouces de diamètre externe afin d avoir une perte minimale de pression statique avec les correctes flux de transport loin de la hotte Consulter l...

Page 18: ...s depending on the model All of the electrical connections are terminated at the field wiring terminal box for hook up by a qualified electrician We recommend each circuit be a dedicated branch circuit However if wired together the maximum load allowed is the sum of individual outlets plus the rating of the unit i e 2 Amps remote 8 Amps integral blower not to exceed the 10A or 20A electrical servi...

Page 19: ... to protect the wiring into the hood The grounding connection shall not be made to the terminal box cover Tout le câblage électrique pour la hotte aspirante devrait être exécuté par un électricien agrée et être conforme à tous les règles en vigueur Dans la plupart des cas la hotte exigera l usage de conduit blindé pour protéger le câblage électrique dans la hotte La prise de terre ne sera pas fait...

Page 20: ...he de fuite Resserrer les installations légèrement si nécessaires CAUTION Do not use oxygen with any standard service fixture Contact Labconco Customer Service for oxygen fixture information PRUDENCE Ne pas utiliser de l oxygène avec l accessoire de service standard Contacter le Service Clientèle de Labconco pour les informations d accessoire d oxygène Should access to the hood plumbing fixture bo...

Page 21: ...ives you the flexibility to change the airflow at the sash opening of your hood To determine the actual face velocity at the sash opening airflow velocity readings will need to be taken This should be done across the sash opening of the hood in accordance with the Industrial Ventilation Manual section on laboratory hoods see Appendix E References Labconco recommends an average face velocity at the...

Page 22: ...ind the front panel and under the air foil to help control fluctuations in face velocity which occur as the sash is closed 1 Unique sash provides maximum visibility of 37 5 high while conserving energy by limiting sash travel to 28 Vertical rising sash may be raised from a closed to 28 operating height The fume hood features a containment enhancing sash handle Optional sash stops are available to ...

Page 23: ...ide maximum visibility and the flexibility to add services after installation 11 All hoods are factory prepared for up to 8 service fixtures 12 Duplex electrical receptacles are mounted on the right and left corner posts as requested Receptacles are factory wired to hood single point junction box 13 Shipped fully assembled and eliminates the need for costly onsite assembly 14 Accessory Guardian Di...

Page 24: ...658 20 Original instructions 20 Optional Sash Stops provide a means of controlling the operating height of the sash 21 Integral Blower Models available as shown in Figure 4 1 17 7 19 14 18 10 8 9 15 1 12 5 11 20 16 6 2 21 Figure 4 1 Note Integral Blower Model Shown 4 25 23 24 22 ...

Page 25: ...ake sure that the exhaust blower is operating and that air is entering the hood at its specified face velocity Bien que la hotte de laboratoire ait été réglée pour maintenir la sécurité optimale de l opérateur la prudence devrait toujours être utilisée en travaillant sous la hotte Avant utiliser la hotte le contrôle pour s assurer que la soufflerie d aspiration fonctionne et que cet air entre dans...

Page 26: ... work as far back in hood as possible It is best to keep all chemicals and apparatus 6 inside the front of the hood Toujours travailler aussi loin que possible de la hotte Il est recommandé de garder tous les produits chimiques et appareils à 6 pouces à l intérieur de l avant de la hotte This hood does not feature explosion proof electrical components unless ordered separately Therefore use of fla...

Page 27: ... relocated serviced or at least annually thereafter La Hotte de Laboratoire Protecteur devrait être certifié par un technicien de certification qualifié avant qu elle soit utilisée au début La hotte devrait être re certifiée quand elle est réinstallée entretenue ou du moins annuellement par la suite Ensure that the unit is connected to electrical service in accordance with local and national elect...

Page 28: ...otection fournie par l unité Do not touch the blower motor The surfaces of the motor can become hot and could cause burns Ne pas toucher le moteur de soufflerie Les surfaces du moteur peuvent devenir chaudes et pourrait causer des brûlures Do not position the fume hood so that it is difficult to operate the main disconnect device Ne pas positionner la hotte de sorte qu il est difficile de faire fo...

Page 29: ...lectric Intelli Sash are available Operating the A Style Combination Sash Some other hood models have additional energy saving sashes called A Style Combination Sashes in place of vertical rising sashes These combination sashes allow the operator to use the hood with sashes either half open horizontally or vertically to conserve energy The horizontal sashes are used in normal operating mode Option...

Page 30: ...ressure is an excellent way to ensure hazardous fumes in the fume hood do not enter the laboratory space inadvertently Turn on the light Slowly raise the sash and verify the fume hood has proper airflow Check the baffle air slots for obstructions Allow the hood to operate unobstructed for two minutes Wear a long sleeved lab coat and rubber gloves Use protective eyewear Wear a protective mask if ap...

Page 31: ...e for two minutes undisturbed to purge airborne contaminants from the work area before closing the sash Unloading Materials and Equipment Objects in contact with contaminated material should be surface decontaminated before removal from the hood All open trays or containers should be covered before being removed from the hood Shutdown Turn off the light and close the sash ...

Page 32: ... operations require a step ladder always use proper safety and consult your safety officer If performing maintenance on any service lines always shut off the supply first Some removable components may be heavy follow safe lifting guidelines Verify all components are installed correctly with performance verified before conducting normal operations Précautions de Sécurité pour l Entretien Lors de l ...

Page 33: ... Routine Maintenance Schedule Weekly Using ordinary dish soap to clean the surface inside of the fume hood and the work surface Using an appropriate glass cleaner clean the sash and all glass surfaces Operate the fume hood blower noting the airflow velocity through the hood using a source of visible smoke Monthly or more often as required Mensuellement ou plus régulièrement si nécessaire Determine...

Page 34: ...u Chapitre 3 Certifier la Hotte Aspirante Protecteur All monthly activities Toutes les activités mensuelles Biannually The sash assembly should be checked to ensure proper operation and to make sure there are no signs of abnormal wear on the sash pulleys cables and clamps Routine Service Operations Front Panel Removal 1 Simply lift the front panel up and then away from the hood to provide access t...

Page 35: ... for your individual requirements These include the addition of work surfaces service fixtures air monitor distillation grids electrical duplex outlets ceiling enclosures and rear panels Installing Work Surfaces Your Protector Fume Hood requires a work surface to work properly Contact Labconco Customer Service for ordering information Figure 7 1 ...

Page 36: ...able Fixed Height Ceiling Enclosure Kit Catalog Number Use this key to configure the seven digit catalog number to order your 3 Sided Fixed Height Ceiling Enclosure Kit For example 9550501 is a 3 Sided Ceiling Enclosure Kit for a 5 Protector Premier Hood with a fixed height of 12 9 5 5 0 ___ ___ ___ STEP 1 Select the nominal width of your fume hood This number is the fifth digit of your catalog nu...

Page 37: ...EP 2 Select the depth based on the model chosen Choose 0 for Premier and 1 for XStream Choose 1 for PVC Choose 0 1 or 2 for the correct depth of the XL Benchtop model Choose 0 or 1 for the correct depth of Stainless Steel This is the sixth digit of your catalog number STEP 3 Choose the correct height range that matches the number This height range should match the height between the top of the hoo...

Page 38: ...our Protector Fume Hood can be modified to add a rear panel behind the fume hood when the fume hood is placed on an island not available on Pass Through Fume Hood Contact Labconco Customer Service for ordering information Side Panel Ceiling Enclosure Rear Stiffener Side Panel Ceiling Enclosure Hood Side Panel Hood Front Panel Front Panel Ceiling Enclosure ...

Page 39: ...Guardian Airflow Monitors continuously monitor face velocity through the fume hood opening The fume hood right corner post is factory prepared to mount either monitor Contact Labconco Customer Service to order Distillation Grids Field Installation The distillation grids have been strategically placed with the vertical rod center lines in front of the lower baffle and middle baffle The distillation...

Page 40: ... Labconco Customer Service for ordering information Not acceptable on explosion proof hoods Votre Protège capot de fumées peut être commandé avec prises doubles cependant si vous avez commandé un modèle sans prise de courant duplex vous pouvez en faire installer sur le terrain par un électricien qualifié Contactez le service clientèle Labconco pour commander Non acceptable sur antidéflagrants hott...

Page 41: ...boxes or switches Check connection of switches Check connection to control box on top of unit Circuit breakers tripped in building electrical supply Reset circuit breakers Remote blower won t operate but lights work Blower wiring is disconnected Belt broken Inspect blower wiring and switch Replace belt Blower motor is defective Replace blower motor Fume hood blower operates but lights will not ope...

Page 42: ... contamination See Location Requirements Chapter 2 Certifying the Hood Chapter 3 and Safety Precautions Chapter 4 sections of this manual Ref Appendix E Fume hood has improper face velocity Have fume hood re certified and check remote blower exhaust system Hood should have average face velocity of 60 100 fpm Vertical sash no longer operates smoothly Cable is frayed or plastic protection is damaged...

Page 43: ...ately if damaged Electrical duplex outlets no longer have power Wires not connected or faulty duplex Check wire connection or replace duplex Circuit breakers tripped in building electrical supply Reset circuit breakers Service valves no longer operate Faulty building supply Inspect building supply shut off valves and appropriate pressures below the recommended 40 PSI Valve no longer operates Repla...

Page 44: ... BRN 2I 1 9826809 WaterSaver Valve Connector OXYGEN LIGHT GREEN 2J 1 9826810 Swivel Gooseneck only GRN 2K 1 9826812 Swivel Gooseneck only WHITE 3 1 9818700 thru 08 Knobs GRAY GRN BLU ORG YEL RED WHT BLK BRN 4A 1 9818800 Hose Barb GRAY NEUTRAL OR ARGON NOT SHOWN 4B 1 9818801 Hose Barb GREEN COLD WATER NOT SHOWN 4C 1 9818802 Hose Barb BLUE GAS NOT SHOWN 4D 1 9818803 Hose Barb ORANGE AIR NOT SHOWN 4E...

Page 45: ...il 6 13H 1 9436525 PVC Eco Foil 8 14 2 1850000 Pulley Front 2 Dia Nylon 15A 2 4949902 Cable Sash 130 NOT SHOWN 15B 2 9414010 Cable Replacement Kit 24 15C 1 9545800 Weight Support Bracket Kit 16 2 9709300 Plastic Pulley Rear 2 17 2 9713300 Bumper Rubber lower sash bumper NOT SHOWN 18 4 1934100 Bronze Bearing Flanged Rear NOT SHOWN 19 4 1920100 Clamp Cable Replacement NOT SHOWN 20 2 9935800 Threaded...

Page 46: ...Appendix A Protector Premier Components Product Service 1 800 522 7658 42 Original instructions Figure A 1 23 25 26 27 15 24 12 10 21 5 6 2 13 7 1 3 11 22 8 16 14 4 17 ...

Page 47: ... 522 7658 43 Original instructions APPENDIX B PROTECTOR PREMIER DIMENSIONS Figure B 1 Premier Model Widths 4 5 6 8 A 48 00 60 00 72 00 96 00 B 38 25 50 25 62 25 86 25 Dimensions in inches CAD layouts available upon request ...

Page 48: ...Appendix B Protector Premier Dimensions Product Service 1 800 522 7658 44 Original instructions Figure B 2 Premier Integral Model Widths 4 5 6 A 48 00 60 00 72 00 B 38 25 50 25 62 25 ...

Page 49: ...age Transient over voltages according to Installation Categories II Over voltage Categories per IEC 1010 Temporary voltage spikes on the AC input line that may be as high as 1500V for 115V models and 2500V for 230V models are allowed Used in an environment of Pollution degrees 2 i e where normally only non conductive atmospheres are present Occasionally however a temporary conductivity caused by c...

Page 50: ...Appendix C Protector Premier Specifications Product Service 1 800 522 7658 46 Original instructions ...

Page 51: ...Appendix C Protector Premier Specifications Product Service 1 800 522 7658 47 Original instructions ...

Page 52: ...rated Protector I S Hoods with limit switches are only available from the factory due to the wiring complexity The integrated Protector I S Hood models with limit switches automatically regulate the Intelli Sense Blower but independent of any room controls Room controls such as room pressurization controls depicted in Appendix E are sold separately and are not sold by Labconco The Protector I S Ho...

Page 53: ... change automatically with sash position and room controls work independently Room controls are sold separate and not sold by Labconco INTELLIGENT The Integrated Intelli Sense Hood becomes a Smart Hood that adjusts 3 speeds automatically based off sash position has built in over amperage adjustment to prevent overheating provides simple blower sizing and provides 3 easy speed adjustments MIN MED M...

Page 54: ...d and set to activate with sash raised 20 above work surface The upper limit switch can be lowered in 1 increments between 15 and 20 Red wire to common White wire to normally open Intelli Sense Control Box powered up and functional without lights Control box is wire to incoming hood light circuit per wiring diagram 7115810 or 7115811 ...

Page 55: ...Appendix D Protector I S Hood Product Service 1 800 522 7658 51 Original instructions Red wire to common Left side lower limit switch wired for low speed Black wire to normally open ...

Page 56: ...ions Airflow monitor in line sensor air pathway and wiring to monitor Night setback lower switch shown on right Switch is wired to normally open and common terminals and wired to air monitor input I P1 Programmed for Night Setback Input 1 Back of airflow monitor Power to air monitor ...

Page 57: ...Appendix D Protector I S Hood Product Service 1 800 522 7658 53 Original instructions Front of airflow monitor showing SETBACK when sash is closed ...

Page 58: ...ix D Protector I S Hood Product Service 1 800 522 7658 54 Original instructions Back of airflow monitor night setback switch wiring to I P1 for Input 1 Sensor wiring in to air monitor Power in to air monitor ...

Page 59: ...Appendix D Protector I S Hood Product Service 1 800 522 7658 55 Original instructions 115V Wiring Diagram Automatic Operation 230V Wiring Diagram Automatic Operation ...

Page 60: ...lexes on hood noted amperage applies B This fume hood includes one additional electrical receptacle individually wired to the field wired box and individually rated as 115V single phase 60Hz 20 Amps Each duplex can be wired on a dedicated circuit rated at 20A or the duplexes may be ganged together on the same circuit with the total load of the ganged duplexes not exceeding the 20A electrical servi...

Page 61: ...exes may be ganged together on the same circuit with the total load of the ganged duplexes not exceeding the 10A electrical service they are wired to H This fume hood includes three additional electrical receptacles individually wired to the field wired box and individually rated as 230V single phase 60Hz 10 Amps Each duplex can be wired on a dedicated circuit rated at 10A or the duplexes may be g...

Page 62: ...exes may be ganged together on the same circuit with the total load of the ganged duplexes not exceeding the 10A electrical service they are wired to N This fume hood includes four additional electrical receptacles individually wired to the field wired box and individually rated as 230V single phase 50Hz 10 Amps Each duplex can be wired on a dedicated circuit rated at 10A or the duplexes may be ga...

Page 63: ... individuellement et classé comme 115V monophasé 60 Hz 20 ampères Chaque duplex peut être branché sur un circuit dédié évalué à 20A ou les duplex peuvent être groupés ensemble sur le même circuit que la charge totale des duplex couplées ne dépassant pas le service électrique 20A ils sont câblés C Cette hotte comprend deux autres prises électriques individuellement câblés à la boîte câblées individ...

Page 64: ...sé 60 Hz 10 ampères Chaque duplex peut être branché sur un circuit dédié classé au 10A ou les duplex peuvent être groupés ensemble sur le même circuit que la charge totale des duplex couplées ne dépassant pas le service électrique 10A ils sont câblés J Cette hotte comprend quatre autres prises électriques individuellement câblés à la boîte câblées individuellement et classé comme 230V monophasé 60...

Page 65: ...dépassant pas le service électrique 10A ils sont câblés N Cette hotte comprend quatre autres prises électriques individuellement câblés à la boîte câblées individuellement et classé comme 230V monophasé 50Hz 10 ampères Chaque duplex peut être branché sur un circuit dédié classé au 10A ou les duplex peuvent être groupés ensemble sur le même circuit que la charge totale des duplex couplées ne dépass...

Page 66: ...ood face velocities between 60 100 lfpm Maximum of 125 lfpm for radioisotope hoods Duct velocities of 1000 2000 fpm for vapors gasses and smoke Stack discharge height 1 3 2 0 x building height Well designed fume hood containment loss 0 10 ppm Industrial Ventilation A Manual of Recommended Practice 24th Edition 2001 American Conference of Governmental Industrial Hygienists 1330 Kemper Meadow drive ...

Page 67: ...ing Chemicals Laboratory hoods should not be relied on for explosion protection Exhaust air from fume hoods should not be recirculated Services should be external to the hood Canopy hoods only for non hazardous applications Materials of construction should have flame spread of 25 or less 80 to 120 fpm to prevent escape NFPA 30 2000 Flammable and Combustible Liquids Code Approved cabinets may be me...

Page 68: ...rworth Publishers 1985 Miller Brinton M et al Laboratory Safety Principles and Practices American Society for Microbiology Washington D C 1986 NIH Guidelines for the Laboratory Use of Chemical Carcinogens NIH Publication No 81 2385 Rayburn Stephen R The Foundation of Laboratory Safety A Guide for the Biomedical Laboratory Springer Verlag New York 1990 Sax N Irving and Lewis JR Richard J Rapid Guid...

Page 69: ... this requirement Labconco offers the following step by step procedure to ensure you have the correct information 1 Locate the serial tag for your fume hood usually on the lower right of the sash glass 2 Move to the section of the document below specific to your model number Model numbers beginning 111 110 100 1 Determine the free opening area a Width i Measure the interior width of the fume hood ...

Page 70: ...0 34 inches A x 0 34 bypass area Bypass area ___________ square inches D sq in b Divide this by 144 to arrive at square feet Bypass area ____________ square feet D sq ft 3 Determining Total Effective Opening Area a This is the Free Opening Area plus the Bypass Opening Area C D Total Effective Opening Area Total Effective Area _____________ square inches Total Effective Area _____________ square fe...

Reviews: