background image


51

the  connection  is  detected,  the  base  station  will  automatically  continue 
reading the data from the sensor. 


The  user  may  at  any  time  switch  from  cable  connection  to  using 
433MHz  (or  vice  versa)  by  simply  disconnecting  (or  connecting)  the 
cable  from  the  base  station  to  the  sensor.   When  the  base  station  de-
tects  no  cable  connection  to  the  sensors,  the  existing  data  reading  in-
terval is changed to the new reading interval, i.e. using cable connection 
is every 8 seconds data reading interval or from 32 seconds - 128 sec-
onds intervals when using 433MHz (depending on wind speed) 


Using the AC adaptor to operate the base station will also supply power 
to the sensor if the cable is connected to it.  Batteries used for 433MHz 
transmission may be left in the sensor when using cable connection for 
power back-up in case of AC power failure.  A loss of power would de-
synchronize  the  base  station  and  the  sensor  and  no  weather  data  will 
be received.  To Synchronize the units so that the weather data can be 
received, press and hold the PLUS(+) for 2 seconds.  However in gen-
eral, batteries that will not be used for long periods should be removed 
to avoid leakage.   
 

Wireless 433MHz transmission: 

Using 433MHz wireless transmission of weather data from the sensor to 
the  base  station  will  provide  users  greater  freedom  as  to  where  units 
can be positioned without the need to be restricted by cable. 


Note: 

If  no  outdoor  weather  data  is  displayed  or  the  signal  to  the  sensors  is 
lost during  setting  up,  mounting,  changing of  batteries to  the  sensor  or 
plugging or unplugging cables, simply press and hold the PLUS(+) key 
for 2 seconds and a short beep will sound to synchronize the base sta-
tion  to  sensors.    Without  being  synchronized,  weather  data  will  not  be 
received. 


Summary of Contents for WS-2308

Page 1: ...56 11 Function description 58 12 Operation keys 60 13 Basic programming modes 62 14 MIN MAX programming modes 63 15 Alarm programming modes 65 16 Auto memory for stored values 72 17 Accessories extensions cables 73 18 Changing batteries 74 19 Interference and problems with operation 75 20 Transmission range 76 21 Cleaning and maintenance 76 22 Specifications 77 23 Liability disclaimer 78 This Oper...

Page 2: ...hermo hygro sensor for operating power and rely on it to communicate to the base station Weather data sent from the thermo hygro sensor can be done by wireless 433MHz trans mission up to 100 meters in open space or by cable connection Using the enclosed 2 meter computer cable and CD ROM you can install the Heavy Weather software to your PC and upload all the re ceived weather data from the base st...

Page 3: ... or hPa absolute or relative user select able Detailed display of rainfall data in 1 hour 24 hours total since last reset user selectable in mm or inch Wind speed in mph km h m s knots or Beaufort user selectable Wind direction display with LCD compass as well as numerical e g 225 and abbreviated characters e g SW Wind chill temperature display Dew point temperature display Weather forecast displa...

Page 4: ... and supplier will not be held liable for actions due to failure to comply with this instruction man ual or from data inaccuracies that may occur with this product In case of harm or damage to a person or property caused by improper handling or failure to comply with this instruction manual the manufac turer and supplier cannot be held liable For reasons of safety and operation alterations to this...

Page 5: ... optional connection to the base station in cluded Wall mounting screws Plastic anchors for screws Wind Sensor Main unit with wind vane 10 meter cable already at tached to the main unit Mast holder 2 x U bolts for mast holder 4 x Washers 4 x Nuts 1 x screw to fix main unit to the mast holder Rain Sensor Main unit base and funnel 10 meter cable already at tached to the main unit Heavy weather PC so...

Page 6: ...Setting up Firstly choose to use the adaptor included in this set or batteries for operation Both these methods allow for operation of using wireless 433MHz transmission or cable connection between the base station and the sensors and setting up for both methods is as follows Base Station ...

Page 7: ...nd and rain sensors to the corre sponding sockets of the thermo hygro sensor by clicking them into place 3 Open the battery cover of the thermo hygro sensor located below the three sockets and insert 2 x AA IEC LR6 1 5V batteries and close the cover 4 Open the base station s battery cover located at the back of the unit and insert 3 x AA IEC LR6 1 5V batteries into the battery com partment and clo...

Page 8: ...on the signal provided by a highly accurate Caesium atomic clock operated by the Physikalisch Tech nische Bundesamt in Braunschweig Germany This radio controlled clock does not only provide for the weather station s time and date dis play but also functions as the time source for all of this weather station s memory and history values using time and date information LED backlight When using the po...

Page 9: ...able connection for power back up in case of AC power failure A loss of power would de synchronize the base station and the sensor and no weather data will be received To Synchronize the units so that the weather data can be received press and hold the PLUS for 2 seconds However in gen eral batteries that will not be used for long periods should be removed to avoid leakage Wireless 433MHz transmis...

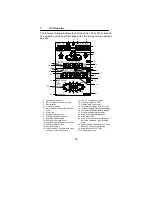
Page 10: ... 17 Rainfall units inch or mm 18 Temperature display units ºC or ºF 19 Outdoor temperature humidity display 20 Indoor temperature humidity display 21 Dew point temperature display 22 Wind chill temperature display 23 Wind alarm icon 24 Wind information for Min Max speed and wind speed low high direction alarm 25 Wind direction and speed m s knots Beaufort km h or mph display 26 Alarm buzzer ON OFF...

Page 11: ...and a short beep will sound to synchronize the base station to the sensors otherwise no weather data will be received Some weather readings such as wind speed and direction may not appear immediately on the LCD if the wind fan or vane of the wind sen sor is moved This is due to the set reading time intervals for the wind readings However the current wind speed or direction will be displayed once t...

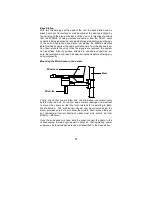
Page 12: ... selected to use cable connection en sure that distances can reach all desired locations before affixing any unit permanently Mounting the Wind Sensor onto a mast Firstly check that the wind fan and the wind vane can rotate freely before fixing the unit For correct and accurate readings it is important to mount the sensor so that the front marked E is pointing in East West direction The wind senso...

Page 13: ...urface test by pouring clean water After mounting the rain sensor connect the cable to the thermo hygro sensor at the corresponding socket so power supply can be received and data be transmitted to the base station The rain sensor is now operable For testing purposes very slowly pour a small amount of clean water into the rain sensor funnel The water will act as rainfall and will be received and d...

Page 14: ... Resetting factory settings As previously mentioned in the event of a power reset to the sensor for example a change of batteries the base station has to synchronize to the sensor again otherwise no weather data will be received To do this simply press and hold the PLUS key for 2 seconds and a short beep will sound to synchronize the base station to the sensor When the units are synchronized the d...

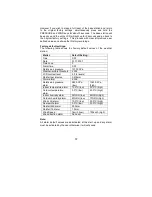
Page 15: ...1 2001 Time zone 0 Alarm time 0 00 Relative air pressure 1013 0 hPa Weather picture threshold 3 hPa LCD contrast level 5 1 8 levels Rainfall per impulse 0 518mm Storm alarm 5 hPa Relative air pressure alarm 960 0 hPa low 1040 0 hPa high Indoor temperature alarm 10 0ºC low 30 0ºC high Outdoor temperature alarm 0 0ºC low 40 0ºC high Indoor humidity alarm 35 RH low 65 RH high Outdoor humidity alarm 4...

Page 16: ...te month year weekday date month seconds alarm set time and time zone Weather forecasting LCD Section 2 The three weather icons Sunny Cloudy and Rainy represent the weather forecasting There are also two weather tendency indicators to show the air pressure tendency either side of the weather icons LCD Section 1 Time date seconds time zone LCD Section 3 Indoor and outdoor temperature and relative h...

Page 17: ...location This is not programmable and the absolute air pressure range of the weather station is from 300 hPa to 1099 hPa standard air pressure at an altitude of 9 100 meters is around 300 hPa Relative air pressure is the one value that is calculated back to sea level from the local absolute air pressure and can thus be taken as a refer ence for weather condition and weather development for the ent...

Page 18: ...ures and wind speeds At an outdoor temperature of e g 8 C and calm winds a person moving at a speed of 6 m s will already feel a windchill temperature of 0 C Wind Data LCD Section 4 The current wind direction will be displayed on the LCD compass on the wind section Press the WIND key to toggle between wind direction as numerical e g 225 and abbreviated characters e g SW as well as numerical wind s...

Page 19: ...umidity Outdoor wind chill Outdoor dew point Rainfall 24h 1h total WIND key To toggle between the following settings Wind speed Wind direction Wind direction display in degrees ALARM key In normal mode to enter the alarm program ming mode In alarm programming mode to select the following setting modes Time alarm setting Indoor temperature alarm high low Outdoor temperature alarm high low Indoor hu...

Page 20: ...dates and times Press any key to activate the LED Backlight 13 Basic Programming Modes Manual Setting modes The manual setting mode allows the user to change several basic set tings which is done by accessing one mode after the other simply by pressing the SET key After the final mode or if no key is pressed for 30 seconds the manual setting returns to the normal display mode The manual setting ta...

Page 21: ...me setting The base station will continue to scan for the radio controlled time signal from 2am 6 am each day winter time or from 3am 6am summer time despite it being manually set During reception attempts the DCF tower icon will flash If reception has been unsuccessful then the DCF77 tower icon will not appear but reception will still be attempted the following hour within the time frame If recep...

Page 22: ...n in any of the above modes press the MIN MAX key to toggle between the maximum or minimum values of those records and their respective time and dates will also be shown For the wind and pressure minimum and maximum readings the same would apply except that the WIND or PRESSURE keys would be used instead of the DISPLAY KEY Exiting the MIN MAX modes If the maximum and minimum modes with times and d...

Page 23: ... high alarm and low alarm 6 Wind chill high alarm and low alarm 7 Dew point alarm high alarm and low alarm 8 Rainfall 24h alarm 9 Rainfall 1h alarm 10 Pressure high alarm and low alarm 11 Wind speed high alarm and low alarm 12 Wind direction alarm 13 Storm warning alarm Setting Alarms For alarm setting press the ALARM key once whilst in normal operation mode to enter the normal alarm time and by f...

Page 24: ...door temperature low by using the PLUS or MINUS keys 6 Press ALARM key to confirm and press the MIN MAX key to return the normal display mode or press the ALARM once more to toggle to another alarm setting mode Outdoor temperature high alarm and low alarm setting 1 Press the ALARM key to enter the normal time alarm 2 Continue to press the ALARM key until you reach the outdoor tem perature high ala...

Page 25: ...normal time alarm 2 Continue to press the ALARM key until you reach the outdoor humidity high alarm set mode 3 Press and hold the SET key to enter the outdoor humidity high set ting values digits will start flashing and set the desired outdoor hu midity high by using the PLUS or MINUS keys 4 Press ALARM key to confirm and press the MIN MAX key to return to the normal display mode or press the ALAR...

Page 26: ...Press ALARM key to confirm and press the MIN MAX key to return to the normal display mode or press the ALARM key once more to toggle to the dew point low alarm set mode 5 Press and hold the SET key to enter the dew point low setting values digits will start flashing and set the desired dew point low by using the PLUS or MINUS keys 6 Press ALARM key to confirm and press the MIN MAX key to return th...

Page 27: ...re to toggle to the pressure low alarm set mode 5 Press and hold the SET key to enter the pressure low setting values digits will start flashing and set the desired pressure low by using the PLUS or MINUS keys 6 Press ALARM key to confirm and press the MIN MAX key to return to the normal display mode or press the ALARM once more to toggle to another alarm setting mode Wind speed high alarm and low...

Page 28: ...alarm is set by en tering the main manual setting mode as follows 10 Press the SET key to enter the manual setting mode 11 Continue to press the SET key until the Storm warning icon flashes tendency arrow flashing downwards with the pressure values flash ing 12 Set the desired hPa pressure value 3 hPa 9 hPa using the PLUS or MINUS keys 13 Press the MIN MAX key to confirm and return to the normal d...

Page 29: ...ther or temperature condition the corresponding alarm is automatically enabled ON when the SET key is pressed regardless of its previous setting and the alarm value will flash to indicate that it has been activated Press the ALARM key to confirm the setting and continue pressing the ALARM key to toggle through each alarm mode until it returns to the normal display mode or press the MIN MAX key at ...

Page 30: ...t has been enabled Now when the temperature drops to 24 9 C or below and thereafter again increases to beyond 25 C the data will be blinking but no alarm will be activated It has to drop to below 24 C with a pre set hysteresis of 1 C so that the alarm can be produced again Hysteresis values for the various weather data types are given in the following table Weather data Hysteresis Temperature 1 C ...

Page 31: ... add these to the current cables to extend your cable connection distance When securing the cables during mounting ensure that base station can receive the weather data since increasing the cables lengths may also increase levels of interference and result with reception difficulties Interference levels will greatly depend on the surrounding area for ex ample setting up on or near metal piping may...

Page 32: ...base station and power outlet 2 Open the battery cover located at the back of the base station 3 Remove the old batteries insert with new ones of the recom mended type and replace the cover This method of battery replacement will result in no loss of MIN MAX and history data However in case of possible power failure the base station will lose the MIX MAX and all weather data recordings and will ne...

Page 33: ... adding more than 10 meter extension cables between units to the existing cable lengths as this will increase the chance data reception problems Reception then no reception loss of transmission signal from the sensor to the base station Press and hold the PLUS key for 2 seconds to synchronize the base sta tion to the sensors for weather data reception If still no signal then change the sensor batt...

Page 34: ...e may also influence reception Poorly shielded PCs can cause interferences that will reduce or in some cases stop reception 21 Cleaning and Maintenance Clean the housing and screen of the base station only with a soft damp cloth Do not use abrasives or solvents Ensure that the rain sensor does not collect leaves or other dirt by checking the funnel for blockages every now and then Also clean the s...

Page 35: ... Resolution Letter format 433MHz data transmission Measuring interval thermo hygro sensor 32 sec if wind factor 10m s or 128sec if wind factor 10m s 10 minutes if the base station fails to receive any data after 5 attempts in a row all outdoor data readings will display except for the rain value With wire data transmission Measuring interval thermo hygro sensor 8 seconds Indoor data Pressure tempe...

Page 36: ... 225 mm Thermo hygro sensor 71 5 x 73 x 136 mm Rain sensor 140 x 70 x 137 mm Wind sensor 291 x 60 x 197 mm 23 Liability disclaimer The electrical and electronic wastes contain hazardous substances Disposal of electronic waste in wild country and or in unauthorized grounds strongly damages the environment Please contact your local or and regional authorities to retrieve the addresses of legal dumpi...

Page 37: ...ure weather and is not 100 accurate Weather forecasts given by this product should be taken only as an indication and not as being totally accurate The specifications of this product may change without prior notice This product is not a toy Keep out of the reach of children No part of this manual may be reproduced without written consent of the manufacturer For use in Germany Austria UK France Bel...

Reviews: