background image


16

Section 

5

 – Maintenance 


Use the table below as a general maintenance schedule for your stove.  See below the table for detailed 
information on performing the maintenance.  CAUTION:  When replacing parts, do not substitute any part 
or material other than factory parts or a factory authorized substitution.  If you have questions about 
substitute parts, contact your dealer. 
 
Ash disposal 

Every 1-2 weeks 

Chimney inspection and cleaning 

Every 2-3 months 

Gasket replacement 

Every year or as needed 

Glass cleaning and replacement 

As needed 

Brick replacement 

Replace broken bricks as needed 

Clean and inspect stove 

Every 2-3 months or as needed. 

Replace ceramic insulation 

Every year or as needed 

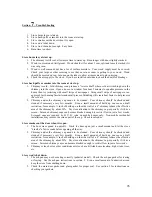
Ash disposal – Every 1-2 weeks 

1.


Empty the ashes when the fire is out.  Never try to empty the ashes when the stove has an active or 
full fire. 

2.


Disposal of ashes- Ashes should be placed in a metal container with a tight fitting lid.  The closed 
container of ashes should be placed on a noncombustible floor or on the ground, well away from 
all combustible materials, pending final disposal.  If the ashes are disposed of by burial in soil or 
otherwise locally dispersed, they should be retained in the closed container until all cinders have 
thoroughly cooled. 

Chimney inspection and cleaning – Every 2-3 months 

1.


Refer to the chimney manufacturers installation instructions for additional information on cleaning 
the chimney.  We recommend having the chimney cleaned by a licensed professional chimney 
sweep.   

2.


When wood is burned, it releases tar and other organic vapors.  When these vapors combine with 
moisture, creosote is formed and enters the chimney.  When the stove is burning on a low setting, 
the exhaust can be moving slow and the chimney can be relatively cool.  This combination of slow 
exhaust and a cool chimney causes creosote to stick to the walls of the chimney.  When creosote 
accumulates, it causes the draft to slow and the problem of creosote accumulation will compound.  
If the creosote is not removed on a regular basis, a chimney fire can occur which can damage the 
chimney and/or stove.  Therefore, the importance of regular chimney maintenance cannot be 
emphasized enough. 

3.


Every few months inspect the chimney for build-up of creosote or soot.  Clean as necessary.  
Generally, a ¼” build-up or more should be cleaned. 

Gasket Replacement – Every year or as needed 

1.


Gaskets need to be checked at least once a year.  The gaskets on your stove are designed to keep 
unwanted air out of the firebox.  Neglecting these gaskets can cause a decrease in burn times, 
more wood consumption and possible over heating of the stove.  When checking the gaskets, look 
for wear areas that show fraying or cutting. Check the gasket for softness by pressing them with 
your finger and give a slight tug on one area to see if the glue is still holding.  Gaskets that are cut 
or fraying can cause small air leaks in that spot.  Gaskets that are hard will not conform to the 
stove and may leak air.  Gaskets that are not held in with glue could come out at an inconvenient 
time.  The gaskets that need to be checked are:  Door gasket and glass gasket.  Refer to section 8 
for part numbers for the correct gasket for your stove and check with your dealer for parts 
availability. 

Glass cleaning and replacement – as needed  

1.


Never clean the glass when it is hot. 

2.


Clean the glass with an approved stove glass cleaner, never use an abbrasive material like 
sandpaper or steel wool 

3.


Your stove is equipped with an airwash system that will self-clean the glass.  If the glass is black 
or covered with soot from slow burning, simply load the stove with good, dry, split wood and burn 
at high burn for about 20- 30 minutes and the glass should burn clean. 

Summary of Contents for K-ASP

Page 1: ...0145 N Old Hwy 95 Rathdrum ID USA MODEL K ASP Aspen Tested to UL 1482 Test Report 123 S 09 2 Testing performed by Omni Test Laboratories INSTALLATION AND OPERATING INSTRUCTIONS SAVE THESE INSTRUCTIONS Rev 9 21 2011 ...

Page 2: ... a quality product that will last a lifetime If you ever have a problem with your stove we will do what is needed to get it resolved and keep you warm You may have noticed a portion of the Bible enclosed in your owner s packet It is a small gift for you Our faith in Jesus Christ is very important to us and we have that faith because salvation and hope are found through Him Hope comes from the mess...

Page 3: ...result in an unsafe condition Consult your local building department for permit and installation requirements Contents Section 1 Safety Precautions Section 2 Free standing Installation Instructions Section 3 1 Masonry Fireplace Installation Instructions Section 3 2 Factory Built Fireplace Installation Instructions Section 4 Wood Burning Operation Instructions Section 5 Maintenance Section 6 Instal...

Page 4: ...xisting chimneys cleaned and inspected by a qualified professional prior to the installation of your new stove 10 NOTE ALL MINIMUM CLEARANCE REQUIREMENTS TO COMBUSTIBLES Installation must comply with minimum clearances as listed in this manual see section 6 Clearances may only be reduced by means approved by the regulatory authority 11 Do not operate this stove with the door in an open position ex...

Page 5: ...ED METHOD Please refer to NFPA code 211 for details about listed wall pass through methods To obtain a copy of the NFPA code 211 you may visit their website at www nfpa org or call them toll free at 1 800 344 3555 Your local building deptartment may also have information regarding NFPA code 211 In Canada refer to CAN CSA B365 Excerpt from NFPA 211 ...

Page 6: ...n the house 2 Try to choose a location that will be easy to access from your wood storage area 3 Survey the roof area above and around the location of the chimney exit Be sure there are no dormers roof valleys or any other roof irregularities that could cause difficulty when trying to set and seal the roof flashing 4 If possible survey the attic area above and around the location of the chimney Be...

Page 7: ...fs or little attic space the chimney can be too short For proper draft and best performance a minimum overall height of connector pipe plus chimney combined should be at least 12 feet tall measured from the stove top to the chimney cap If necessary add chimney STEP 3 OUTSIDE AIR SUPPLY Outside Air An outside air supply is required in all manufactured mobile home installations 1 Kuma stoves does no...

Page 8: ...ace as well as 6 to either side of the insert this 16 is measured from the face of the insert and not the ash lip MINIMUM Floor Protection size Requirements For Free Standing Stove For Fireplace insert STEP 5 Setting the stove and connecting to the chimney 1 Assemble the stove legs pedestal ash pan blower Follow the installation instructions that are included in each accessory box Once the stove i...

Page 9: ...illed in the base mark the location on the floor and use bolts and nuts or lag screws to fasten 4 The stove must be connected to a 6 factory built chimney conforming to CAN ULC S629 standard for 650 C factory built chimneys and the top sections must be removable for transportation of the mobile home Your stove is now ready for use If your stove installation required a permit and requires inspectio...

Page 10: ... 6 diameter listed stainless steel flue liner according to the manufacturers instructions The flue collar on the stove must be attached to the end of the liner for quick installation and removal a Loosen the flue collar bolts and remove the collar from the stove b Install the flue collar to the liner using 3 stainless steel sheet metal screws c Slide the stove into place leveling bolts are supplie...

Page 11: ...er installation Smoke Shelf Baffle Wood Grate Viewing Screen Damper and ember catches 2 The Fireplace itself must not be altered with the exception of damper removal Any non functioning trims that are removed must be kept so that the fireplace can be restored to full working order if the insert is ever removed 3 The local building department has the final authority to approve with a permit the ins...

Page 12: ...with the kit SEE SECTION 6 FOR INSERT INSTALLATION CLEARANCES AND DIAGRAMS NOTE Consideration must be given to ensure an adequate supply of combustion air for your insert Make sure the cover plate at the back of the stove is removed If your fireplace is equipped with an outside air source then simply make sure that vent is open As with any vent open to the outside make sure there is a rodent scree...

Page 13: ...UP A FIRE Using flammable liquids can be explosive and cause personal injury or even death Using a good firestarter can make lighting a fire much easier There are several different types of firestarter available in chips nuggets and gels Newspaper also makes a good fire starter if it is torn into strips When building a fire use plenty of fire starter on the bottom and use small kindling directly o...

Page 14: ... glass clean Doing this in the morning will not only clean the glass but re builds the heat level for an efficient burn warming the chimney system as well as the secondary burn system 4 IF YOU THINK YOU HAVE A CHIMNEY FIRE CLOSE THE DOOR SHUT DOWN THE AIR CONTROL COMPLETELY ALLOWING THE FIRE TO GO OUT DO NOT FIRE THE STOVE AGAIN UNTIL THE CHIMNEY HAS BEEN CLEANED AND INSPECTED FOR DAMAGE 5 Break i...

Page 15: ... the stove body Turn the variable speed knob to click onto high speed As the knob is turned clock wise the blower speed decreases to your desired speed The blower speed should match the desired burn rate on your stove i e low burn rate low blower speed high burn rate high blower speed and so forth When routing the blower power cord take care to keep it away from hot surfaces or surfaces that could...

Page 16: ...ool This combination of slow exhaust and a cool chimney causes creosote to stick to the walls of the chimney When creosote accumulates it causes the draft to slow and the problem of creosote accumulation will compound If the creosote is not removed on a regular basis a chimney fire can occur which can damage the chimney and or stove Therefore the importance of regular chimney maintenance cannot be...

Page 17: ... once a year Every 2 3 months visually check the stove interior especially for ash build up on top of the ceramic insulation This is a great time to inspect the bricks gaskets ceramic blanket and the rest of the stove for signs of abnormal wear Start by shoveling all the ashes out of the stove and emptying the ash pan Use a shop vac to clean the hard to reach places Look at the inside of the stove...

Page 18: ...llowing installations 1 Mobile Home installation with the stove in a corner using double wall pipe 2 Residential installation with the stove in a corner using double wall pipe For single wall pipe refer to figure 2 Hearth ALL CLEARANCES SHOWN IN INCHES ALL CLEARANCES ARE MINIMUMS 16 16 8 6 8 ...

Page 19: ...installation 1 Residential installation with the stove in a corner using single wall pipe For double wall pipe refer to figure 1 For mobile home installation in a corner refer to figure 1 Hearth ALL CLEARANCES SHOWN IN INCHES ALL CLEARANCES ARE MINIMUMS 16 16 8 8 6 ...

Page 20: ...Mobile home installation with the stove on a straight wall using double wall pipe 2 Residential installation with the stove on a sraight wall using double wall pipe For single wall pipe refer to figure 4 ALL CLEARANCES SHOWN IN INCHES ALL CLEARANCES ARE MINUMUMS 8 11 8 17 16 Hearth ...

Page 21: ...ations 1 Residential installation with the stove on a stright wall using single wall pipe For double wall pipe refer to figure 3 For mobile home installation on a straight wall refer to figure 3 ALL CLEARANCES SHOWN IN INCHES ALL CLEARANCES ARE MINIMUMS 12 13 10 21 Hearth ...

Page 22: ...earances to combustibles must be maintained per manufacturer s instructions on chimney pipe and stove pipe connectors Use only double wall connector in mobile homes Spark arrestor cap 3 minimum 2 minimum 10 Roof brace Residential or manufactured home Installation Residential Home Installation Storm collar Chimney Sections Attic Insulation Shield Support Box Cross Framing Double Wall Connector 4 ou...

Page 23: ...23 Dimensional Drawings for the Aspen 11 28 25 6 10 9 5 x12 18 5 5 29 25 20 75 23 ...

Page 24: ...owing installations 1 Installation into a masonry fireplace 2 Installation into factory built fireplace 16 15 21 Combustible Mantle Option 1 Leveling bolts Option 2 Roller Chimney liner 16 21 6 9 5 x12 Fireplace Surround Installation zone 9 25 15 25 ...

Page 25: ...nstallation Use this diagram for the installation of your stove into an alcove All other hearth section 2 and stove clearance requirements section 6 must be maintained 48 Minimum Opening 60 Minimum Height 48 Maximum Depth ...

Page 26: ...ary every few months Even a small amount of build up can cause a draft restriction for example inch of build up on the side wall of a 6 chimney reduces the effective area of the chimney by about 20 Pay close attention to the chimney cap especially if it has a screen Screened chimney caps can become blocked enough to restrict flow in just a few weeks Screened caps are required by H U D code on mobi...

Page 27: ...he pedestal pedestal models only 5 Atmospheric conditions Occasionally barometric episodes occer that affect draft thereby affecting stove performance If your stove has been working fine and performance drops suddenly this is most likely the cause and will usually go away within a few days 6 Your fuel load may be too small or the wood size too large for the coal bed A small bed of coals requires r...

Page 28: ...e black door Includes Glass glass holder gaskets door handle and door pins 10 KA DOOR1GOLDC Complete gold door Includes Glass glass holder gaskets door handle and door pins 11 KA DOOR1PEWTERC Complete pewter door Includes Glass glass holder gaskets door handle and door pins 12 KA ASPSURROUND Fireplace surround kit Parts 1 KR BRICK Individual replacement firebrick 2 KR DOORGASKET Replacement door g...

Page 29: ...line at kumastoves com When calling you will need to have your proof of purchase the model name and the serial number of your stove When calling please remember that shipping and handling costs are not covered under this warranty Warranty Exclusions This Warranty does not cover 1 Changes in the color of the surface of the stove as this naturally happens during the firing of the stove and is consid...

Page 30: ...1 1990 SMOKE THIS MODEL 0 GRAMS PER HOUR 7 5 EFFICIENCY 50 60 70 80 90 100 Wood heaters with higher efficiencies cost less to operate TESTED FOR EFFICIENCY USING CANADIAN METHOD B 415 HEAT OUTPUT 11 689 to 24 206 BTU HR Use this to choose the right size appliance for your needs Ask dealer for help This wood heater will achieve low smoke output and high efficiency only if properly maintained See ow...

Page 31: ...31 63 ...

Reviews: