


Krueger | 1401 N Plano Rd | Richardson, TX 75081 | 972.680.9136 | [email protected] | www.krueger-hvac.com
KAH Operation & Maintenance Guide
Page: 54 of 88
FIGURE 63 - DISASSEMBLY
FIGURE 64 - ASSEMBLY
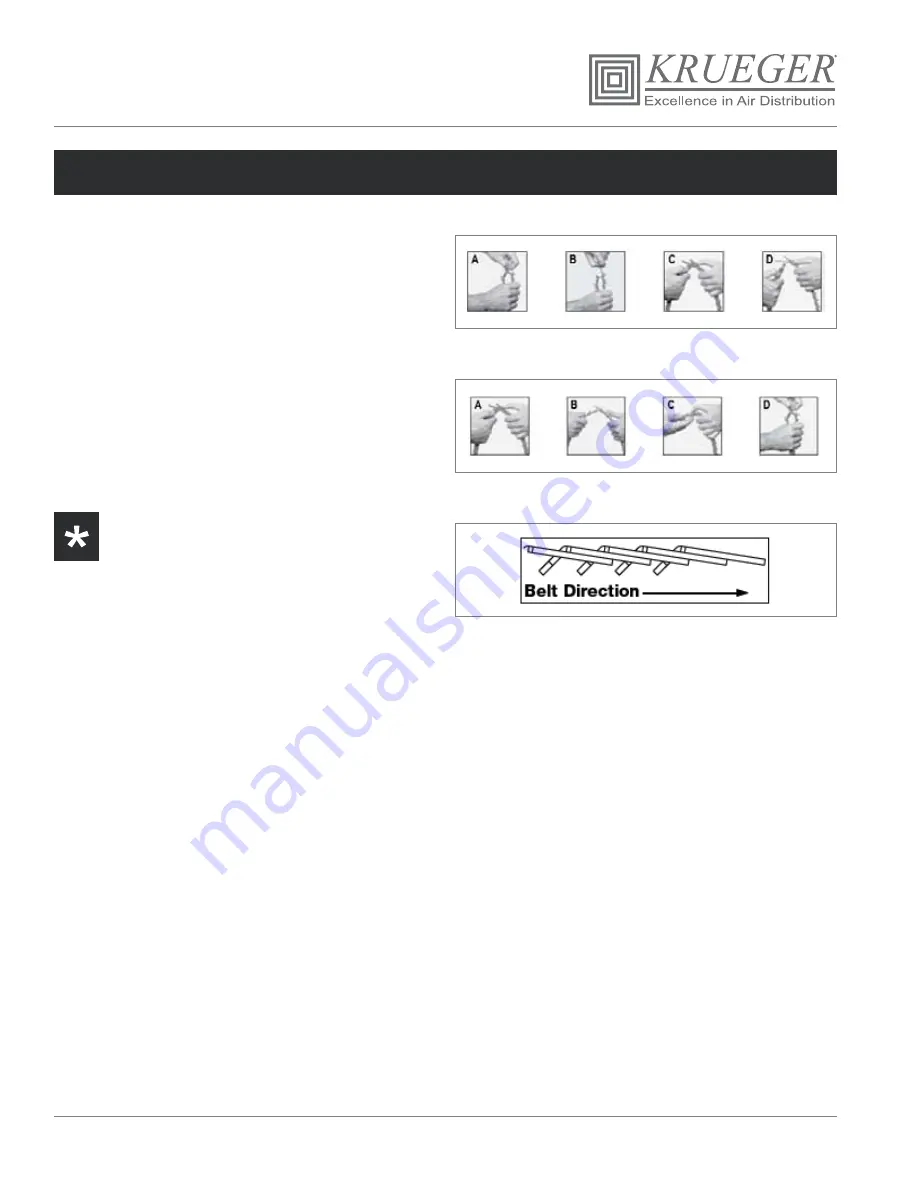
FIGURE 65 - INSTALLATION
SECTION 3 - MAINTENANCE (CONTINUED)
Installation
1. Turn belt with tabs to the inside before installing.
2. Determine direction of drive rotation.
3. Belt must travel with tabs trailing or following the belt
direction arrow (g).
4. Fit belt in nearest groove of smaller pulley.
5. Roll belt onto larger pulley, turning the drive slowly.
Belt may seem very tight; this is ok; DO NOT JOG
MOTOR.
6. Check to see all tabs are still in their correct position
and are not twisted out of alignment.
7. For multiple belt drives, work belt from groove to
groove. On particularly wide drives, it may be easier
to install half the belts from the inboard side and half
from the outboard. (See Figure 65, right)
Alternative Installation Method
1. Set motor to mid-position of adjustment range and
mark base clearly.
2. Determine required belt length as in I.
3. Push motor forward to minimum centre distance.
4. Install belts as in IV.
5. Pull motor back to previously marked mid-position.
Retensioning
Like all high performance V-belts, PowerTwist Plus V-Belts
require the maintenance of correct drive tension to operate
efficiently. Experience indicates that drive tension should
be checked after 24 hours running at full load. A retension
may be necessary depending on the severity of the drive.
Any initial belt stretch is then taken up. Subsequently, belt
tension should be checked periodically and adjusted when
necessary.
NOTE -
With drive ratios around 1:1, it may be
necessary to add back one link to allow belts to be
rolled on. This does not apply if using the Alternative
Installation Method.


