12
EN
Your Mission
TM
RTK
n
will live a much happier and longer life if it is cleaned regularly. Since your Mission
TM
RTK
n
is an electric machine, you will need to take care when cleaning. Hose water clean is supported. It is best to
use a spray bottle filled with water. When cleaning the machine body, use a soft brush or clean cloth and avoid
using solvents or polishes. Lastly, remove all build up of grass clippings and debris.
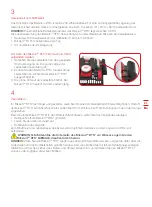
Clean the contact pins located on the charging
base and the charging strips located on the
Mission
TM
RTK
n
using a cloth. Remove any built
up grass clippings or debris around the contact
pins and charge strips periodically to ensure the
Mission
TM
RTK
n
successfully charges each time.
Again, it is important that you power the Mission
TM
RTK
n
OFF and
wear protective gloves before
touching the blade turning disc.
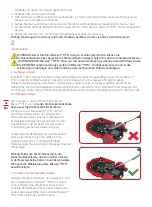
First, flip
your Mission
TM
RTK
n
upside down to expose its
underside. Here you will see the blade disc, the
chassis, and the front wheel and driving wheels.
Clean everything thoroughly with a soft brush or
moist rag. Hose water clean is supported.
Rotate the blade disc to ensure it rotates freely.
Check the blades spin freely around the fixing
screws. Remove any obstructions.
IMPORTANT: Remove any stuck debris so
that it does not cause a crack in the blade
disc. Even the tiniest crack can decrease your
Mission
TM
RTK
n
's mowing output.
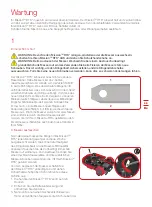
A. Cleaning the Body
C. Clean the contact pins and the charging strips
B. Cleaning the underside
WARNING: Before cleaning, turn your Mission
TM
RTK
n
OFF. Put on protective gloves before
cleaning the blade turning disc and do not rinse or flush with water.
WARNING! YOUR Mission
TM
RTK
n
can only be washed by using a hose! DO NOT use high
pressure washer on your Mission
TM
RTK
n
. High pressure water can go inside the sealings and
damage electronic and mechanical parts.
Keep it Clean
2
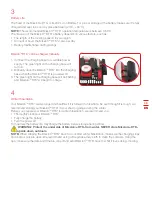
screwdriver and remove the blades.
6. Firmly screw on the new blades and new screws for fixing blades.
7. Refit and firmly screw on the disks on the underside of Mission
TM
RTK
n
.
8. Refit the battery and the battery cover.
Important: After screwing the blade to the blade disc, make sure the blade is able to spin freely.
Summary of Contents for MISSION KR233E
Page 1: ...Owner s Manual ...
Page 2: ......
Page 140: ......
Page 141: ......
Page 142: ......
Page 143: ......
Page 144: ...www kress robotik com ...


