background image

Main Menu, Navigation and Setup Cont...

26

S-1200/ 1200U

4.   Configure Audio

A. 

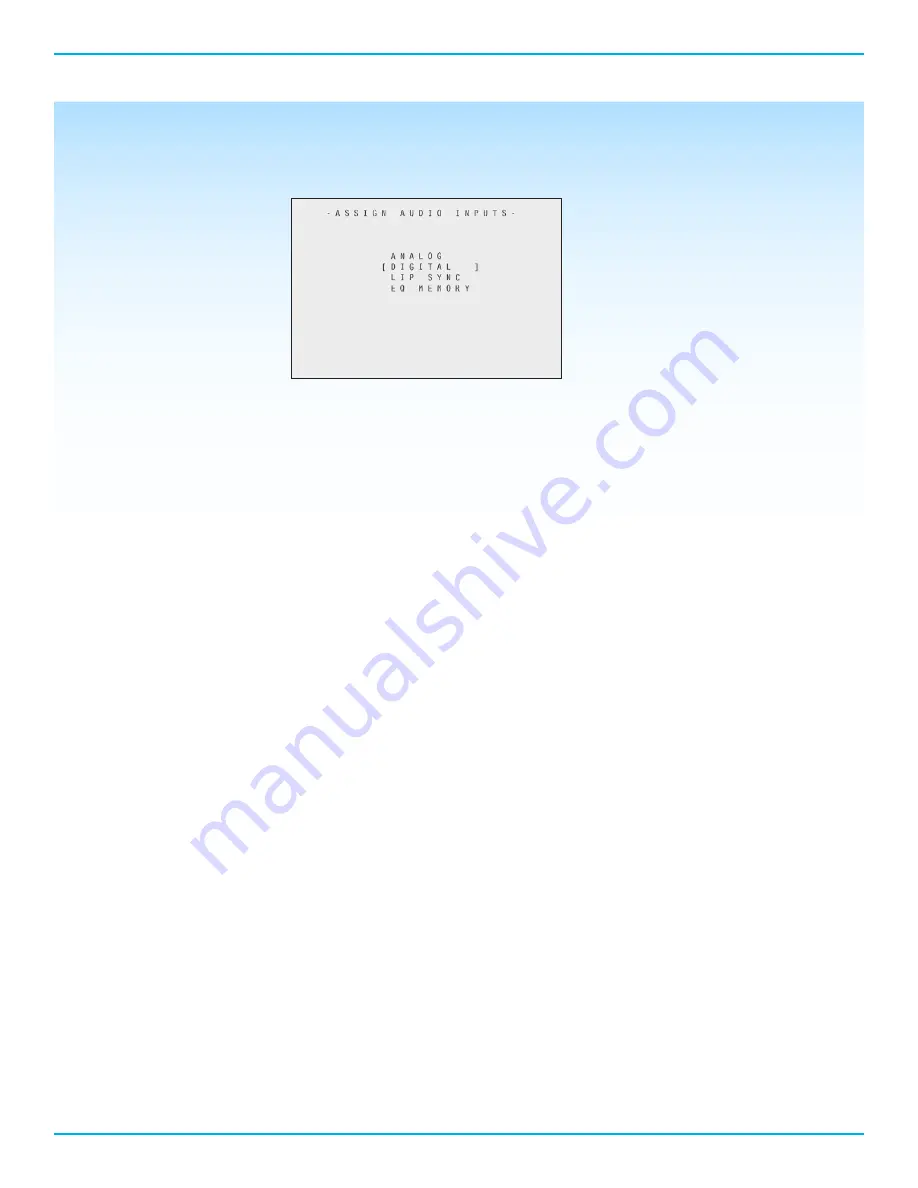
Assigning Audio Inputs – There are potentially four audio related settings available for each 

preset button, A main or primary analog audio input, A main digital audio input, A lip sync 

delay setting and an EQ memory setting. 

1.  Analog - Sets analog audio option for each button

2.  Digital – Sets Digital audio option for each button

3.  Lip Sync – Changes the delay time between viewing a person’s lips moving on 

the screen and the sound leaving their mouth. Normally this synchronization will 

be correct but in systems where multiple video connections are made or extreme 

distances are required, a delay can be present. The lip Sync setting can increase the 

audio delay in milliseconds to match video presentation.

4.  EQ Memory – Sets the room equalization mode configured in the operation menu. 

There are up to 4 different EQ settings that can be utilized for any button.


B. 

Setting the Analog audio Input  


Using the arrow keys navigate to the text to the right of the for “device” label. Press the 

enter button to make the text flash, while flashing and using the up and down arrows, 

select the device input to be changed by pressing the enter button. Navigate to the text 

to the right of the “analog Input is” label and press Enter, this will make the text flash and 

allow scrolling to the required input type. 


Summary of Contents for S-1200

Page 1: ...S 1200 S 1200U OWNER S REFERENCE ...

Page 2: ...y other component make sure all components are off Turn off all system power before connecting the S 1200 1200U to any other component Make sure all cable terminations are of the highest quality free from frayed ends short circuits or cold solder joints CONTACT INFORMATION Krell Industries LLC 45 Connair Road Orange CT 06477 3650 USA TEL 203 799 9954 FAX 203 891 2028 E MAIL krell krellonline com W...

Page 3: ...anel and Remote Control Function Diagram 15 Initial Setup 16 OSD On Screen Display 16 1 Connection and Operation of the OSD 16 2 AC Power cord connection 16 3 Video output Connection 16 5 Power Button 16 6 Menu Button 16 Main Menu Navigation and Setup 17 CONFIGURE VIDEO OUTPUT S 1200U only 17 1 Overview 17 2 OSD Default Output 17 3 Analog Video Scaler 17 A Setting maximum Video output resolution 1...

Page 4: ...er Distance 21 A Left Right 21 B Center 21 C L Surr R Surr 21 D L Back R Back 21 E Sub 21 4 Calibrate Room Setup 22 A Auto Noise Sequence 22 B Manual Noise Sequence 22 C Program Material 22 CONFIGURE DEVICES 23 1 Overview 23 A Defining inputs and outputs for audio and video sources 23 B Video input and output connections 23 1 Digital Video Options 23 a HDMI 2 Analog Video Options 23 a Component Vi...

Page 5: ... default input presets 25 3 Configure Video 25 A Assigning Video Inputs 25 1 Setting the Main Video Input 25 4 Configure Audio 26 A Assigning Audio Inputs 26 1 Analog 26 2 Digital 26 3 Lip Sync 26 4 EQ Memory 26 B Setting the Analog audio Input 26 1 Analog 27 2 Digital 27 C Choosing an Analog Decode Preference 27 D Auto Migration 28 E Choosing a Digital Decode Preference 28 F Assign Lip Sync Delay...

Page 6: ...rim 32 A Anti Clip B Input Gain 4 Music Mode Sub Trim 32 5 DTS Control Trim 33 6 PLII Control Trim 33 7 Maximum Volume Limit 33 OPERATION 34 1 Overview 34 2 OSD Operation 34 A OSD On Time 34 B Line Number 34 C Menu Back ground 34 1 Transparent 2 Solid D LCD Contrast 34 3 Audio Operation 34 A Mute Mode 34 B Dolby Hold Mode 35 C DTS Mode Hold 35 D EX Auto Switching 35 E Dynamic Range 35 ...

Page 7: ...ory 36 C Channel 36 D Filter Parameters 36 1 Type 36 a HPF 36 b LPF 37 c Notch 37 d Lshlf 37 e Hshlf 38 f Pking 38 39 2 Frequency 39 3 Shape 39 4 Level 39 E Apply 39 Basic Operation of the S 1200 1200U 40 1 Power On Off and Stand By 40 2 Volume Control 40 3 Quick level adjustment buttons 40 A Center B Surr C Back D Sub E Bal F EQ assignment ...

Page 8: ...nts Cont 8 S 1200 1200U 4 Tape VCR inputs and outputs 41 5 Button Mode Presets 41 6 Save and Recall 41 7 Factory Reset 41 Firmware Updates 42 Questions and Answers 43 RS 232 and RC 5 Control 44 Warranty 46 Service 47 ...

Page 9: ...und quality that is paired to the latest in surround processing technology The S 1200 includes the finest Krell audio and video engineering plus the latest in connectivity technology HDMI 1 3 to insure the ultimate home theater experience The audio signal path is a direct descendant of the Evolution 707 Reference Surround preamp processor The S 1200 also uses the same DSP engine and 1080p video st...

Page 10: ...s ANALOG VIDEO 3 Component Video via RCA connectors 4 S video via DIN connectors 3 Composite Video via RCA connectors OUTPUTS ANALOG AUDIO 8 Balanced via XLR Connectors R L C SR SL SBR SBL SW 8 Single ended via RCA Connectors R L C SR SL SBR SBL SW 1 Tape out via RCA connectors 1 VCR audio out via RCA connectors DIGITAL AUDIO 1 EIAJ optical via TosLink connector 1 Coaxial via RCA connector DIGITAL...

Page 11: ...DTS 5 1 DTS ES Discrete 6 1 DTS ES Matrix 6 1 DTS Neo 6 PCM 5 1 PCM 7 1 PREAMP Direct Analog Only PREAMP 5 1 Direct Analog Only SURROUND ENHANCEMENT MODES General Admission Front Row On Stage Enhanced Stereo Orchestra Mezzanine Full Range Sub Monophonic Party RS 232 DB9 Pin Out 1 Data Carrier Detect 2 Received Data 3 Transmitted Data 4 Data Terminal Ready 5 Signal Ground 6 Data Set Ready 7 Request...

Page 12: ...ngle Ended 47K Ω Audio Output Impedance Balanced 160 Ω Single Ended 160 Ω Power Consumption Stand by TBA Operation TBA DIMENSIONS Inches L 17 15 x W 17 25 x H 5 65 Centimeters L 43 56 x W 43 82 x H 14 35 WEIGHT 18lbs Unit only 8 16kg Unit only 24lbs Shipping Weight 10 89kg Shipping weight All operational features functions and specifications are subject to change without notification ...

Page 13: ...heat like power amplifiers Please consult an authorized KRELL dealer or KRELL industries to insure proper installation guidelines 1 Accessories included A 1 AC Power cord B 1 Handheld Remote control C 1 Trigger cable D 1 CD w Owner s reference E 1 Quick start guide F 1 Warranty registration card G 2 AAA Batteries H 1 T 10 torx wrench AC Power Guidelines The S 1200 1200U is designed to work all ove...

Page 14: ...h 23 VCR audio input 4 Composite video inputs 14 Single ended audio outputs 24 Tape output 5 S video output 15 AC power cord receptacle 25 Tape input 6 Composite video output 16 RC 5 control port 26 Single ended analog inputs 7 Composite OSD output 17 RS 232 control port 27 Balanced analog inputs 8 S video OSD output 18 Coaxial digital output 28 Balanced audio outputs 9 HDMI output 19 Coaxial digi...

Page 15: ...3 Volume Up Down adjustment 12 Power Standby button 4 Display window 13 Navigate right adjustment 5 Surround mode select 14 Enter button 6 Quick center channel adjust 15 Activate OSD Menu button 7 Quick Surround channel adjust 16 Navigate left adjustment 8 Quick Sub channel adjust 17 Previous screen adjustment 9 Setup memory recall 18 Mute audio select ...

Page 16: ...o output formats Use composite video if you are uncertain as to the video display s capabilities NOTE When using the HDMI output for OSD do not connect an HDMI input at this time It can make initial setup more difficult as the S 1200 1200U will be communicating with the source before the setup of inputs and outputs has occurred 5 Press the Power button on the front panel Within a few seconds the v...

Page 17: ...video output will be determined by the source 2 OSD Default Output Sets the output format for the On Screen Display The OSD options are listed in the chart below 3 Output Format S 1200 only Sets the video frequency for the video output of the transcoder For example If the output is set to 50Hz then any video frequency from the incoming source will be converted to 50Hz The Options are Follow Source...

Page 18: ...s listed below A Quantity Sets the number of channels in the system B Full Range This setting allows the passing of full spectrum audio frequencies including LFE information C LIM limited Hz Sets the low pass filter frequency Low frequency information below this setting is channeled to the sub woofers or LFE channels The following settings are available to any of the speakers in the system except ...

Page 19: ...the listening position 1 Quantity NO 1 and 2 2 Crossover Full LIM Hz G Back Speaker channels positioned to the Left and Right behind the listening position respectively 1 Quantity NO 1 and 2 2 Crossover Full LIM Hz H 5 1 Surround This setting allows the steering of surround information to be routed additionally to the rear speakers surround speakers or both during 5 1 channel playback in a 7 1 sys...

Page 20: ...tilized for LFE Low Frequency Effects information and low frequency information to surround speakers set to limited 1 Quantity NO 1 2 Crossover N A SMALL LFE LFE and Subwoofer functions are enabled All low frequency from speakers set to limited as well as the LFE effects are sent to the subwoofer s ...

Page 21: ...e center channel is required for a 5 1 or 7 1 surround system C L SURR R SURR Speaker channels positioned to the Left and Right midway into the room respective to the listening position They can also be placed further back or behind the listening position in 5 1 systems Surround channels are required for a 5 1 or 7 1 surround system D L BACK R BACK Speaker channels positioned to the Left and Right...

Page 22: ... The auto setup program will stay on each speaker channel for approximately 3 seconds and then move to the next speaker channel Once finished to exit from the auto noise sequence menu press the previous button or the menu button B Manual Noise Sequence The manual noise sequence works similarly to the Auto Noise sequence the major difference being that the automatic portion has been removed In manu...

Page 23: ... connection standard featuring three dedicated signal paths for Red Blue and Green This video standard also supports uncompressed video but does not carry audio data and would require the use of an audio interface to be used in conjunction There are 3 Component video inputs and 1 output The S 1200 1200U uses RCA connections for component video b S video Separate Video A standard definition connect...

Page 24: ...nnel 24 96 24bit 96Khz data or 8 channels of 24 48 24bit 48Khz There is no difference in the signal transmission between coaxial and optical data is carried over a 75ohm coaxial cable instead of being optically transferred There are 4 coaxial inputs and 1 output The S 1200 1200U uses RCA connections for S PDIF coaxial digital audio 2 Analog Audio Options a Balanced A standard audio connection tech...

Page 25: ...ng available for each button Setting the Main Video Input Using the arrow keys navigate to the text below the device label Press the enter button to make the text flash while flashing and using the up and down arrows select the device input to be changed by pressing the enter button Navigate to the text below the Main Video Input label and press Enter this will make the text flash and allow scroll...

Page 26: ...s where multiple video connections are made or extreme distances are required a delay can be present The lip Sync setting can increase the audio delay in milliseconds to match video presentation 4 EQ Memory Sets the room equalization mode configured in the operation menu There are up to 4 different EQ settings that can be utilized for any button B Setting the Analog audio Input Using the arrow key...

Page 27: ...be set to 720p or higher b HDMI S S PDIF Signal mode Decodes from the standard HDMI audio transport known as S PDIF typically used for earlier sources that have audio over HDMI in an S PDIF format For this type of source use the HDMI S option These source units may not transfer audio on the advanced HDMI audio transport NOTE HDMI audio inputs are defined by the Video selection c S PDIF Optical TOS...

Page 28: ... SB 4 On Stage L R C S SB 5 Enhanced Stereo L R C S 6 Orchestra L R C S SB 7 Mezzanine L R C S SB 8 Full Range Sub L R S 9 Preamp L R 10 Stereo L R D Auto Migration Auto migration is a utility that allows you to connect an active analog and digital input to the same button preset If the Processor senses a digital signal it will default to that format for sound if it does not sense the digital sign...

Page 29: ...olby D 5 1 SurEX 3 Dolby D 5 1 PLIIx Movie 4 Dolby D 5 1 PLIIx Music DTS 5 1 1 DTS 5 1 Movie 2 DTS 5 1 Music Dolby 2 0 1 Dolby D PLIIx Movie 2 Dolby D PLIIx Music 3 Dolby D 2 0 PCM 1 Dolby PL11X Movie 44 1 48 96 192 kHz 2 Dolby PL11X Music 44 1 48 96 192 kHz 3 Dolby PL11X Matrix 44 1 48 96 192 kHz 4 Dolby PL11X Emul 44 1 48 96 192 kHz 5 Dolby PL11 Virtual 44 1 48 96 192 kHz 6 DTS NEO 6 Cinema 44 1...

Page 30: ...s select the device input to be changed by pressing the enter button Navigate to the text to the right of the Delay label press enter and change the Lip Sync delay The delay can be adjusted from 0 200ms G Assign EQ Memory To adjust the EQ Memory options Use the arrow keys to navigate to the text to the right of the device label Press the enter button to make the text flash while flashing and using...

Page 31: ... button preset device to configure 2 Choose whether one or all the triggers will be configured at once The options are Selective or All triggers If the all triggers option is selected then the Mode and delay will be configured for all 4 trigger outputs for that selected button preset If Selective is used then each trigger can be configured individually for that button preset The selective options ...

Page 32: ...ice with an analog source configured needs to be selected first in order to enable the Analog input trim function Select the device button preset and proceed to the OSD Menu A Anti Clip The anti clip function measures the signal level and prevents the inputsignal from overloading clipping the analog to digital converters The Anti clip option is ON or OFF B Input Gain Increase or decreases the anal...

Page 33: ...ead to the left and right speakers and also the amount of fade from front speaker to surround speakers The two available adjustments are Center Width and Dimension Center Width Adjust how much of the center output signal is dispersed to the left and right channel outputs The adjustment range is from 0 lowest to 7 highest effectively mutes the center channel in 1 dB increments Dimension Adjust the ...

Page 34: ...djusted from 1 to 12 lines down in 1 line increments C Menu Bkgnd Adjusts the way OSD is displayed on the video display The options are Transparent and Solid 1 Transparent Displays only white text over whatever image that is currently on the video display 2 Solid Displays a blue screen with white letters masking the image on the video display D LCD Contrast Adjusts the Contrast of the S 1200 1200U...

Page 35: ...f compression NOTE The OSD will display a DYN label next to the volume setting when Dynamic Range compression is in use 4 7 1 Input Setup Adjusts the number of active channels used in the discrete 5 1 analog input This reduces the amount of noise being introduced into the S 1200 1200U insuring the best possible performance The 5 1 Input setup options are A Active Inputs L R L C R L R SL SR L C R S...

Page 36: ...This scheme maintains accurate center frequencies and bandwidth There are 24 of these filters that make up the Room EQ Each channel in the S 1200 1200U has 3 of these filters cascaded and labled I II or III B Memory There are 4 memory locations for advanced EQ filters The options for Memory are 1 2 3 4 and Off C Channel An EQ filter can be saved and set for any individual channel The channel optio...

Page 37: ...F c Notch Notch Filter Below is a graph of the Notch Filter The graph also shows what happens when you change the Shape parameter of the Notch filter Notice how the width of the notch changes The Frequency parameter of the notch filter moves the notch across the frequency band d Lshlf Low Shelf Filter The Low Shelf filter is the same as the High Shelf Filter except the LEVEL parameter changes the ...

Page 38: ...aphs of the peaking filter The peaking filter is similar to the notch but the peaking filter has the ability to vary the depth of the notch using the LEVEL parameter The depth can be changed to the point that it offers boost instead of cut The first graph shows what happens when you change the Shape parameter of the Peaking filter with the LEVEL parameter set at 6 Notice how the width of the peak ...

Page 39: ...ed from 0 4 to 9 0 4 Level The Peaking High Shelf and Low Shelf filters require a level adjustment The input level to the filter is reduced allowing the filter to pass full scale input at the filter s peak level without clipping the signal The level difference is made up in the volume control so the peak of the filter is really above below the un filtered level and the un filtered levels are the s...

Page 40: ...s the fasted way to set menu items like speaker distance that can require several clicks of the up or down buttons 3 Quick level adjustment buttons Located on the front panel or the remote control are six quick adjustment buttons These settings are for quick level or balance trim while listening and are not permanent Pressing the power button will reset these parameters to the default values A Cen...

Page 41: ...menu can be saved to a default layout Once a layout has been saved it can be recalled at anytime restoring back to the last saved working presets To Save a layout Press and Hold the Save button on the Front panel The front panel display will show Saving Setup and return to its last activity To Recall a layout Press and Hold the Recall button on the Front panel The front panel display will show Rec...

Page 42: ...ather than being returned to the factory Firmware updates are sent via the RS 232 port located on the back panel NOTE Firmware upgrades are to be installed by an Authorized Krell Dealer or Distributor Special loading software and instructions are required to perform said updates Please contact an authorized Krell Dealer Distributor or the Factory for information regarding firmware updates ...

Page 43: ...er amplifiers from the processor and then amplifiers to speakers If all seems to be in working order check to see if the S 1200 is in Phantom Center mode this can be enabled by pressing the center quick select button twice which will disable the physical center channel and redirect center information to the left and right speakers Q When I play a standard DVD on my Blu ray machine the video works ...

Page 44: ... control protocols with feedback and RC 5 communication For detailed information regarding these alternate control methods refer to the S 1200 1200U RS 232 RC 5 Control Parameters document available in electronic form on the supplied documentation CD or from the website at www krellonline com ...

Page 45: ...Krell S 1200 1200U 45 S 1200 1200U The S 1200 Preamp Processor with matching S 1500 multi channel amplifer ...

Page 46: ...ty Return freight within the United States U S A is included in the warranty If you have purchased your Krell product outside the U S A and wish to have it serviced at the factory all freight and associated charges to the fac tory are your responsibility Krell will pay return freight to the U S A based freight forwarder of your choice Freight and other charges to ship the unit from the freight for...

Page 47: ... be hand delivered if arrangements with the Service Department have been made in advance Proof of purchase will be required for warranty validation at the time of hand delivery NOTE Use the original packaging to ensure the safe transit of the product to the factory dealer or distributor Krell may at its discretion return a product in new packaging and bill the owner for such packaging if the produ...

Reviews: