Type
RA-2 HV3
Operating Instructions
DOK-208-GB.doc
No. 0920-..,
0921-...
Caution
When setting the spray profile, take steps to ensure that no changes can occur or be made
to the settings (setting parameters) without the knowledge of the set-up technician.
The automatic spray gun type RA-2 HV3 is now ready for operation.
5.
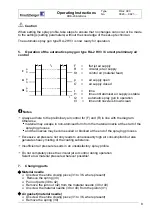
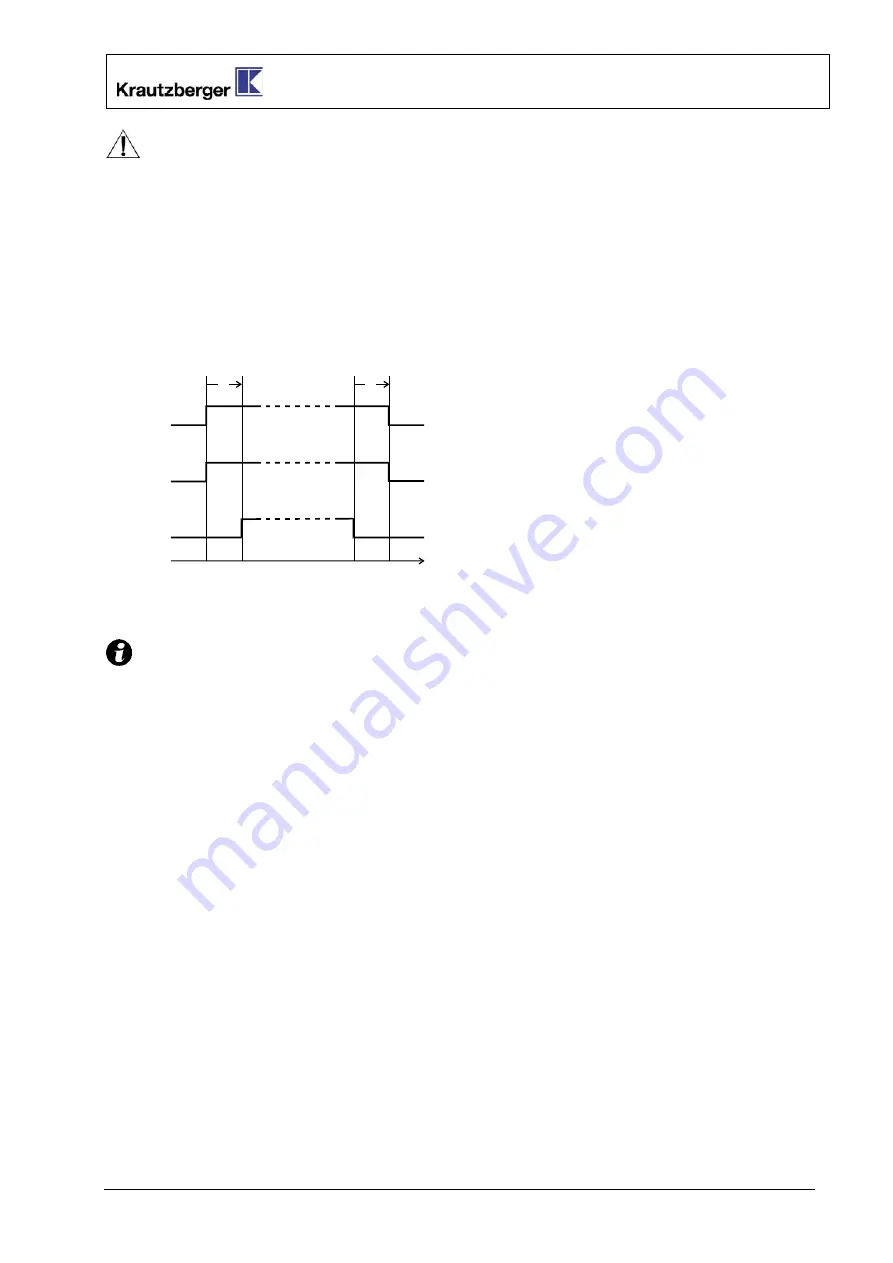
Operation of the automatic spray gun type RA-2 HV3 / Correct preliminary air
control
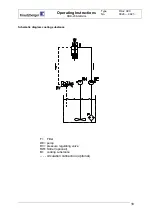
F
=
flat jet air supply
t
F
p
0
R
p
0
St
p
0
t
1
t
2
t
3
R
=
circular jet air supply
St
=
control air (material feed)
p
=
air supply open
O
=
air supply closed
t = time
t1
=
time until atomiser air supply is stable
t2 = automatic spray gun in operation
t3 = time until nozzle is blown clean
Notes
Always adhere to the preliminary air control for (F) and (R) in line with the diagram.
Otherwise
i
material may escape in non-atomised form from the material nozzle at the start of the
spraying process
i
and the nozzles may become soiled or blocked at the end of the spraying process.
Excessive air pressure not only leads to unnecessarily high air consumption but also
generates heavy misting of the coating substance.
Insufficient air pressure results in an unsatisfactory spray profile.
Do not completely close the circular jet air control during operation
Select a low material pressure wherever possible!
7. Changing
parts
Material needle
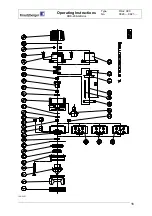
Unscrew the entire closing piece (31 to 36, where present)
Remove the spring (30)
Pull out parts (38 to 42)
Remove the jam nut (42) from the material needle (39 or 40)
Unscrew the material needle (39 or 40) from the piston (41)
Air gasket (material needle)
Unscrew the entire closing piece (31 to 36, where present)
Remove the spring (30)
8


