Kramer VS-88HD, User Manual
The Kramer VS-88HD is a high-quality video scaler with advanced features for professional video processing. Enhance your viewing experience with this versatile device. Make sure to download the user manual for free from manualshive.com to fully utilize all the functions and capabilities of this product.
Share
Download


Reviews:
No comments
Related manuals for VS-88HD
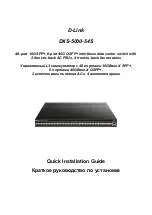
DXS-5000-54S
Brand: D-Link Pages: 17

ATC-900
Brand: Eaton Pages: 40

HW2250K
Brand: Panio Pages: 5

A51606-SW
Brand: ASTEK Pages: 3

PPS-1201
Brand: Kobold Pages: 10

Signature ANTENNA GENIUS 8x2 v2 PLUS
Brand: 4O3A Pages: 57

MaxiiNet VI3026
Brand: Vigitron Pages: 288

IPES-5208T-X Series
Brand: Lantech Pages: 39

KIT-401
Brand: Kramer Pages: 4

enbrighten 51253
Brand: Jasco Pages: 2

IntraCore IC39240
Brand: Asante Pages: 3

RPT-2012/P-4F-T-1 Series
Brand: Subject Link Pages: 2

TL-SF1016D
Brand: TP-Link Pages: 2

HDSW4
Brand: SOFLY Pages: 4

VS-81SP
Brand: Kramer Pages: 32

Alpha 5
Brand: Whelen Engineering Company Pages: 3

ULTRAVIEW PRO -
Brand: Dakota Computer Solutions Pages: 52

CH-21
Brand: CYP Pages: 4


