


198
Sequencer operating mode
Record mode: Step Record page
Multitrack recording procedure
Here is the general procedure to follow for the Multitrack
Recording.
1.
Press SEQUENCER to enter Sequence mode.
2.
Press the RECORD button, and select the “Multitrack
Sequencer” option to enter the Multitrack Record mode.
Now you can prepare your recording parameters. (For
more details, see “Record mode: Multitrack Sequencer
page” on page 196).
3.
Be sure the Overdub or Overwrite recording options is
selected (see “Rec mode (Recording mode)” on page 196).
4.
Set the tempo. There are two ways of changing tempo:
• Keep the SHIFT button pressed, and use the TEMPO/
VALUE controls to change the tempo.
• Move the cursor to the “Tempo” parameter, and use the
TEMPO/VALUE controls to change tempo.
5.
Use the TRACK SELECT button to switch between Song
Tracks 1-8 and Song Tracks 9-16, and assign the right
Sound to each track (see “Sound bank’s icon” on page 194).
6.
Select the track to record. Its status icon will automatically
change to Record (see “Track status icons” on page 197).
7.
Use the “Locate measure” parameter to enter a measure
where you want to start recording.
8.
Press
(
PLAY/STOP) to start recording. Depending on
the Metro option you selected, a 1- or 2-bars precount may
play before the recording actually begins. After precount,
play freely.
• If you selected the Auto Punch recording mode, the
recording will begin only when reaching the Start point.
• If you selected the Pedal Punch recording mode, press the
pedal when you want to begin recording. Press it again to
finish recording.
Note:
The Punch functions will not work on an empty Song.
At least one track must already be recorded.
9.
When finished recording, press
(
PLAY/STOP) to stop
the sequencer. Select a different track, and go on recording
the whole Song.
10.
When finished recording the new Song, either press the
RECORD button, or select the “Exit from Record” com-
mand from the page menu (see page 216).
Warning:
Save the Song to a storage device, to avoid it is lost
when turning the instrument off.
Note:
When exiting the Record mode, the Octave Transpose is
automatically reset to “0”.
11.
If you wish, edit the new Song, by pressing the MENU but-
ton, and selecting the various edit pages.
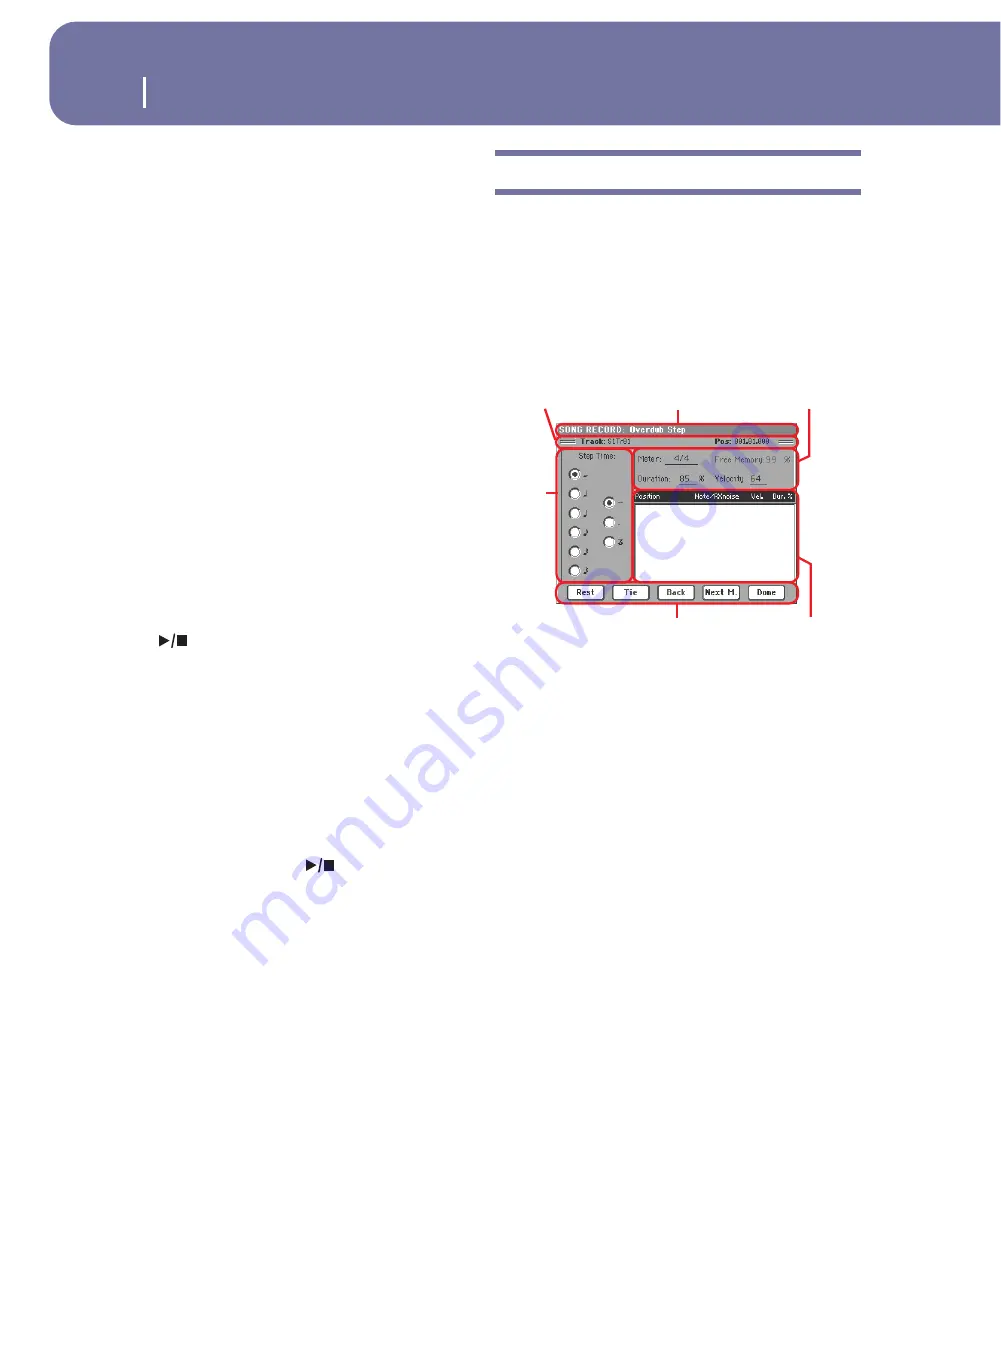
Record mode: Step Record page
The Step Record allows you to create a new Song by entering sin-
gle notes or chords to each track. This is very useful when tran-
scribing an existing score, or needing a higher grade of detail,
and is particularly suitable to create drum and percussion tracks.
To access this page, select the “Overdub Step Recording” or
“Overwrite Step Recording” command from the page menu.
In Overdub Step Recording mode you will add to existing events,
while in Overwrite Step Recording mode you will overwrite all
existing events.
See “Step Record procedure” below, for information on the
record procedure.
Page header
This line shows the current operating mode.
Page sub-header
Track
Name of the selected track in record.
S1Tr01…Tr16
Player 1 track. In Sequencer mode, you always
work with Player 1.
Pos (Position)
This is the position of the event (note, rest or chord) to be
inserted.
Step Time area
Step Time
Length of the event to be inserted.
…
Note value.
Standard (–) Standard value of the selected note.
Dot (.)
Augments the selected note length by one half of
its value.
Triplet (3)
Triplet value of the selected note.
Page header
Note parameters
Step
time
Buttons
Page sub-header
Event list
Summary of Contents for pa2X pro
Page 1: ...User s Manual ENGLISH OS Ver 2 0 MAN00010019 4 E ...
Page 9: ...Introduction ...
Page 34: ...30 Easy Mode The Lyrics page in detail ...
Page 35: ...Quick Guide ...
Page 85: ...Reference ...
Page 278: ...274 MIDI Playing another instrument with the Pa2X ...
Page 279: ...Appendix ...
Page 346: ......
Page 347: ......


