


Media Types
27
Use transparencies that are
Approved for laser printing
DO NOT use transparencies that
Have static electricity that will cause them to stick together
Are specified for inkjet printers
Glossy Stock
Test all glossy stock to ensure acceptable performance and to ensure that the
image does not shift.
DO NOT use glossy stock that is
Mixed with any other media in the trays (as this will cause printer misfeed-
ing)
Specified for inkjet printers
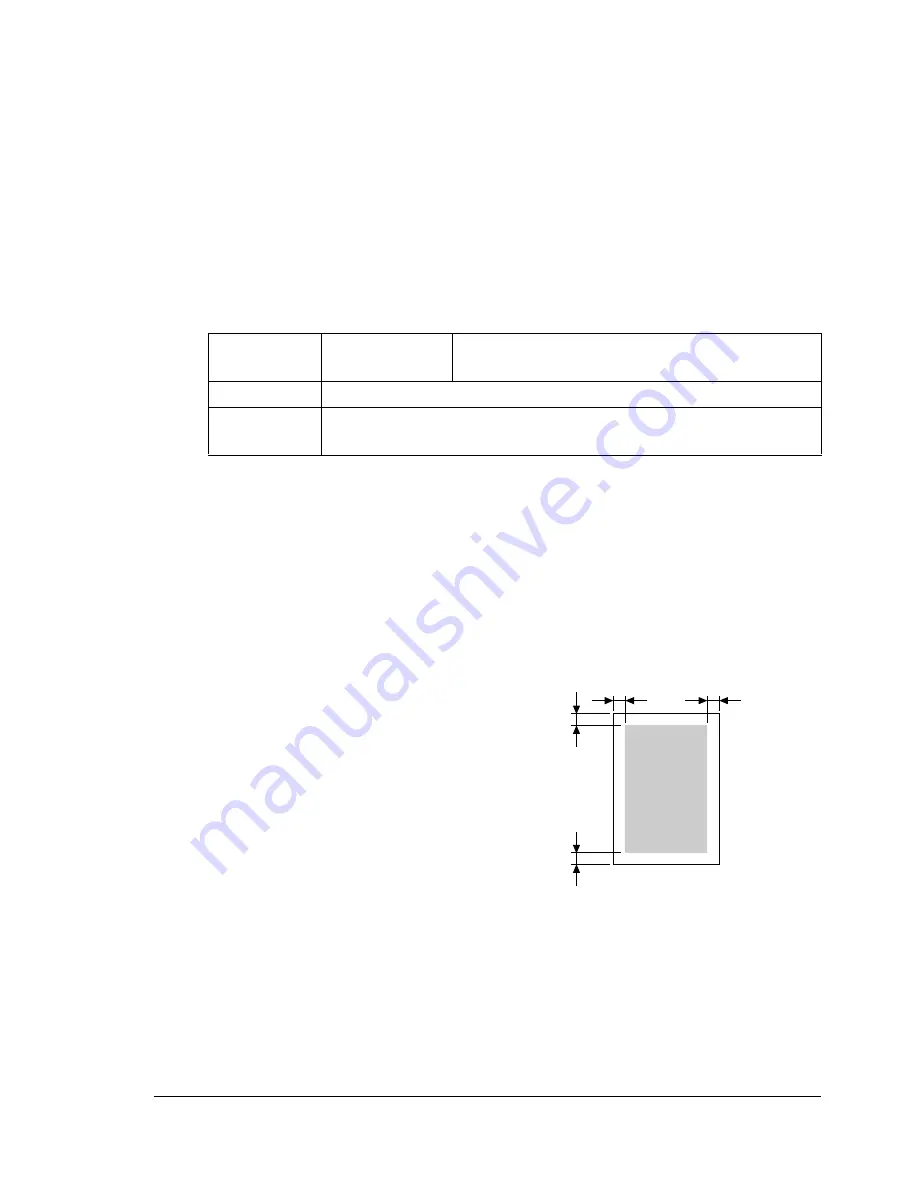
What Is the Guaranteed Imageable (Printable) Area?
The printable area on all media sizes is
up to 4 mm (0.157") from the edges of
the media.
Each media size has a specific image-
able area, the maximum area on which
the printer can print clearly and without
distortion.
This area is subject to both hardware
limits (the physical media size and the
margins required by the printer) and
software constraints (the amount of
memory available for the full-page frame buffer). The guaranteed imageable
(printable) area for all media sizes is the page size minus 4 mm (0.157") from
all edges of the media.
"
When printing in color on legal-size media, the bottom margin is
10.4 mm (0.409
"
).
Capacity
Tray 1
Up to 50 glossy sheets, depending on their
thickness
Orientation
Face up
Driver
Media Type
Glossy
a
a
a
a
Printable
Area
a = 4 mm (0.157")
Summary of Contents for magicolor 2400W
Page 1: ...magicolor 2400W User s Guide 4139 7733 01A 1800767 001A ...
Page 7: ...Introduction ...
Page 13: ...Software Installation ...
Page 20: ......
Page 21: ...Using the Status Display ...
Page 25: ...Using Media ...
Page 42: ...Loading Media 36 5 Slide the media guides against the edges of the media ...
Page 45: ...Replacing Consumables ...
Page 57: ...Maintaining the Printer ...
Page 65: ...Troubleshooting ...
Page 74: ...Clearing Media Misfeeds 68 4 Reinstall the drum cartridge ...
Page 75: ...Clearing Media Misfeeds 69 5 Carefully close the top cover ...
Page 87: ...Installing Accessories ...
Page 91: ...Appendix ...


