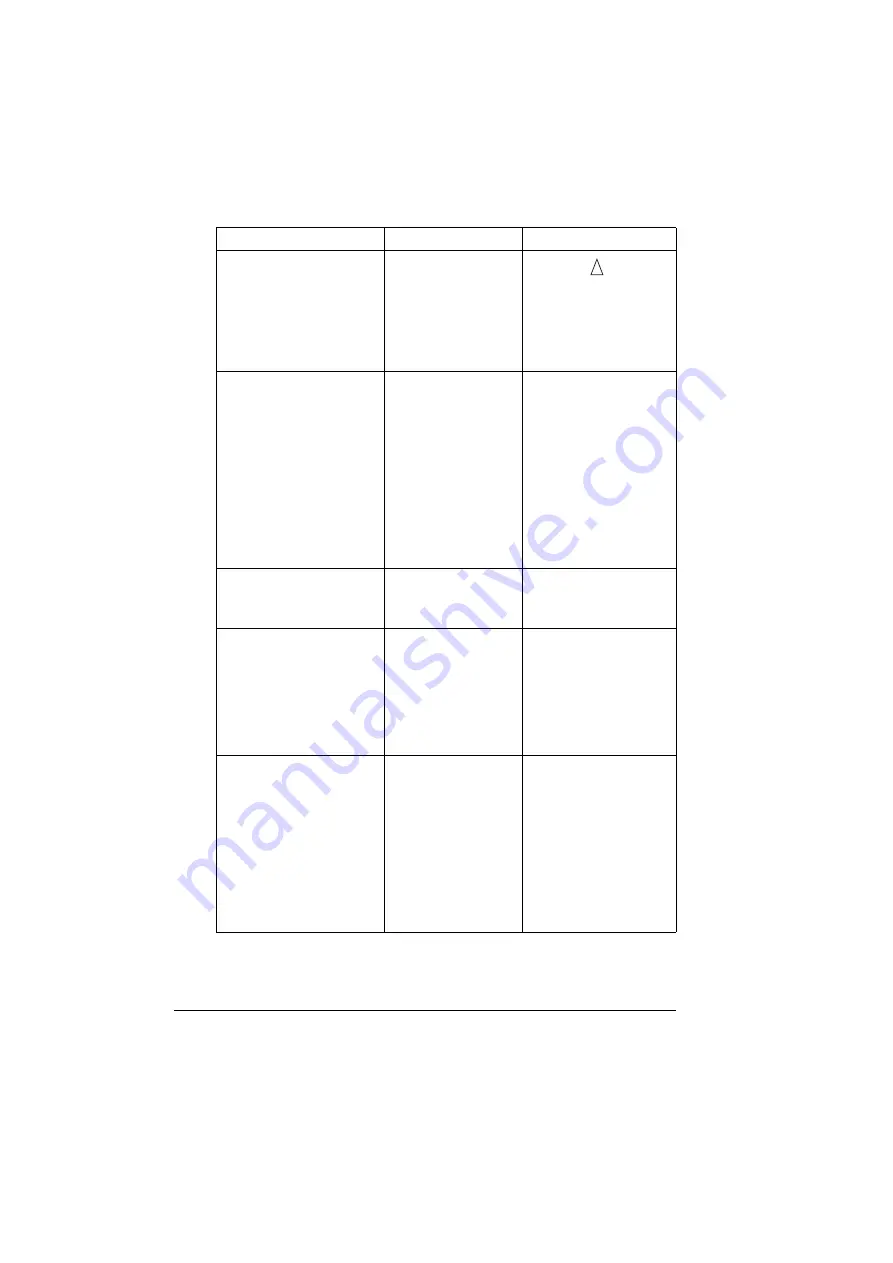
Status, Error, and Service Messages
220
MANUAL FEED
“SIZE”
“MEDIA”
The Paper Source in
the printer driver is
set to Tray 1 (Manual
Feed), but there is
already media in the
tray when printing
begins.
Press the
key to
print, or remove and
reload the media in Tray
1.
MEMORY FULL
PRESS CANCEL
The printer has
received more data
than can be pro-
cessed with its inter-
nal memory.
Press the Cancel key to
cancel the print job.
Decrease the amount of
data to be printed (for
example, by decreasing
the resolution), and then
try printing again.
If that doesn’t solve the
problem, install an
optional memory mod-
ule.
OUTPUT FULL
REMOVE PAPER
YYYY
The output tray is full
of media.
Remove all media from
the output tray.
PAPER EMPTY
“SIZE”
“MEDIA”
The specified tray is
empty. (Appears
when
PAPER
MENU/PAPER
SOURCE/TRAY
CHAINING ON
is
set.)
Load the correct media
into the specified tray.
PAPER ERROR
“SIZE”
“MEDIA”
The media size/type
set in the printer
driver is different from
the size/type of media
loaded (Appears
when
PAPER
MENU/PAPER
SOURCE/TRAY
CHAINING ON
is
set.)
Load the correct media
size and type.
This message...
means...
do this...
Summary of Contents for BIZHUB C30P
Page 1: ...bizhub C30P User s Guide A011 9566 00A ...
Page 8: ......
Page 14: ...Contents vi ...
Page 15: ...Introduction ...
Page 20: ......
Page 21: ...About the Software ...
Page 36: ...Using the Postscript and PCL Printer Driver 22 ...
Page 37: ...Using the Status Monitor Windows Only ...
Page 40: ......
Page 41: ...Printer Control Panel and Configuration Menu ...
Page 107: ...Camera Direct ...
Page 109: ...Memory Direct ...
Page 111: ...Using Media ...
Page 145: ...Replacing Consumables ...
Page 158: ...Replacing Consumables 144 14 Close the front cover ...
Page 178: ......
Page 179: ...Maintaining the Printer ...
Page 189: ...10 Troubleshooting ...
Page 204: ...Clearing Media Misfeeds 190 4 Push down the levers 5 Close the right side cover ...
Page 239: ...11 Installing Accessories ...
Page 262: ...Staple Finisher 248 10 Install the relay unit on the machine 11 Open the relay unit cover ...
Page 269: ...Appendix ...


