


Memory Direct
96
Memory Direct
PDF, JPEG and TIFF files saved on USB memory devices can be printed by
plugging the USB memory device into the printer.
"
Memory direct can be used only if the optional hard disk drive or a
CompactFlash card is installed.
In order to perform collated printing with memory direct, the optional
hard disk drive or a CompactFlash card of 1 GB or more must be
installed.
"
For details on specifying settings with the control panel, refer to
“MEMORY DIRECT” on page 65.
Printing From a Connected USB Memory Device
1
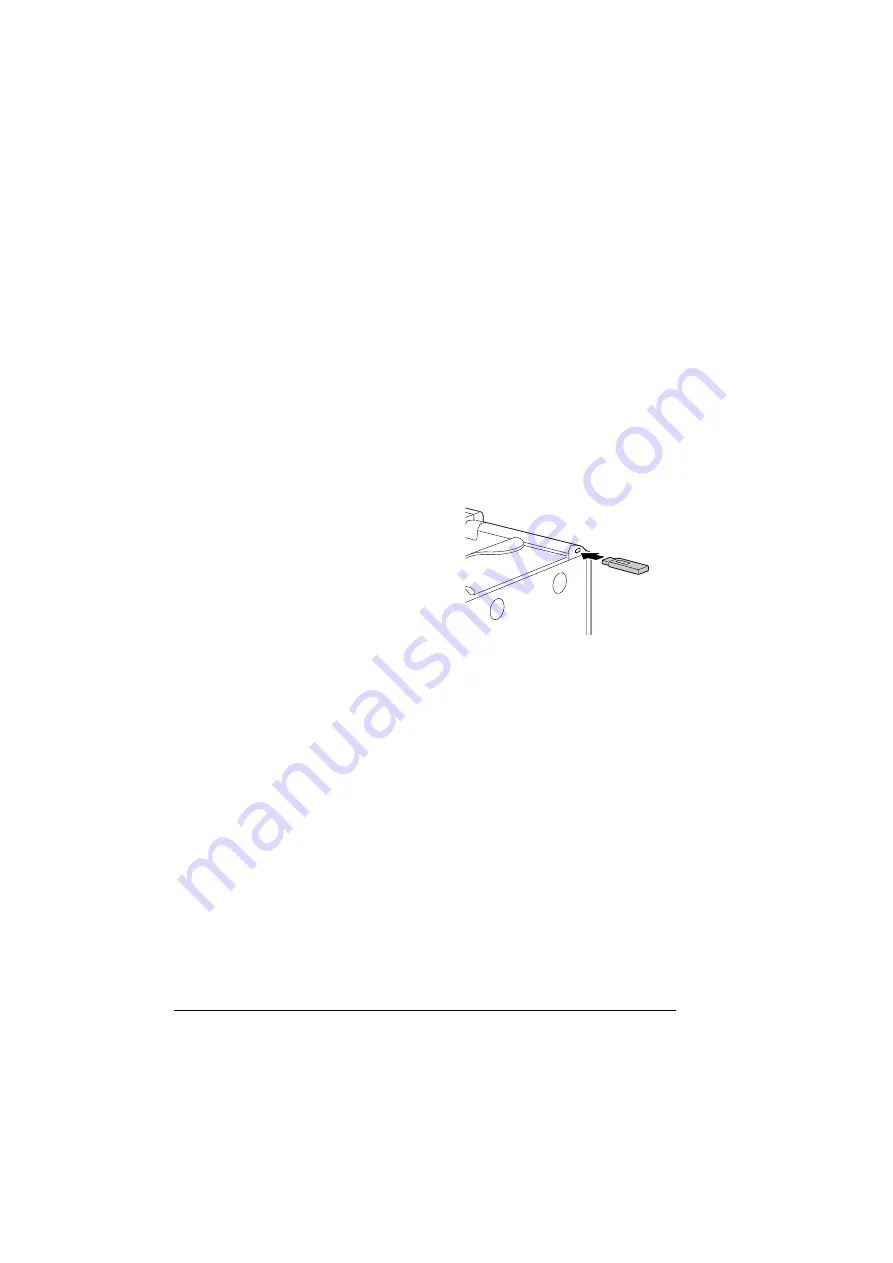
Plug the USB memory device
into the KONICA MINOLTA Digi-
tal Camera Direct Print Port.
The USB icon appears in the
upper-right corner of the mes-
sage window, and the
Memory
Direct
menu appears.
2
Select
LIST OF FILES
, and then press the
Menu/Select
key.
"
When all files (PDF, JPEG and TIFF) are displayed, select
Type
OF FILES
, and then press the
Menu/Select
key.
3
From the file list, select the file that you wish to print, and then press the
Menu/Select
key.
If the file to be printed is in a folder, select the folder, and then press the
Menu/Select
key.
"
A maximum of 99 folders and files can be displayed.
"
Up to 8 folder levels can be displayed.
4
Select
, and then press the
Menu/Select
key.
When printing is finished, the status screen appears again.
"
Settings can be specified for the paper size, duplex printing, num-
ber of copies, collating, the output tray, and finishing.
"
Do not unplug the USB memory device from the KONICA
MINOLTA Digital Camera Direct Print Port during memory direct
printing.
Summary of Contents for BIZHUB C30P
Page 1: ...bizhub C30P User s Guide A011 9566 00A ...
Page 8: ......
Page 14: ...Contents vi ...
Page 15: ...Introduction ...
Page 20: ......
Page 21: ...About the Software ...
Page 36: ...Using the Postscript and PCL Printer Driver 22 ...
Page 37: ...Using the Status Monitor Windows Only ...
Page 40: ......
Page 41: ...Printer Control Panel and Configuration Menu ...
Page 107: ...Camera Direct ...
Page 109: ...Memory Direct ...
Page 111: ...Using Media ...
Page 145: ...Replacing Consumables ...
Page 158: ...Replacing Consumables 144 14 Close the front cover ...
Page 178: ......
Page 179: ...Maintaining the Printer ...
Page 189: ...10 Troubleshooting ...
Page 204: ...Clearing Media Misfeeds 190 4 Push down the levers 5 Close the right side cover ...
Page 239: ...11 Installing Accessories ...
Page 262: ...Staple Finisher 248 10 Install the relay unit on the machine 11 Open the relay unit cover ...
Page 269: ...Appendix ...


