14
Safety precautions
CAUTION
—
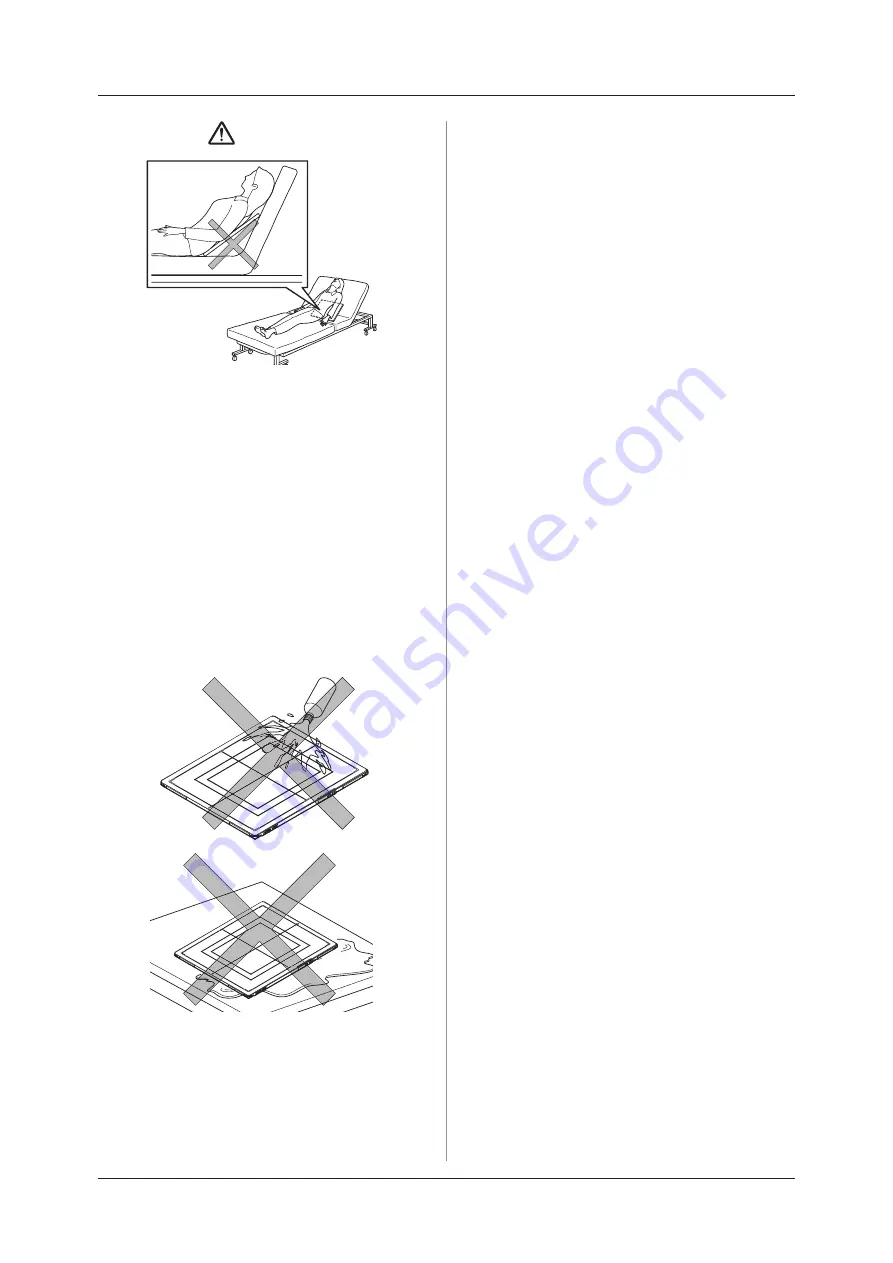
When laying the patient onto the DR Detector during
positioning, do so very slowly.
—
When placing the DR Detector under the patient as part of
the exposure process, insert and pull out the detector slowly.
—
Use the adapter when you need to perform exposure on
a stretcher or a place where load is to be applied locally.
—
Exposing or immersing the DR Detector to patient body
fluids, chemicals, water, etc. may allow such liquids to
enter through exterior gaps and cause a failure. Make
sure to cover the DR Detector with a vinyl sheet, etc.
—
The exposure side of the DR Detector is designed
to have waterproof capabilities. However, be careful
when handling them because they are not guaran-
teed to be completely waterproof. Also, subjecting it
to strong impacts or excessive loads by dropping or
hitting it against other objects may diminish its water-
proof capabilities
—
Never leave DR Detectors in hot and humid environ-
ments for long periods of time.
—
The DR Detector has wireless antennae positioned
at 2 places. Do not block them with the body or metal
because that will interfere with, disconnect or slow
down wireless communication.
—
Ensure that each LED turns on or flashes when the
DR Detector starts up.
—
The DR Detector is precision equipment, and therefore
impact or vibration during radiography or image transfer
may affect the image quality. Be careful when handling
the DR Detector during and just after radiography.
—
Never leave DR Detectors around heat generators such
as electric carpet
—
Do not damage or deform the DR Detector; doing so
may have an effect on exposed images, or lead to injury.
—
Do not use a sharp object to operate the switch; doing
so may damage the DR Detector.
—
The surface temperature of the DR Detector can rise
up to 43 °C.
—
When using multiple DR Detectors, keep a distance
between each DR Detector for at least 30 cm.
•
When using the DC Power Cable, observe the following:
—
Remove the cable by holding the connector housing.
—
Do not let the cable get pinched by doors and do not
place heavy objects on it.
—
Do not bend or pull the cable excessively.
—
Make sure that the cable is properly connected to the
DR Detector without wobbling.
—
When connecting the AC Adapter and the DC Power
Cable, ensure to insert the connectors until a click sound
is heard.
•
Take note of the following if the DR Detector is damaged
and fluorescent medium or lead is exposed:
—
Immediately stop using the device, and contact Konica
Minolta technical representatives.
—
If the fluorescent medium gets in your eyes, do not rub
and instead wash with running water immediately.
—
If you have swallowed any of the fluorescent medium
or if the fluorescent medium has gotten into your eyes,
administer first-aid treatment immediately, and consult a
doctor
—
If the medium comes into contact with your skin directly,
wash the affected area thoroughly with water.
—
Use and store in a location inaccessible to children.
•
When the DR Detector is used for exposure, pay attention
to the following items.
—
Start exposure after confirming on the display of the image
processing controller that the machine is ready for exposure.
—
Perform exposure under the X-ray imaging conditions
that has been confirmed by us.
—
Use the specified grid to perform exposure.
—
Apply the specified operation methods to use the grid.
—
Do not let the DR Detector vibrate or receive shock until
the preview image is displayed.
—
If the irradiation field is larger than DR Detector when
you take an image, an artifact may occur due to the X-
ray backscatter effect. Adjust the irradiation filed to fit
within the imaging range.
—
Confirm that a confirmation is sounded from the image
processing controller after the start of exposure.
—
Confirm that the DR Detector's battery level is full be-
fore performing exposure.
—
Use the system under the exposure condition confirmed
prior to exposure.
Summary of Contents for AeroDR SKR 4000
Page 1: ...EN 02...
Page 2: ......
Page 8: ...8...
Page 9: ...9 Chapter 1 Safety Precautions Warnings...
Page 22: ...22...
Page 23: ...23 Chapter 2 Product Overview...
Page 29: ...29 Chapter 3 General Operations...
Page 42: ...42...
Page 43: ...43 Chapter 4 Troubleshooting...
Page 46: ...46...
Page 47: ...47 Chapter 5 Maintenance...
Page 50: ...50...
Page 51: ...51 Chapter 6 Specifications...
Page 56: ...56...
Page 57: ...57...
Page 58: ...58...
Page 59: ......


