background image

Basic theory

(CD015005E)

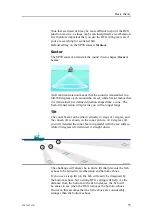
B

A

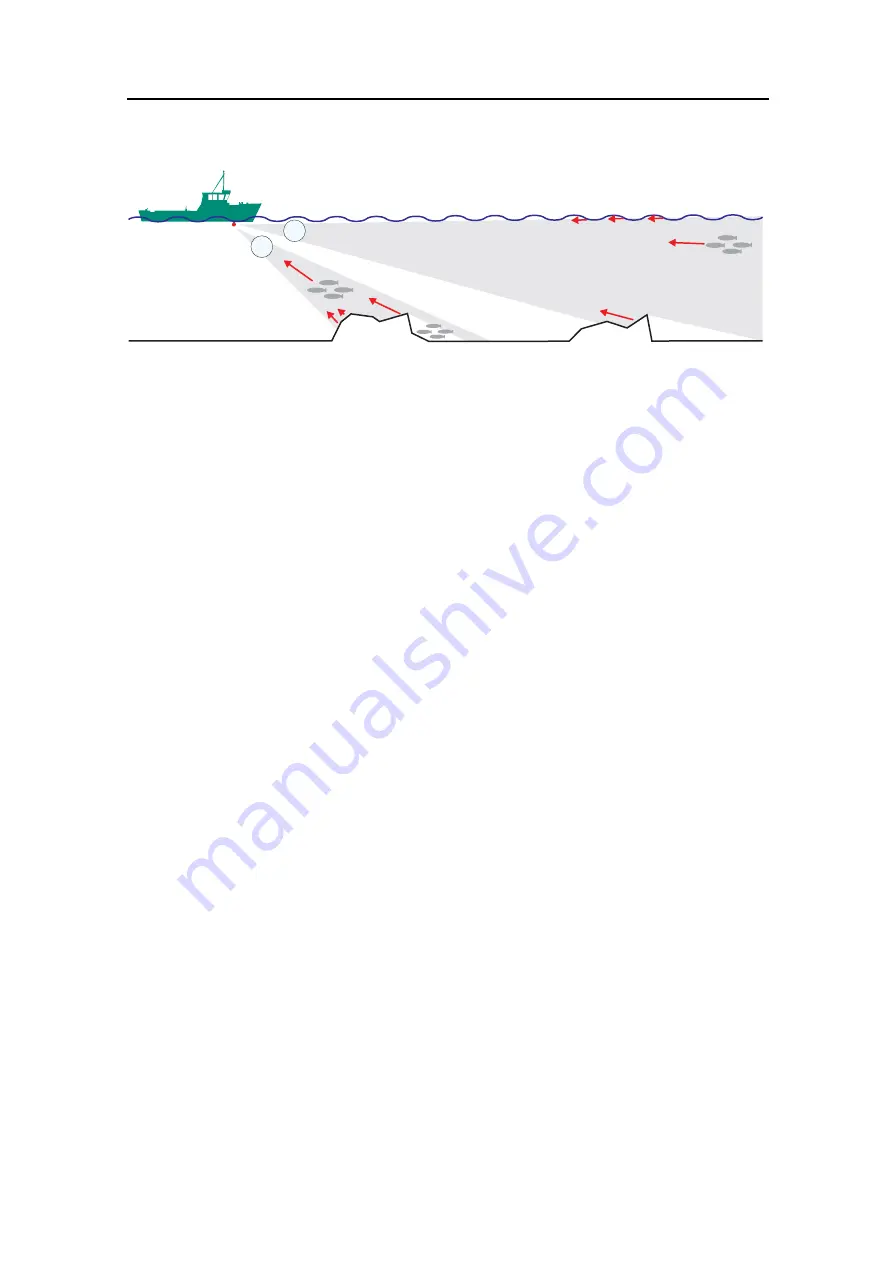
The echoes from the bottom will vary with how uneven the
bottom is, what kind of bottom you have under your vessel,
(rock, mud, sand etc.) as well as your current tilt setting. The
echo from the sea surface will vary with the current sea state and
your current tilt setting.

The illustration demonstrates how the bottom and the sea surface
return echoes back to your sonar transducer. In situation (A) you
will see several weak echoes from the waves and from the rock on
the bottom, you will still be able to identify the school of fish. In
situation (B) you will be able to identify the upper school of fish,
but the lower school will be hidden in the shadow of the rock.

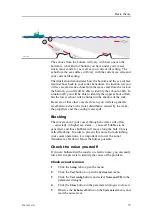
Be aware of that other vessels close to you will also generate
reverberation due to the water disturbance caused by the wake,
the propellers and the cooling water spill.

Blocking

The movement of your vessel through the water will often
— especially in higher sea states — cause air bubbles to be
generated, and these bubbles will move along the hull. This is
called blocking. In order to prevent this noise from disturbing
your sonar operations, it is important to lower the sonar
transducer as far down below the hull as possible.

Check the noise yourself!

If you are bothered with acoustic or electric noise, you can easily
run a few simple tests to identify the cause of the problem.

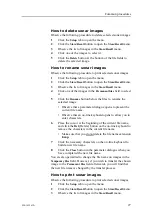
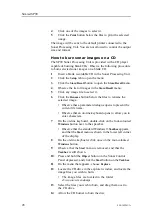
Check acoustic noise

1

Click the

Setup

tab to open the menu.

2

Click the

Test

button to open the

System test

menu.

3

Click the

Test config

button, and select

Noise and VR

in the

parameter dialogue.

4

Click the

Close

button in the parameter dialogue to close it.

5

Observe the

Echo level

button on the

System test

menu, and

read the noise level.

850-165261/A

37

Summary of Contents for Simrad SP90 Series

Page 1: ...Mini manual Simrad SP90 Low frequency long range fish finding sonar M A X I M I Z I N G Y O U R P E R F O R M A N C E A T S E A www SIMRAD com ...

Page 2: ......

Page 3: ...anual This manual provides you with the basic information required to operate the Simrad SP90 Low frequency long range fish finding sonar For more detailed information refer to the Operator manual 850 165261 A March 2006 ...

Page 4: ... errors or omissions Warning The equipment to which this manual applies must only be used for the purpose for which it was designed Improper use or maintenance may cause damage to the equipment and or injury to personnel The user must be familiar with the contents of the appropriate manuals before attempting to operate or work on the equipment Simrad disclaims any responsibility for damage or inju...

Page 5: ...EDURES 21 Menu procedures 21 How to hide the menu 21 How to simplify the menu 21 Gain adjustment procedures 21 How to adjust the gain 22 How to control the AGC 22 How to control the RCG 22 How to control the TVG 23 How to control the Display gain 23 Mode procedures 24 How to select operational mode 24 How to define the function of the Mode buttons 24 How to sort the operational modes 24 Storage pr...

Page 6: ...9 How to enable position track 30 How to enable target track 30 How to add a target tracking line 31 BASIC THEORY 32 Settings 32 TVG 32 AGC 33 PP Filter 33 Pulse form and length 33 Beam 34 Gain 34 RCG 34 Sector 35 Tilt 35 Noise and reverberation 36 Cavitation 36 Reverberation 36 Blocking 37 Check the noise yourself 37 Layers and deflections 38 Temperature and salinity layers 38 Deflections 39 4 85...

Page 7: ...panel aka Sonar Control Panel A transmitter and receiver unit A hull unit with a transducer array In this publication we will focus on the basic use of the display and control panel Click Help Installed on your SP90 sonar you will also find a comprehensive on line help system You may not be able to find your language but everything written in the SP90 Operator manual is also available on the sonar...

Page 8: ...y important since you may in worst case run the transducer into the bottom This will damage the transducer and the transducer shaft and extensive repair is required When you dock the vessel It is very important that the sonar system remains switched off when the vessel is in dry dock If the transducer is subjected to transmit power when it is in open air it will be damaged As a safeguarding measur...

Page 9: ...nu Dead reckoning function implemented The TX Power function is changed to have the power switched off when the sonar is powered up The Mode buttons on control panel can be used to choose operational modes or operator setup The PP Filter has been improved SW 1 1 X When you select pulse form FM Auto the sonar will automatically remember the parameters you choose for short less than 900 m and long r...

Page 10: ...that the power has been switched on and that the computer is starting up After a short period approximately 2 minutes you will see the sonar picture on the display 3 Press the Down button D on the control panel to lower the transducer The transducer will stop automatically when it has been lowered to its full length The dialogue at the bottom right corner of the display will tell you when the tran...

Page 11: ...e transducer has been fully retracted 2 Press the Power button A on the Sonar Control Panel and keep it depressed for approximately two seconds The sonar is switched off Note that you must NOT use the on off switch on the computer only this Power button on the Sonar Control Panel 3 Switch off the display monitor If the sonar is switched off by mistake before the transducer has be hoisted or you ha...

Page 12: ...S Zoom Record Off Centre Position Track Manual Target Track Auto Search TRAIN SIMRAD Main switch This is the sonar s on off switch It has been previously explained SYMBOL CD015022C A B C D Symbol These buttons allow you to enter four different markers on the sonar picture Target marker A Own ship B and Circle marker C The markers will be placed at the cursor s location when you press the button Ev...

Page 13: ...r The trackball is used to move the cursor on the display The Menu button is used to hide the menu while the Select button is used to make selections on the display The View and Object buttons open specific short cut menus Tilt In this field you find the buttons used to tilt the sonar beam up or down You can also start an automatic tilt program to carry out automatic searches Train This field cont...

Page 14: ...n provided by this presentation The Catch data presentation for purse seining is shown on the right hand side remove the menu It shows all the net data relative to the target and the bottom as well as relevant target data Bow Up Vertical The Bow up Vertical mode is specially designed for purse seining The picture is divided into three sections where the left side is a bow up presentation The upper...

Page 15: ...en you select Target Track the target will automatically be moved to the screen centre Dual The Dual modes are both kind of two sonars in one operation where each presentation is updated for every second transmission All settings can be set individually for each of the two presentations This makes the dual mode especially useful if you wish to improve your settings as you can compare the two prese...

Page 16: ...the Select button Menu structure The menu field on the SP90 sonar display contains several different buttons tabs and parameter dialogues CD15009A A C D E F B A Sonar type The top field indicates the sonar in operation This is not a button B Mode selection This button is used to display the current mode You can click it to select a different operational mode C Tabs These selections on the right ha...

Page 17: ...uttons in each menu field have three functions You can select a lower parameter value You can select a higher parameter value You can open the applicable parameter dialogue C D015010A B A C A Decrease Position the cursor on the left side the button Observe the arrow symbol change to a minus sign Decrease the parameter by pressing the Select button on the Sonar Control Panel B Increase Position the...

Page 18: ...e applied to all modes Range Select the current range Tilt Select the sonar beam s vertical angle Bearing Add a white bearing line to your sonar picture Gain This setting controls the amplification of the received echoes Pulse form The standard pulse form is FM Auto If you experience a lot of reverberation from the bottom decrease the pulse length In good water conditions while searching for scatt...

Page 19: ...one mode the setting will be applied to all vertical modes Range Select the current range Bearing Use this function to adjust the bearing of the white audio channel line Gain This is the analogue gain If you activate the AGC function this gain setting is ignored Pulse form The standard pulse form is FM Auto If you experience a lot of reverberation from the bottom decrease the pulse length In good ...

Page 20: ...presentation The chosen resolution is shown in the colour bar below the button Display gain This function controls the amount of echo that are displayed Use this control together with Gain to control the sonar s sensitivity Colour threshold Click this button to control how many colours to use in the echo presentation Colours Control how bright colours you wish to use Panel backlight This function ...

Page 21: ...te for the ship s movements in the sea Movements This function makes it possible to estimate the position of a tracked school at a given time Track window This command enables you to adjust the size of the window the sonar places on the chosen target A larger track window will enable the system to track a large target more easily but the system will be more susceptible to background noise Smaller ...

Page 22: ...tific purposes When enabled the sonar will provide special information on an ethernet port Fish alarm This function makes it possible to set up the sonar to warn you when a school of fish are detected inside the selected sector The selected sector is displayed with white dashed lines in the horizontal sonar picture User setting This function is used to store the parameter settings for different ty...

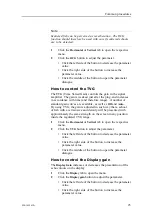
Page 23: ...screen Off button In order to restore the previous menu location 1 Move the cursor to the far left or far right side of the display 2 Observe that the menu appear 3 Click the Full screen On button How to simplify the menu You can easily reduce the number of buttons on the sonar menus This can be useful if you never use them 1 Press theDisplay tab to open the menu 2 Click the Menu button at the bot...

Page 24: ...GC Automatic Gain Control adjusts the gain in the sonar s preamplifier circuitry This gain depends on the strength of the incoming echo signal The result is a filter effect reducing noise and reverberation The AGC has four different settings 1 Click the Horizontal or Vertical tab to open the respective menu 2 Click the AGC button to adjust the parameter Click the left side of the button to decreas...

Page 25: ...ell as Off and Auto By using TVG the gain is adjusted in such way that a school of fish with a certain size and density will be presented with approximately the same strength on the screen in any position inside the regulated TVG range 1 Click the Horizontal or Vertical tab to open the respective menu 2 Click the TVG button to adjust the parameter Click the left side of the button to decrease the ...

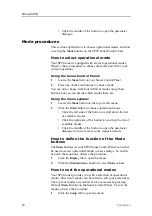
Page 26: ...l mode Click the left side of the button to scroll down the list of available modes Click the right side of the button to scroll up the list of available modes Click the middle of the button to open the parameter dialogue for direct access to the requested mode How to define the function of the Mode buttons The Mode buttons on your SP90 Sonar Control Panel can either be used to select operational ...

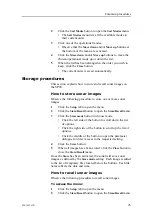
Page 27: ...en the menu 2 Click the Store Recall button to open the Store Recall menu 3 Click the Store mode button to choose mode Click the left side of the button to scroll down the list of options Click the right side of the button to scroll up the list of options Click the middle of the button to open the parameter dialogue for direct access to the requested setting 4 Click the Store button 5 When all ima...

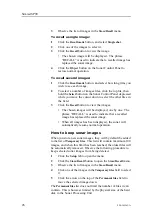
Page 28: ...yed one by one The phrase RECALL is used to indicate that a recalled image has replaced the sonar image When all images has been displayed the sonar will automatically resume normal operation How to keep sonar images When you store new sonar images they will by default be added to the list of Temporary files This list will contain maximum 100 images and when this limit has been reached the oldest ...

Page 29: ... to present the current file name Observe that an on line keyboard opens to allow you to enter characters 6 Place the cursor at the beginning of the current file name and click the Del Delete button on the on line keyboard to remove the characters in the current file name Make sure that you do not delete the file name extension bmp 7 Click the necessary characters on the on line keyboard to build ...

Page 30: ... selected image Observe that a parameter dialogue opens to present the current file name Observe that an on line keyboard opens to allow you to enter characters 7 On the on line keyboard double click on the four coloured Windows button next to the spacebar Observe that the standard Windows Taskbar appears and that the Start menu is shown in the lower left corner of the display 8 On the on line key...

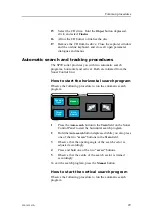
Page 31: ...llowing procedure to run the automatic search program TRAIN CD15022H Target Track Position Track Manual Auto Search 1 Press the Auto search button in the Train field on the Sonar Control Panel to start the horizontal search program 2 Hold the Auto search button depressed while you also press one of the two arrow buttons in the Train field 3 Observe that the opening angle of the search sector is ad...

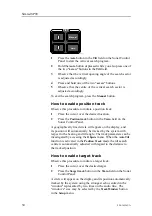
Page 32: ...e Sonar Control Panel A geographically fixed circle will appear on the display and its position will automatically be tracked by the system with respect to the bearing and tilt angle The track parameters can be investigated by accessing the Objects menu When the Auto Tilt function is activated in the Position Track mode the tilt search centre is automatically adjusted with regard to the distance t...

Page 33: ...ight violet colour How to add a target tracking line Observe this procedure to add a tracking line to a tracked target to indicate its movement history 1 Choose an operational mode with a horizontal view 2 Press the View button in the Cursor field on the Sonar Control Panel 3 Observe that the GeoView short cut menu appears on the display 4 Click the Target track option on the menu 5 Observe that t...

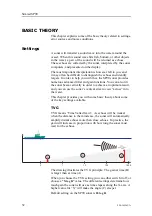
Page 34: ...ertically in order to achieve an optimum result and you can use the sonar s vertical slice to view across into the water This chapter provides you with some basic theory about some of the key settings available TVG TVG means Time Varied Gain As echoes will be weaker when the distance to them increase the sonar will automatically amplify distant echoes more than close echoes In practice the gain wi...

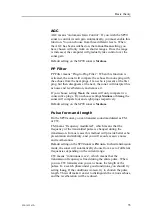
Page 35: ...edium or Strong the sonar will compare four and eight pings respectively Default setting on the SP90 sonar is Medium Pulse form and length On the SP90 sonar you can transmit sound modulated as FM or CW FM means frequency modulated which means that the frequency of the transmitted pulse is changed during the transmission In most cases this method will provide better echo presentation and stability ...

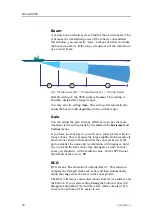
Page 36: ...n the Horizontal and Vertical menus If you have too much gain you will see a sonar picture with too many echoes This is because the large amplification presents all kind of noise and reverberation that the sonar picks up If the gain is smaller the noise and reverberation will disappear but if it is too small the fish echoes may disappear as well In most cases you should try with a medium value On ...

Page 37: ...sion will provide you with a longer range Tilt The sonar beam can be tilted vertically in steps of 1 degree and the chosen tilt is shown on the sonar picture At 0 degrees tilt you will transmit the sonar beam in parallel with the sea surface while 90 degrees tilt will direct it straight down CD015005D C B A The challenge will always be to find a tilt that prevents the fish echoes to be buried in r...

Page 38: ...ottom conditions The most common cause of acoustic noise is the propeller and the cavitation caused by its rotation Other typical noise sources on board your vessels are winches refrigerating plants power generators pumps and cranes If you experience problems you think are caused by noise try to find out which system that causes the noise and contact your dealer for advice Cavitation As the propel...

Page 39: ...ation due to the water disturbance caused by the wake the propellers and the cooling water spill Blocking The movement of your vessel through the water will often especially in higher sea states cause air bubbles to be generated and these bubbles will move along the hull This is called blocking In order to prevent this noise from disturbing your sonar operations it is important to lower the sonar ...

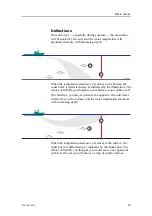
Page 40: ...al with the problem consult your dealer and or a certified ships electrician Layers and deflections Your sonar operations may also be disturbed by environmental situations that you are unable to control Two typical conditions are temperature and salinity layers and deflections caused by increasing or decreasing water temperature Temperature and salinity layers You may experience that temperature a...

Page 41: ...lustration The school of fish B you thought you would see is not visible at all On cold days you may experience the opposite the cold water will be close to the surface and the water temperature increases with increasing depth CD015005H B A When the temperature decreases A closer to the surface the sonar beam is deflected up as indicated by the illustration The school of fish B you thought you wou...

Page 42: ...r images 27 Reverberation theory 36 S Safety information 6 Salinity layers theory 38 Search program horizontal 29 Search program vertical 29 Sector transmission theory 35 Select operational mode 24 Setup menu 19 Short menu 21 Software releases 7 Sonar images burn on CD 28 Sonar images delete 27 Sonar images keep 26 Sonar images print 27 Sonar images recall 25 Sonar images rename 27 Sonar images st...

Page 43: ...Index 850 165261 A 41 ...

Page 44: ... 10 82 8066 071 2 ISBN 13 978 82 8066 071 8 2006 Simrad Strandpromenaden 50 P O Box 111 N 3191 Horten Norway Simrad AS Telephone 47 33 03 40 00 Telefax 47 33 04 29 87 simrad sales simrad com www simrad com ...

Reviews: