background image


Komptec GmbH. KT-90A User Manual


Page 34 of 52


v1.0a; 8 May 2016


10.


Maintenance  

 
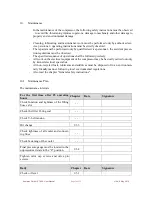
In the maintenance of the compressor, the following safety instructions must be observed 
– to avoid life-threatening injuries to persons, damage to machinery and other damage to 
property and environmental damage. 


Cleaning, lubricating and maintenance work must be performed only by authorized ser-
vice personnel - operating instructions must be strictly observed. 


The repairs must be performed only by qualified service personnel - the accident preven-
tion regulations must be observed. 


The specified sequence of operations shall be followed precisely. 


All work on the electrical equipment of the compressor may be basically carried out only 
by trained electrical specialists. 


All non-recycled fuels, lubricants and additives must be disposed of in an environmen-
tally friendly manner, following local environmental regulations. 


Also read the chapter "General safety instructions". 


10.1.


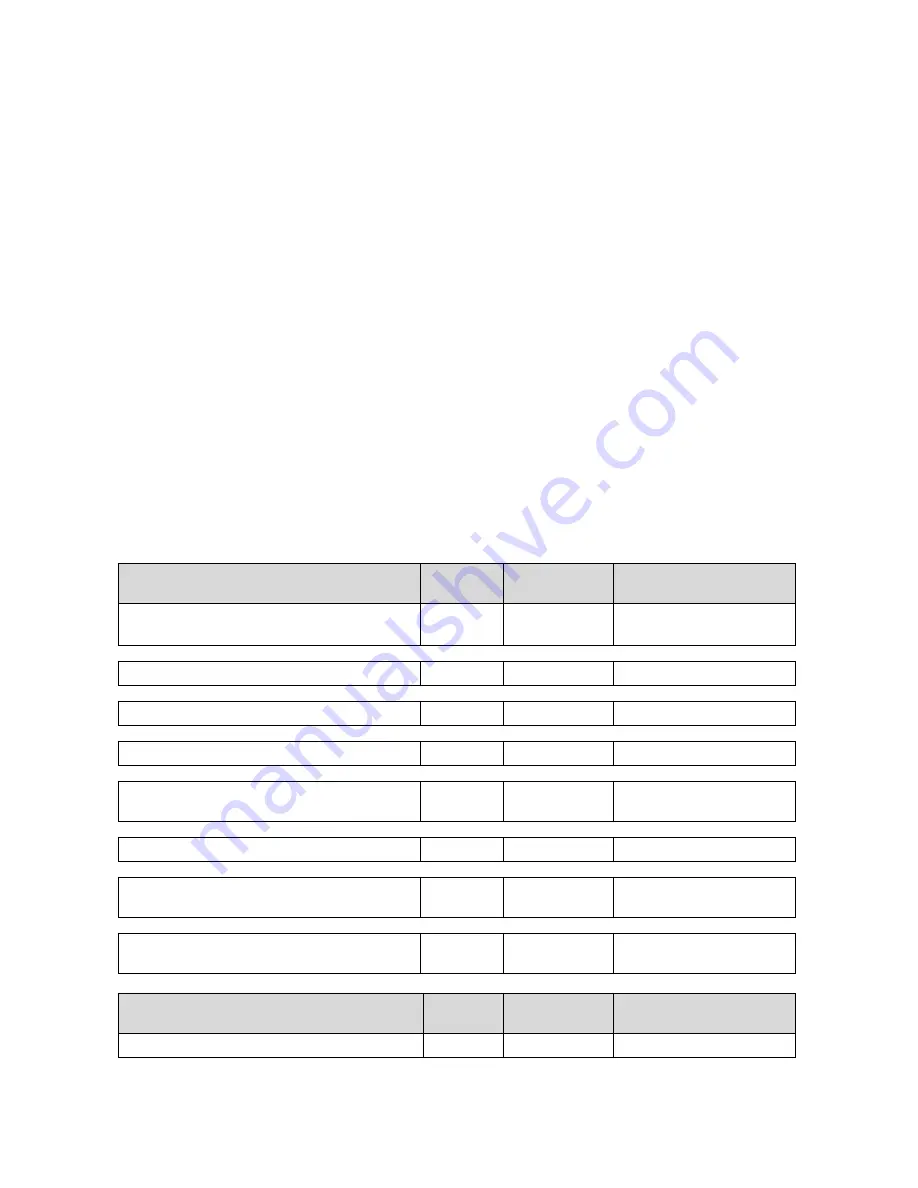
Maintenance Plan 

 
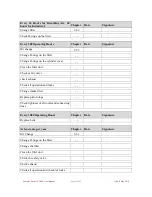
The maintenance intervals  
 

For  the  first  time  after  25  operating 
hours 

Chapter 

Date 

Signature 

Check function and tightness of the filling 
hose valve 

- - 


Check the filter O-ring seal 

- - 


Check V-belt tension 

- - 


Oil change 

9.3.3 


Check tightness of all cooler and connect-
ing lines 

- - 


Check fastening of the cooler 

- - 


Final pressure gauge must be located in the 
unpressurized state to the “0” position 

9.3.4 


Tighten  valve  cap  screws  and  valve  pin 
screws. 


Daily 

Chapter  Date 

Signature 

Check oil level 

9.3.1 


Summary of Contents for KT-90A

Page 1: ...Komptec GmbH KT 90A User Manual v1 0a 8 May 2016 Page 1 of 52 KT 90A HIGH PRESSURE AIR COMPRESSOR User Manual...

Page 2: ...Examples of training topics 10 1 12 Symbols Used 10 2 Product Description 12 2 1 Intended Use 12 2 2 Construction 12 2 2 1 Air Filter 12 2 3 Optional Equipment 13 2 3 1 Block Heater for operation belo...

Page 3: ...ng Hose 27 8 2 Adjusting and Setting 28 8 2 1 Operation 28 8 2 1 1 Starting the Motor 28 8 2 1 2 pressure buildup 29 8 2 1 3 To Fill the pressure cylinder 29 8 2 1 4 Condensate Drain 30 8 2 1 5 Turnin...

Page 4: ...Komptec GmbH KT 90A User Manual Page 4 of 52 v1 0a 8 May 2016...

Page 5: ...s than 5 C run for 5 minutes with output open with no pressure vessel attached then turn off Open Condensate Screws and drain condensate Close Output Fill Valve Attach Pressure Vessel to be filled Tur...

Page 6: ...rized to work on the compressor must have read the operating instruc tions The compressor has been built according to state of the art and recognized safety regulations Nevertheless it can be hazardou...

Page 7: ...O WARRANTY ORAL OR WRITTEN EXPRESED OR IMPLIED OTHER THAN THE ABOVE WARRANTY IS MADE WITH REGARD TO THIS KOMPTEC PROD UCT KOMTEC DISCLAIMS ANY IMPLIED WARRANTY OF MERCHATABIL ITY OR FITNESS FOR A PART...

Page 8: ...sure the manual is given to other users or subsequent owners in the event of resale keep the manual in good condition and ensure its contents remain undamaged do not remove tear or re write any part o...

Page 9: ...operator Any failure to comply with the safety instructions in this manual or on the compressor can result in injury or death Read the KOMPTEC Instruction Manual All compressor operators mainte nance...

Page 10: ...e operating elements Explanation of the operating instructions for the operating personnel Special experience of the operator in handling the compressor The use of input materials tools and auxiliary...

Page 11: ...of 52 v1 0a 8 May 2016 Danger Specifications or instructions and prohibitions to prevent personal injury or substantial property damage Mark for performing an action by the operator Enumeration Hint U...

Page 12: ...perating instructions and comply with the inspection and maintenance schedules The KT90A is tailored to the specific requirements of filling air tanks Its construction has been designed for this purpo...

Page 13: ...acked and must be used within for 24 months of their seal date Once the cartridge is removed from its vacuum pack and put into service it has a one year life independent of compressor usage 2 3 Option...

Page 14: ...lter is incorpo rated in the housing for the KT 90A In the gasoline version of the KT 90 an intake filter must be mounted in the lid of the com pressor when used for com pressing breathing air The int...

Page 15: ...mpressor and per form maintenance and repairs the personnel are regularly instructed in all applicable questions regarding occupa tional safety and environmental protection and knows the operating ins...

Page 16: ...ly identified Only authorized personnel should operate the compressor Make sure that training must be performed by an experienced person Work on electrical equipment of the compressor may only be perf...

Page 17: ...work Cleaning of flexible hoses connections and fittings at the beginning of maintenance is important Aggressive or flammable cleaning agents should not be used Before cleaning the compressor cover al...

Page 18: ...Hazard statements for dealing with the filter and pressure vessels Never remove reservoir cap or pipe connection parts under pressure The KT 90A has a container filter for dynamic load This pressure v...

Page 19: ...er from heat generated by the exhaust of the Internal Combustion Engine Wait 30 minutes after switching off the engine before carrying out maintenance work Danger derived from the noise emitted by the...

Page 20: ...DIN EN ISO 13857 2008 DIN EN 1012 1 2010 DIN EN 60204 1 2006 Angewendete nationale Normen und technische Spezifikationen AD 2000 Merkbl tter TRG 400 Technische Regeln Druckgase Abs F llanlagen TRG 401...

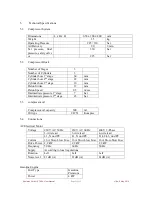
Page 21: ...on Stroke 17 mm Piston Speed 0 5 m sec Intermediate pressure 1st stage 7 bar Intermediate pressure 2nd stage 45 bar 5 3 compressor oil Compressor oil capacity 300 ml Oil type CL751 Komptec 5 4 Connect...

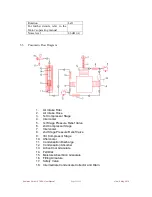
Page 22: ...2 Air Intake Hose 3 1st Compressor Stage 4 Intercooler 5 1st Stage Pressure Relief Valve 6 2nd Compressor Stage 7 Intercooler 8 2nd Stage Pressure Relief Valve 9 3rd Compressor Stage 10 Aftercooler 11...

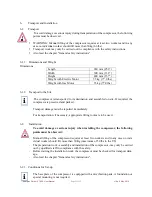
Page 23: ...ed to its destination and assembled on site If required the compressor is preserved and packed Transport damage must be reported immediately For transportation if necessary appropriate lifting tools a...

Page 24: ...that near the intake point are no motor vehicles with the engine running l Physical Do not operate near open flames fumes 6 3 Placement Place the unit on a firm surface Place the unit horizontally Sp...

Page 25: ...pressor with the filling valve open for a few minutes To prevent fire hazards and to ensure adequate ventilation place the compressor in operation in at least 0 5m from buildings and other equip ment...

Page 26: ...rst start that all tools and foreign objects were removed from the compressor For three phase motors check the motor rotation direction prior to operation Also read the chapter General safety instruct...

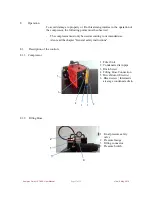
Page 27: ...only be used according to its intended use Also read the chapter General safety instructions 8 1 Description of the controls 8 1 1 Compressor 1 Filter Unit 2 Condensate drain pipe 3 Drain Screw 4 Fil...

Page 28: ...ed Only approved and current air receivers and air tanks DOT T V etc should be filled Only compressed air containers and bottles that are approved for the in tended operating pressure filling pressure...

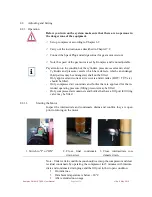
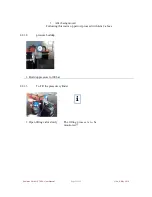
Page 29: ...a 8 May 2016 After being moved Following this warm up period proceed with item 2 above 8 2 1 2 pressure buildup 1 Build up pressure to 100 bar 8 2 1 3 To Fill the pressure cylinder 1 Open filling valv...

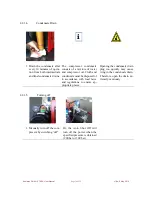
Page 30: ...ter and compressor oil Cloth and condensate must be disposed of in accordance with local laws and regulations to ensure ap propriate places Opening the condensate drain plug too quickly may cause icin...

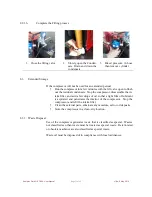
Page 31: ...compressor disassemble the in take filter and add a few drops of oil so that a light film of lubricant is aspirated and penetrates the interior of the compressor Stop the compressor and refit the inta...

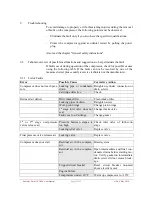
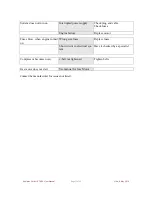
Page 32: ...ve Action Compressor does not reach pres sure Leaking pipe or condensate drain Retighten cylinder connection or drain screws Cartridge defective Check Reduced air deliver Dirty intake filter Clean int...

Page 33: ...e Check fuses Engine failure Replace motor Fuses blow when engine turned on Wrong size fuses Replace fuses Short circuit in electrical sys tem Have it checked by a specialist Compressor becomes noisy...

Page 34: ...work on the electrical equipment of the compressor may be basically carried out only by trained electrical specialists All non recycled fuels lubricants and additives must be disposed of in an environ...

Page 35: ...hange O rings on the cylinder cover Clean the filter unit Check safety valve check exhaust Check all operation and leaks Change intake filter Replace piston rings Check tightness of all cooler and con...

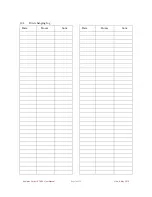
Page 36: ...Komptec GmbH KT 90A User Manual Page 36 of 52 v1 0a 8 May 2016 10 2 Filter changing log Date Hours Sum Date Hours Sum...

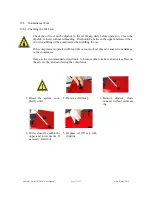
Page 37: ...the compressor when refilling the oil If the compressor is operated with too little or too much oil this can cause serious damage to the compressor Only use the recommended oil section 4 3 because ot...

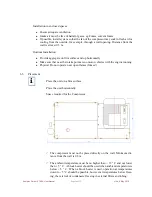
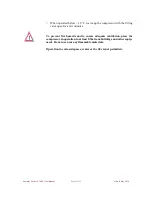
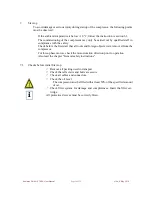
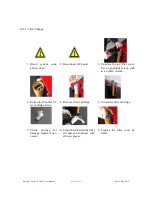
Page 38: ...3 Unscrew the air filter cover Use an appropriate tool such as an Allen wrench 4 Extraction Tool for fil ter cartridge screw 5 Remove filter cartridge 6 Insert new filter cartridge 7 Check O rings for...

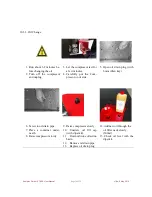
Page 39: ...4 Carefully put the Com pressor on its side 5 Open oil drain plug with 6mm Allen key 6 Screw in oil drain pipe 7 Place a container under neath 8 Raise compressor slowly 9 Raise compressor slowly 10 Un...

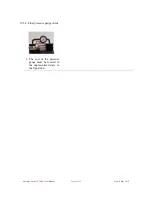
Page 40: ...Komptec GmbH KT 90A User Manual Page 40 of 52 v1 0a 8 May 2016 10 3 4 Final pressure gauge check 1 The end of the pressure gauge must be located in the unpressurized state to the 0 position...

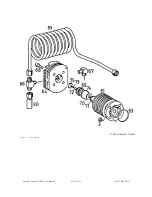
Page 41: ...Komptec GmbH KT 90A User Manual Page 41 of 52 v1 0a 8 May 2016 86 87 87 79 87 80 77 79 Figure 1 Exploded View 2016 KompTec GmbH...

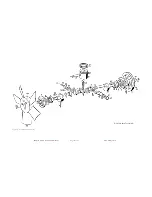
Page 42: ...Komptec GmbH KT 90A User Manual Page 42 of 52 v1 0a 8 May 2016 Figure 2 Crankshaft with Pistons 2016 KompTec GmbH...

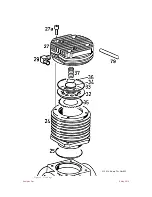
Page 43: ...Komptec GmbH KT 90A User Manual Page 43 of 52 v1 0a 8 May 2016 Figure 3 First Stage 2016 KompTec GmbH...

Page 44: ...Komptec GmbH KT 90A User Manual Page 44 of 52 v1 0a 8 May 2016 86 87 Figure 4 Second Stage 2016 KompTec GmbH...

Page 45: ...Komptec GmbH KT 90A User Manual Page 45 of 52 v1 0a 8 May 2016 Figure 5 Third Stage 2016 KompTec GmbH...

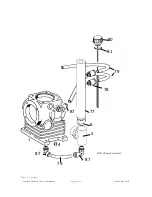
Page 46: ...Komptec GmbH KT 90A User Manual Page 46 of 52 v1 0a 8 May 2016 78 80 5 77 79 0 79 87 0 6 87 87 0 81 0 78 Figure 6 Crankcase 2016 KompTec GmbH...

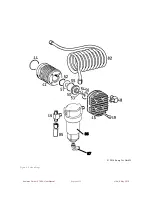
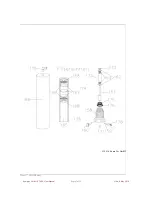
Page 47: ...Komptec GmbH KT 90A User Manual Page 47 of 52 v1 0a 8 May 2016 Figure 7 Filter Housing 2016 KompTec GmbH...

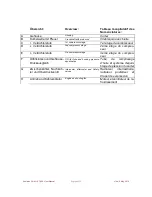
Page 48: ...stage 2 me tage du compres seur E 3 Verdichterstufe 3rd compressor stage 3 me tage du compres seur F lf llstutzen und Geh use Druckausgleich Oil filler tube and housing pressure equalization Tube de...

Page 49: ...1er tage 910190 020 1 Kolbenbolzen Piston pin Axe de piston 910200 021 2 Sicherungsringe f r Kol benbolzen Piston pin snap ring Anneaux d arr t pour axe de pis ton 910210 022 1 Kolbenring mit O Ring...

Page 50: ...ilfeder Intake valve spring Ressort soupape d admission 910710 072 1 Ausla ventil Exhaust valve Soupape d chappement 910720 073 1 Ausla ventilfeder Exhaust valve spring Ressort soupape d chappement 91...

Page 51: ...ch Adapter cooling fan Ventilateur 911010 102 1 Pa feder Adjustment spring Ressort d ajustage 911020 104 1 Senkschraube Sink bolt 911040 105 3 Sechskantschrauben Hex screws Vis t te hexagonale 911050...

Page 52: ...c Kompressoren Technik GmbH Gutenbergring 3 63110 Rodgau Telefon 49 0 6106 2661787 Telefax 49 0 6106 2662829 Email kontakt komptec de Service Komptec Kompressoren Technik GmbH Gutenbergring 3 63110 Ro...

Reviews: