METHOD FOR REPLACING AIR CLEANER ELEMENT
1.
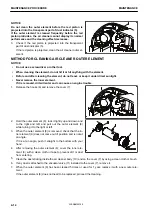
Release the hooks (6) and remove the cover (7).
2.
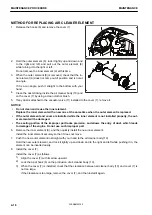
Hold the outer element (8), rock it lightly up and down and
to the right and left, and pull out the outer element (8)
while turning it to the right or left.
Do not remove the inner element (9) at this time.
3.
When the outer element (8) is removed, check that the in-
ner element (9) does not come out of position and is not at
an angle.
If it is at an angle, push it straight to the bottom with your
hand.
4.
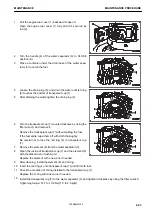
Clean the dust sticking inside the air cleaner body (10) and
on the cover (7) by using a clean cloth or brush.
5.
If any dust is attached to the vacuator valve (11) installed to the cover (7), remove it.
NOTICE
• Do not clean and reuse the inner element.
Replace the inner element with a new one at the same time when the outer element is replaced.
• If the outer element and cover are installed while the inner element is not installed properly, the out-
er element will be damaged.
• The sealing portion of the improper part lacks precision, and allows the entry of dust, which leads
to damage of the engine. Do not use such improper part.
6.
Remove the inner element (9), and then quickly install the new inner element.
Install the inner element securely so that it does not move.
7.
Push the new outer element in straight with your hand to the air cleaner body (10).
Hold the new outer element, and rock it lightly up and down and to the right and left while pushing it in, the
element can be inserted easily.
8.
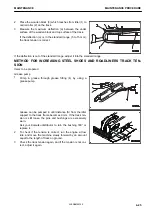
Install the cover (7).
Install the cover (7) as follows.
1) Align the cover (7) with its arrow upward.
2) Lock the tip of hook (6) on the protrusion of air cleaner body (10).
3) When the cover (7) is installed, check that the clearance between air cleaner body (10) and cover (7) is
not too large.
If the clearance is too large, remove the cover (7), and then install it again.
MAINTENANCE PROCEDURE
MAINTENANCE
4-16
WENAM00150
Summary of Contents for PC30MR-5
Page 2: ......
Page 66: ...WENAM00150 ...
Page 69: ... 14 Engine rear cover 15 Cooling cover 16 Battery OPERATION GENERAL VIEW 3 3 WENAM00150 ...
Page 325: ...SPECIFICATIONS 5 1 WENAM00150 ...
Page 363: ...REPLACEMENT PARTS 7 1 WENAM00150 ...
Page 370: ...WENAM00150 ...
Page 379: ......
Page 380: ......


