Vers. 100822 Page 15
In case of error, you will see:
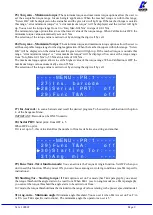
- - - - - - - - S T E P - - 1 - - - - -
S t a r t t e s t
E r r . R e p e a t S c r e w i n g
Just repeat the test.
6. Press ESC to abort the calibration process.
Press OK, then the display will show:
- - - - - - - - S T E P - - 1 - - - - -
E n t e r t o r q u e v a l u e :
0 0 . 0 1 N m
Set the torque value by selecting each digit individually pressing and and press OK to confirm it, then
press OK again to save. You will see:
- - - - - - - - S T E P - - 2 - - - - -
E n t e r t h e
p e r c e n t a g e : 2 5 %
7. Set the percentage of the second torque to 25% by pressing and press OK.
(25% is just an example).
8. Repeat the procedures described on points 4 and 5.
9. When calibration ends, “Setting end” will be displayed. You will hear two beep sounds, too.
Now you are ready to work and see the correct torque on the display.
WARNING:
-
Calibration values will be referred to the parameters of the control unit which are set during
calibration, i.e. if you modify speed or torque, the unit will need to be recalibrated. During calibration
when a screwing is not carried out correctly or if for any reasons you’re not sure of the torque value
it is possible to repeat it. A wrong screwing can affect the precision of the calibration.
-
Calibration is carried out for two torque levels optionally chosen. The minimum calibration interval
is 5% (example: if I have to work at 50%, I can calibrate at 45% and 55%). In this case, if for any
reasons I need to work at torque percentages which are lower or higher than the min-max ones set
during the calibration, they will be analyzed and displayed anyway but since they won’t be based on
effective data the torque value displayed may be not accurate.
-
During calibration it is not possible to go back to the previous screen. Press ESC to stop calibration
and then repeat the screwing cycles.

