11.7
Section 11
Reassembly
11
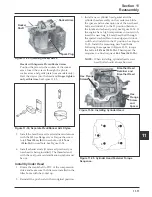
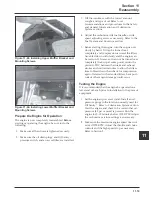
Figure 11-19. Closure Plate Sealant Pattern.
3. Install the closure plate to the crankcase and
install the twelve hex flange screws. Tighten the
screws hand tight.
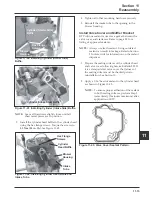
4. Torque the fasteners, in the sequence shown in
Figure 11-20 to
24.4 N·m (216 in. lb.)
.
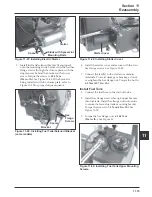
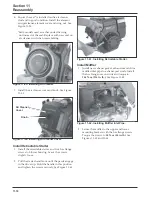
Figure 11-22. Installing Oil Pump Cover.
Install Oil Pump
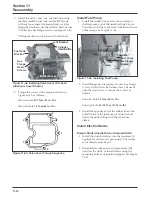
1. Lubricate the oil pump cavity and oil pump
rotors with engine oil. Install the outer and inner
oil pump rotors. See Figure 11-21.
Figure 11-20. Closure Plate Fastener Torque
Sequence.
1
2
3
4
5
6
7
8
9
10
11
12
Inner Rotor
Balance
Shaft
Outer
Rotor
Figure 11-21. Installing Oil Pump Gears and O-Ring.
2. Install the O-Ring in the groove in the closure
plate.
3. Install the oil pump cover (machined side toward
O-Ring). Secure with three hex flange screws. See
Figure 11-22.
NOTE:
Apply sealant to the oil pump cover hex
flange screws to prevent leakage.
Torque the screws as follows:
First time installation on a new closure plate:
6.2 N·m (55 in. lb.)
.
Reinstallation on a used closure plate:
4.0 N·m (35 in. lb.)
.
Oil Pump Cover
Hex Flange
Screws


