KLINDEX
KLINDEX
KLINDEX
KLINDEX
S.
S.
S.
S.
R
R
R
R
....
L
L
L
L
....
L E V I G H E T O R
T 5 - T 7
Data ultimo aggiornamento: 11/05/2007
Pag. 9 di 23
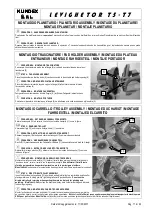
ACCENSIONE / STARTING UP / DEMARAGE / ANSCHALTEN / PUESTA EN MARCHA
MACHINE STARTING UP
Switch the machine on usin
g
the switch only, never pulling in or out the plug. Never pull the electric cable to switch or cut the
power off. Hold the cable from the head to plug it into the electric socket, do not plug the cable in from the wire.
SAFETY SWITCH:
A safety switch is placed at the back of the handle to avoid accidental starting up. Always press this
safety switch
(2) to switch the machine on
and then push and hold the
control levers
(3) to start up.
IMPORTANT:
If any problem occurs during the work, let go of all the levers immediately and the machine will stop automatically. Do not try to start the machine if the
handle is up or it is not in a comfortable position for the operator. It could be dangerous for the machine and the operator.
DEMARAGE DE LA MACHINE.
Faire partir la machine en se servant uniquement de l’interrupteur, jamais en branchant ou en débranchant la machine. Ne
jamais tirer sur le fil électrique pour débrancher la machine. Ne jamais forcer sur le câble électrique pour l’infiler dans la prise de courant.
INTERRUPTEUR DE SURETE:
l’interrupteur de sûreté est placé derrière le manche, celui-ci empêche à la machine de partir accidentellement. Pour démarrer la
machine vous devez toujours appuyer sur
cet interrupteur de sûreté (2)
et ensuite actionner le
LEVIER DE COMMANDE (3)
pour faire partir la machine.
NOTE IMPORTANTE:
Si vous avez quelques difficultés durant le travail, lâchez immédiatement les leviers et la machine s’arrêtera automatiquement. Ne pas essayer
de mettre en marche la machine si le manche est position soulevée ou s’il n’est pas dans une position confortable pour l’opérateur, cela pourrait être dangereux pour
l’opérateur et pour la machine.
ANSCHALTEN DER MASCHINE
Maschine nur mit den Schalter anschalten, nie durch rein und raus ziehen vom Stecker. Nie die Elektrokabel ziehen um
den Strom aus zu schalten. Nie am Stecker mit kraft schieben um ihn an der Steckdose zu verbinden.
SICHERHEITSSCHALTER:
Auf der hinteren Seite der Maschine ist ein Sicherheitsschalter der verhindert das die Maschine ungewollt angeht. Um die Maschine zu
starten muss man erst diesen
Sicherheitsschalter
( 2 ) betätigen und dann die
Hebeln
( 3 ) um die Maschine zu starten.
WICHTIGE NOTIZ:
Bei jeder Art von Schwierigkeit die bei der Arbeit vorkommen könnte, lassen sie sofort alle Hebeln los und die Maschine schaltet sich automatisch
aus. Versuchen Sie nicht die Maschine an zu schalten wenn der Griff nicht in einer gemütlichen Position für den Arbeiter ist, es könnte für ihn und für die Maschine
gefährlich sein.
PUESTA EN MARCHA DE LA MAQUINA
Poner en marcha la maquina unicamente por el interruptor, nunca conectando e desconectando el enchufe.
Jamàs tirar el cable eletrico para apagar o desconectar la corriente. Jamàs presionar sobre el cable para conectar a la toma de corriente.
INTERRUPTOR DE SEGURIDAD:
Detras del mango esta colocado un interruptor de seguridad que no permite a la maquinq de arrancar accidentalmente.Para
poner en marcha la maquina hai que empujar este
interruptor de seguridad
(2) y despues se pueden accionar las
levas de
mando
(3) para hacer arrancar la
maquina.
NOTA IMPORTANTE :
Si durante el trabajo se presentan algunas dificultades, deje inmediatamente las levas y la maquina se para automaticamente. No intentar de
poner en marcha la maquina si el mango esta levantado o si no esta en una posiciòn confortable para el trabajador. Podria ser peligroso para la maquina y tambien
para el trabajador.
MONTAGGIO SERBATOIO / TANK ASSEMBLY / MONTAGE DU RESERVOIR /
MONTAGE TANK / MONTAJE TANQUE
OPERAZIONE: MONTAGGIO SERBATOIO
Prima di collegare la levigatrice alla rete elettrica porre il serbatoio dell’acqua sull’asta del
comando macchina come mostrato in figura. Fissare il serbatoio con la staffa indicata con (1)
bloccando quest’ultima con il pomello filettato.
Inserire il capo libero del tubo indicato con (2) nel ugello posizionato nella parte inferiore del
serbatoio. Inserire l’altra estremità nel foro presente sulla carcassa per l’utilizzo del
trascinatore, nel foro presente sul planetario per l’utilizzo di quest’ultimo
STEP: TANK ASSEMBLY
Fasten water tank on the machine control pole before connecting polishing machine to the
power socket as pictured. Fasten tank with bracket (1) blocking it with the ball grip pictured.
Pull free pipe extremity (2) in the nozzle of the lower part of the tank. Pull the opposite
extremity in the case hole for the pad holder use, in the planetario hole for the latter.
OPERATION: MONTAGE DU RESERVOIR
Avant de brancher la machine à la prise de courant mettre le réservoir d’eau sur le manche
de comandes machine comme montré sur l’image. Fixer le réservoir avec la patte indiquée
avec le n° 1 en bloquant celle-ci avec le pommeau fileté.
Insérire le bout libre du tube indiqué avec le n° 2 dans l’embout placé sur la partie inférieure
du réservoir. Insérer l’autre extrémité dans le trou présent sur la carcasse pour l’utilisation du
plateau entraineur, dans le trou présent sur le planétaire pour l’utilisation de celui-ci.
OPERAZION: MONTAGE TANK
Bevor Sie die Polliermaschiene am Strom verbinden legen Sie den Wassertank auf dem Stab
wie in der Abb. gezeigt. Den Tank mit dem Steigbügel verbinden mit ( 1 ) angezeigt,
blockieren Sie diese mit dem Gewinde.
Führen Sie den freien Kopf vom Schlauch mit ( 2 ) angezeigt in der Düse die sich auf der
unteren Seite vom Tank befindet. Führen Sie die zweite Extremität im Loch der sich am
Skelett befindet für die Nützung vom Verschieber, im Loch der sich am Planetar befindet für
die Nützung dieses.
2
1


