16
17
b. Parameter setting for photo shooting
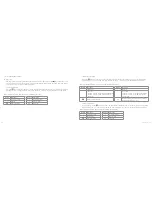
1. Image resolution
8.0 MP
3200 x 2400p
4:3
5.0 MP
2592 x 1944p
4:3
3.0 MP
2048 x 1536p
4:3
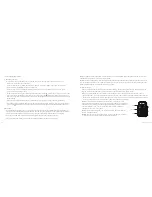
2. Capture mode
• Single shot:
The shooting mode is automatically set to single shot each time the camera is turned on.
Pressing the “Shutter” once will take one photo
• Triple shot:
Pressing the “Shutter” once will take three consecutive photos
• Time-lapse mode:
Takes one photo every 2s/3s/5s/10s/20s/30s until they key is pressed to stop, the card
is full or the power has run out
• Self-timer mode:
Select the self-timer delay time (0s, 5s or 10s), then press the “M” key to return to the
“Preview” state. Press the “Shutter” key once to start the timer. The self-timer indicator will
flash at the end of the delay time and take one photo. The system will then automatically
recover the shooting mode to single shooting. If the “Self-timer Delay Time” has been set,
but the unit is restarted without pressing the “Shutter” key, the machine will auto set the
“Self-timer Delay Time” to 0 seconds
Note:
Single shot, Triple Shot, Time-lapse mode and Self-timer modes cannot be activated at the same time
c. System parameter setting
1.
Beep:
Turning the key tones on or off
Note:
The camera will still beep when you start and stop a video recording. This cannot be turned off
2.
Green indicator light:
Please turn it on or off before self timing; the default setting is “ON”
3.
Time display:
Please set before using. The camera will auto record the shooting date and time of an image and
display it in the bottom right corner of the file
4.
Loop coverage:
When “ON”, the video/audio file will be automatically saved in a segment once every 15 minutes.
If it is not set, the video/audio file will be automatically saved in a segment once every 30 minutes.
Note:
The video length is actually determined by the file size, not the length of time. For example: When Loop
coverage is on for 15 minutes, if filming in a dark environment the video may record for a little longer than 15
minutes
5.
Auto standby:
Select the auto standby time to OFF, 2 minutes, 5 minutes or 10 minutes. Once selected, if there is
no operation, the timer will start and the camera will turn off input and output to enter standby mode at the end
of the time set. If there is any operation during countdown, the system will re-time. If the video recording or
shutter is operated in the standby process, the camera will wake up. The default standby time is set to OFF
6.
TV output format:
NTSC or PAL. The video format outputted to TV can be selected. If the selected format is
changed, the camera will restart to update the parameters
7.
Format:
Once you’ve confirmed that recorded files do not need to be saved, all files can be removed by formatting
Note:
lf there is no card inserted, the memory of the camera will be formatted. When a card is inserted, the card
will be formatted rather than the camera’s memory
[continued...]


