26
27
[...continued]
Using the camera
9. Standby mode
Turn the power switch to the “ON” position. The system will start working and it will enter preview mode
once initialization has finished. If there is no operation for the set time in the system settings, the system will
automatically enter standby power-saving mode. Pressing the “Record” or “Shutter” key, or any key on the remote
control, will wake the system up
Note:
Pressing keys on the TFT screen in standby mode cannot wake the system up
Note:
The LCD segment screen will not display anything in standby mode
10. AV output connection
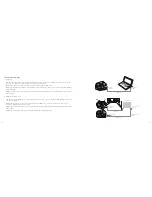
In preview state, connect the camera with the display device using an AV cable. All of the camera’s functions can
then be operated
Note:
After connecting with an audio and video display device, the TFT screen on the camera and the voice will
be turned off, and the audio and video will be displayed on the device’s display. The LCD segment screen on the
camera will display the corresponding function operations normally
11. HDMI output connection
In preview state, connect the camera with the high-definition display device using an HDMI cable. The camera’s
functions can then be operated
Note:
After connecting with the HDMI display device, the TFT screen on the camera and the voice will be turned
off and the audio and video will be displayed on the device’s display
Note:
The camera may be in an abnormal state if the HDMI cable is inserted or unplugged improperly when
connecting. It can be recovered once it is re-started and the LCD segment screen will display the corresponding
function operations normally
12. USB connection
• In startup state, use the USB cable to connect to a computer. Data stored on the micro SD card can be read and
the LCD segment screen will display the USB connection state icon
• The camera can be charged at any time by connecting to a computer with the USB cable
• The camera may be in abnormal state if the USB cable is inserted or unplugged improperly when connecting.
Restarting will recover the camera
13. Turning the TFT display on/off
When the camera is in any status, pressing the “Shutter” key for 3 seconds will turn the TFT display on or off.
Note:
The TFT display cannot be turned on or off by pressing the “Shutter” key on the remote control


