17
Assemble units as described herein only. To do otherwise
may result in instability. All screws, nuts and bolts must be
tightened securely and must be checked periodically after
assembly. Failure to assemble properly, or to secure parts
may result in assembly failure and personal injury.
Monitor Arms - Mounting the Monitor
Assembly Instructions
Mounting the Monitor
Note:
Maximum allowed weight of
monitor screen is 20 lb per monitor
mount.
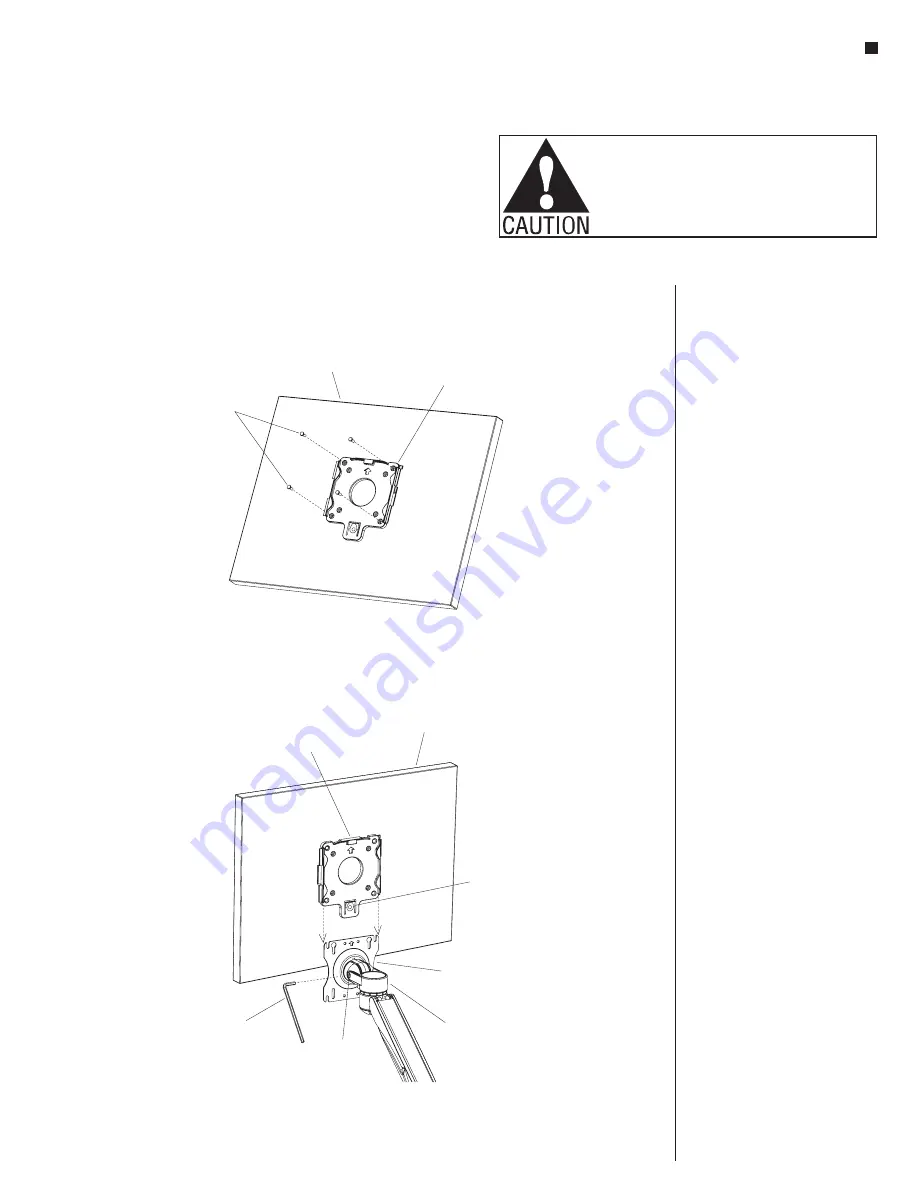
1. Orient the quick connect bracket so
that the arrow symbol points up.
Secure bracket to the back of the
monitor screen using the mounting
screws supplied by the user
(Figure 1).
2. Making sure the arrow symbol on
the faceplate of the monitor mount
assembly is facing up, slide connect
bracket onto faceplate until the
bottom tab of the connect bracket
clicks onto the faceplate (Figure 2).
3. To remove the monitor, depress
tab on the quick connect bracket
and remove from monitor mount
assembly (Figure 2).
4. If the monitor lowers or is too tight,
adjust the tension screw at the side
of the head of the monitor mount
assembly as shown using a
3
/
16
”
Allen key (Figure 2).
quick connect
bracket
Figure 1
mounting
screws
(user supplied)
monitor
Figure 2
3
/ ”
Allen key
16
quick connect
bracket
monitor
mount
assembly
faceplate
monitor
tab
tension
screw


