


ENGLISH
Chapter 5: KGUARD Web Client
102
DVR User’s Manual
« TIP »
To cancel any modifications and retain the existing settings, click
Refresh
.
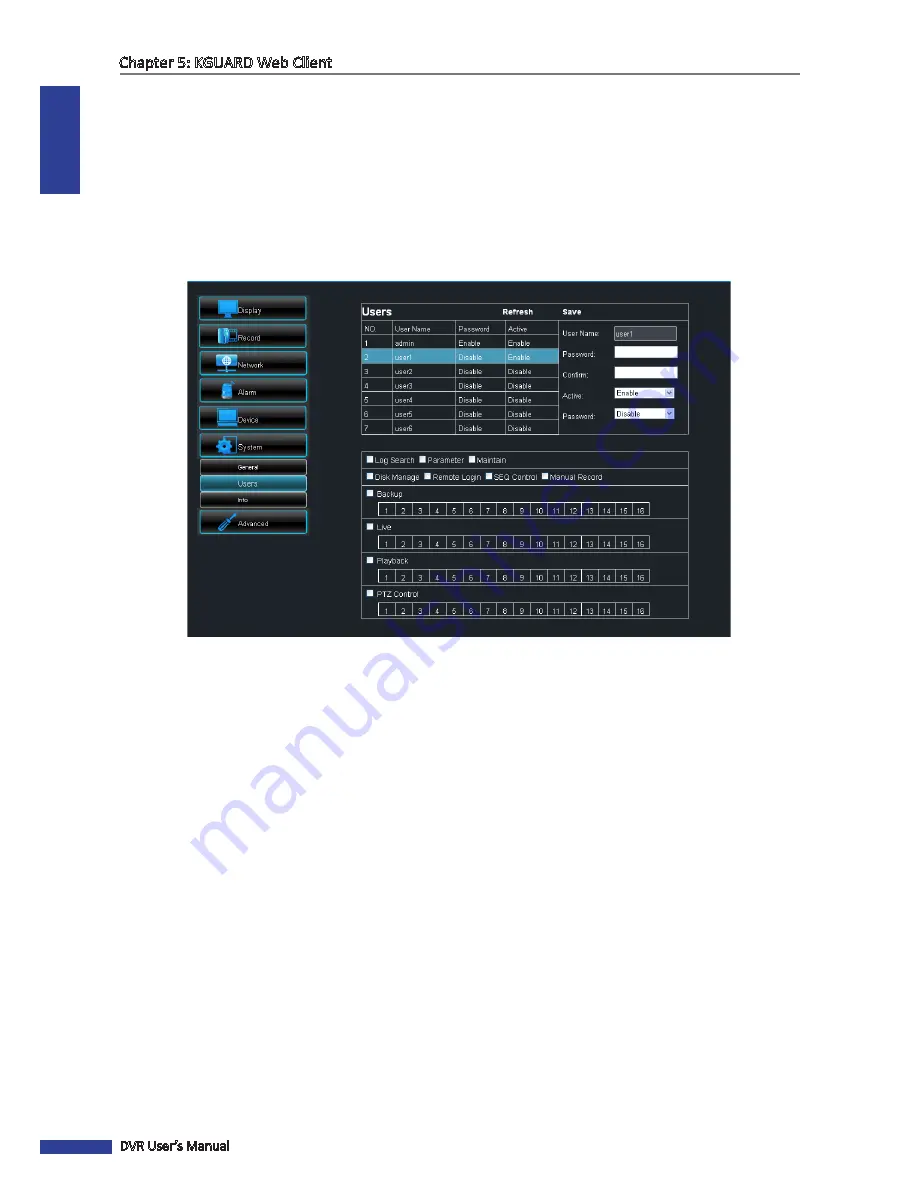
User Account Setup
To authorize user accounts, you must login with an administrator account and then do the following:
1
On the Main Menu, click
Remote Setting
.
2
On the left panel, click
System
>
User
. The Users screen appears.
3
Select the user account from the table.
4
On
User Name
, enter the desired user name.
5
Enter the desired password on the
Password
and
Confirm
fields.
6
On
Active
, select
Enable
. The access rights table appears below.
7
Enable
Password
.
8
Check the settings that the user is allowed to access on the access rights table.
9
When all settings are complete, click
Save
.
System Information
Use the Information menu to view the device and firmware information.
1
On the Main Menu, click
Remote Setting
.
2
On the left panel, click
System
>
Info
. The Information screen appears.


