background image

50

 EN

Preparations

Basic section

Application section

Knowledge section

4. D.AUDIO setting

Recording to a digital audio player

5.

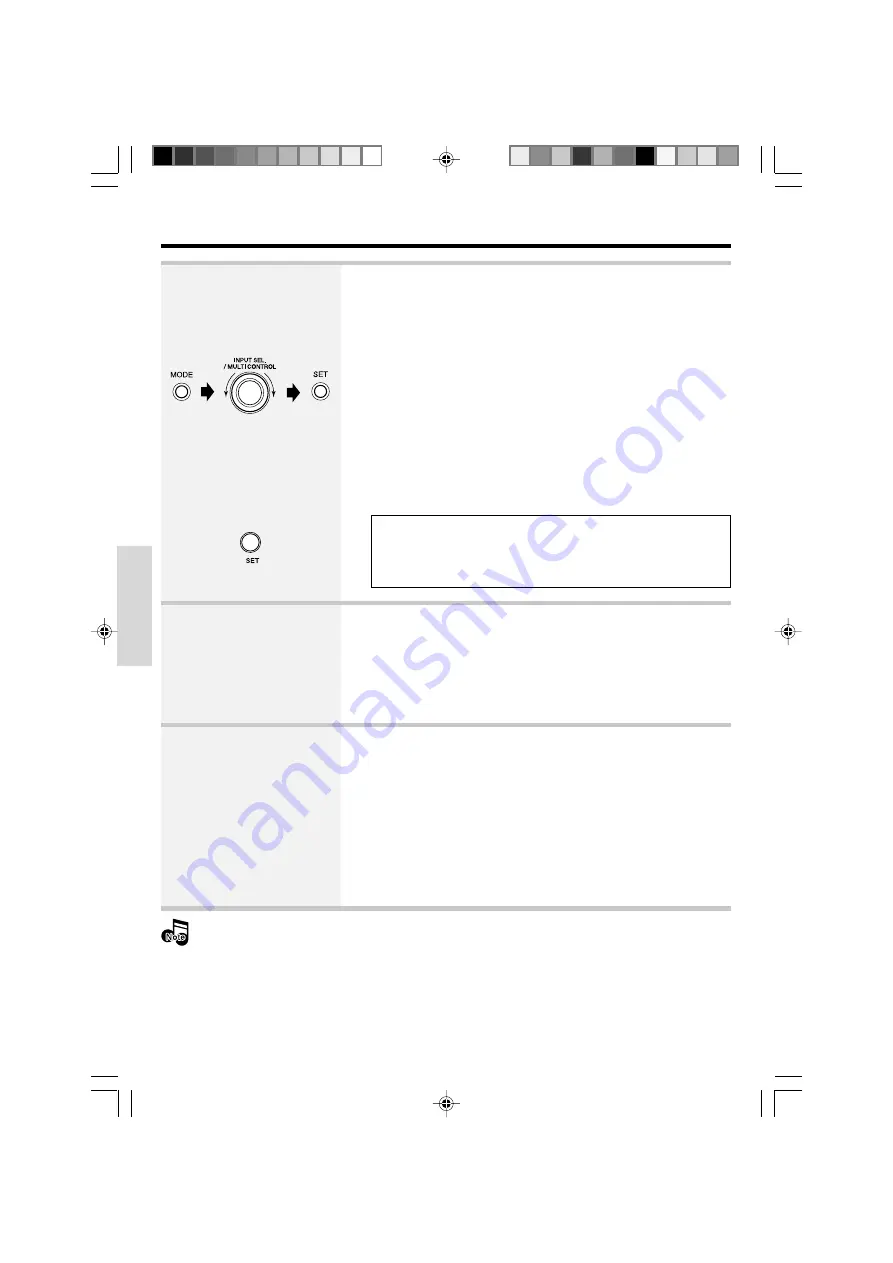
Preparing for recording

1

Press the MODE key, turn
the INPUT SEL./MULTI
CONTROL knob to select
“D.AUDIO OUT”. Then
press the SET key.

2

Confirm "REC OUT ON" and
set by pressing the SET
key.

Switch the output of the D.AUDIO (PHONES) terminal of this unit

from headphones output to digital audio recording output.

÷

Operation at the time of "

REC OUT ON

" causes return to "

HEADPHONE

".

÷

Please note that the volume may become high when switch-

ing "D.AUDIO OUT" while using headphones.

÷

Please pay attention to the volume setting as sound will

come from the speakers when switching to "REC OUT ON".

÷

Perform options setting for external recording.

Q

÷

Please refer to the instruction manual of the digital audio player for the

recording settings for the digital audio player.

6.

Start recording

1

Start recording with the digital audio player.

÷

For details, refer to the instruction manual of the digital audio player.

2

Start playback of the source (audio source) with this unit.

÷

When recording has been completed, perform the operation of step 

4

to return to "

HEADPHONE

".

÷

Return to "

HEADPHONE

" is made when the power is switched off.

÷

When CD repeat and/or program settings are made, the set contents

can be recorded.

After use, switch off the power for both units, and then disconnect the digital audio player con-
necting cord from the terminal of this unit.

÷

The 

Rec Out

  indicator (LED)

lights up.

*5613/46-51/EN

06.1.6, 0:54 PM

50

Summary of Contents for AX-7

Page 1: ...COMPACT HI FI COMPONENT SYSTEM INSTRUCTION MANUAL KENWOOD CORPORATION B60 5613 10 02 MA E X OC 0508 AX 7 ...

Page 2: ...E OF UNINSULATED DANGEROUS VOLTAGE WITHIN THE PRODUCT S ENCLOSURE THAT MAY BE OF SUFFICIENT MAGNITUDE TO CONSTITUTE A RISK OF ELECTRIC SHOCK TO PERSONS THE EXCLAMATION POINT WITHIN AN EQUILATERAL TRIANGLE IS INTENDED TO ALERT THE USER TO THE PRESENCE OF IMPORTANT OPERATING AND MAINTENANCE SERVICING INSTRUC TIONS IN THE LITERATURE ACCOMPANYING THE APPLIANCE CAUTION CLASS 1 LASER PRODUCT Beforeapply...

Page 3: ...urges 10 Overloading Do not overload wall outlets extension cords or integral convenience receptacles as this can result in a risk of fire or electric shock 11 Object and Liquid Entry Never push objects of any kind into this product through openings as they may touch dangerous voltage points or short out parts that could result in a fire or electric shock Never spill liquid of any kind on the prod...

Page 4: ...play contents of the display 38 Receiving broadcast station 39 RDS Radio Data System 43 Searching for a desired program type PTY search 44 Listening to external input sources 46 Adjusting the external input level TAPE VIDEO1 VIDEO2 TV AUX 46 Listening to the sound of a Kenwood digital audio player 47 Recording to a digital audio player 49 Option settings for external recording 51 Application secti...

Page 5: ...h the speaker package For front speakers red line 2m 2 For surround speakers blue line 2m 2 If any accessories are missing or if the unit is damaged or fails to operate notify your dealer immediately If the unit was shipped to you directly notify your shipper immediately Kenwood recommends that you retain the original carton and packing materials in case you need to move or ship the unit in the fu...

Page 6: ...ge generally a great deal of time and work are spent finding the best listening position such as changing speakers or furniture position while listening to the sound This function enables you to simply create it in a short time without laborious settings Digital Sound Equalizer feature This model is equipped with Digital Sound Equalizer by Digital Sound Processing which makes more detailed sound a...

Page 7: ...talSurround are registered trademarks of Digital The ater Systems Inc Manufactured under license from Dolby Laboratories DOLBY the double D symbol and PRO LOGIC are trademarks of Dolby Laboratories RDS Radio Data System tuner This model is equipped with an RDS tuner that provides several convenient tuning functions RDS Auto Memory to automatically preset up to 40 RDS stations broadcasting differen...

Page 8: ...wn in the diagram Only plug the AC power cord into an AC wall outlet once connections are completed CAUTION The magnet in the speaker may cause color irregu laritytotheTVorPCmonitor Placethespeakers far ther away from the TV set or PC monitor Malfunction of microcomputer If operation is not possible or erroneous display ap pears even though all connections have been made properly resetthemicrocomp...

Page 9: ...aker cord for surround Blue line Audio cord Audio cord 1 2 3 4 LS AXD7 L When subwoofer center and the two surround terminals are connected to the 3 1 channel speaker system to be sold later expansion to a 5 1 channel system is possible For details please refer to the operation instructions for your equipment Connect this only for setting the auto room equalizer and keep it disconnected at other t...

Page 10: ...he proper antenna connections Connect the anten nas properly according to the following instructions 1 2 3 How to connect the antenna The supplied antenna is for indoor use Place it as far as possible from the main unit TV set speaker cords and POWER cord and set it to a direction which provides the best reception AM loop antenna Antenna adaptor Commercially available parts FM outdoor antenna Lead...

Page 11: ...nput terminals of this unit Connection to a TV with video input terminal Use the accessory video cord for connection to the VIDEO terminal at the VIDEO OUT part of this unit Set TV aspect in the DVD CD settings according to the connected TV 4 3 or 16 9 s Connection to a TV with S video input terminal Use a commercial S video cord to connect to the S VIDEO terminal of the VIDEO OUT part of this uni...

Page 12: ...connection cords are plugged or unplugged with the power cord left plugged in malfunction or damage may result Connectionofotheraccessories Commercially available parts CAUTION Connect the components as shown in the diagram Only plug the power cord into an AC wall outlet once connections are completed AC POWER cord To AC wall outlet System connections Audio OUT Digital IN optical Audio OUT Cassett...

Page 13: ...TL L R kHz MHz TUNED ST AUTO RDS PTY P B C V F S Dolby Digital DTS MUTE A B 30 10 5 3 1 0 dB D Bass 1 RDM DigitalEQ REC PGM 2 PL RoomEQ 1 2 3 1 3 4 5 8 7 9 0 2 6 8 D Bass indicator 9 Level meters a 0 RDS indicator PTY indicator Tuner related indicators CD time display Clock display Frequency display Timer related indicators ˇ DigitalEQ REC indicator Q DVD CD related indicators 1 3 2 5 4 Mainamplif...

Page 14: ...gnals from the remote control unit 6 DVD CD tray 7 0 DVD CD open close key Used for opening or closing the DVD CD tray 8 6 Play Pause Band key DVD CD Used for selecting the DVD CD input and starting playback During DVD CD playback press to pause TUNER Used for selecting the TUNER input This key is also used to select the received broad cast band 9 7 Stop Tuning Mode key DVD CD Used for stopping a ...

Page 15: ...BASS TONE SOUND SELECTOR key Used to switch the function of the INPUT SEL MULTI CONTROL knob to the sound setting function MODE key Used to switch the function of the INPUT SEL MULTI CONTROL knob to menu selection mode SET key During MODE operation Used to confirm the selected item During SOUND operation Used to confirm the se lected item Used to confirm the program No at the time of DVD CD Clear ...

Page 16: ...r recall a preset station of the tuner 4 V F S key Select to produce a surround effect with only speakers installed at the front CLEAR VOICE key Used for switching the CLEAR VOICE effect LISTEN MODE key Selects Listen mode MODE key Used for entering the function setting mode 5 MULTI CONTROL fi keys Used to select the equalizer frequency band to be ad justed and to adjust various modes ENTER key Whe...

Page 17: ...isplay for the information displayed on screen AUDIO key U Used to select the audio at the time of DVD playback SUBTITLE key U Used to select the subtitles at the time of DVD play back MUTE key Used for muting the sound temporarily Loading batteries 1 Remove the cover 2 Insert batteries 3 Close the cover Insert two R03 AAA size batteries following the polarity indications DVD TUNER CONTROL PRE AMP...

Page 18: ...at and DVD R and DVD RW discs but depending on the recording unit the disc manufacturer etc playback sometimes may not be possible This unit may also be incapable of playing certain CD R RW discs depending on their properties recording condi tions etc ThisplayercannotplaybackdiscscompatiblewithCPRM CPRMistheabbreviationofContentProtectionforRecord able Media and it is a technique for copyright pro...

Page 19: ...ion of the region code it may sometimes unable to be played on this player due to certain restrictions Regioncodesintheworld The DVD players are given a region code according to the country or area it is marketed as shown in the follow ing map Professional use disc Air Line cabin service Indicates the region code where the disc can be played Number of voice languages recorded with the audio functi...

Page 20: ... format of the VCD and DVD discs to be played on the player as described below 1 Check if the video formats of the TV to be used and disc to be played match each other For details refer to the instructions provided with the TV and disc 2 When the TV is switchable between NTSC and PAL set the TV format according to the disc format When the video formats are different Try playing the disc If the vid...

Page 21: ...he Exif Ver 2 1 JPEG baseline method Image resolution Within 7680 x 7680 subsampling 4 2 2 4 2 0 Not compatible with progressive JPEG JPEG2000 This unit is compatible with discs written with ISO9660 level 1 or level 2 expanded format excepted Not compatible with discs written with packet writing This unit is compatible with closed multi session discs The maximum number of folders which can be play...

Page 22: ...6 Structure of CD and Video CD Video discs MP3 WMA JPEG Structure of discs with recorded MP3 WMA JPEG files CD and Video CD discs are divided into so called tracks File1 Folder1 File2 3 4 5 File1 Folder2 File2 3 4 5 A folder is the largest unit recorded on a disc A folder can be composed of one or more files but files also can be recorded directly on the disc without being in a folder There are al...

Page 23: ...ay 8 07 After the hour is input the minute display starts to blink 1 Adjust the hour 2 Press the SET key Turn POWER ON 4Adjust the minute If you made a mistake restart from the beginning When the time of day has been set by pressing the SET key the display shows COMPLETE After a power failure or the AC power cord has been unplugged the time set will be cleared You have to set the time again when t...

Page 24: ...ernal input sources y VIDEO2 External input sources y TV y AUX External input sources y D AUDIO u InputleveladjustmentispossibleforTAPE VIDEO1 VIDEO2 TV AUX and D AUDIO Pressing the DVD CD 6 D AUDIO 6 or TUNER BAND key on the remote selects the corresponding input When CD is selected Continued to next page DVD TUNER CONTROL PRE AMPLIFIER SOUND SELECTOR INPUT SEL MULTI CONTROL VOLUME MODE SET D AUD...

Page 25: ...me the original volume It is also canceled when the volume is changed Press the MUTE key OUT L R 30 10 5 3 1 0 dB MAIN UNIT REMOTE When D AUDIO OUT is set to REC OUT ON sound is put out from the speakers and the volume from the headphone ter minal is constant independent on the VOLUME position When listening with headphones set D AUDIO OUT to HEADPHONE The ini tial setting is HEADPHONE p Caution a...

Page 26: ...g the INPUT SEL MULTI CONTROL knob R EQ START Measurement starts R EQ OFF Characteristics setting is temporarily canceled R EQ CALL Characteristics setting is called up When measuring for the first time only R EQ START can be selected Measuring takes several minutes If the microphone is not connected or headphones are connected the measurement is impossible CAN T SETUP is displayed The original di...

Page 27: ...ome party NIGHT Mode that is convenient when you wish to enjoy music with low vol ume at midnight It is adjusted based on melodious sounds such as vocal and will relatively be clear sound with low volume Press the ENTER key on the remote control to end the operation To cancel the measurement Turn the VOLUME knob on the main unit or press the VOLUME fi key on the remote control unit or When the oper...

Page 28: ...n be added according to the source 1 Press the SOUND SELECTOR key turn the INPUT SEL MULTI CONTROL knob to se lect D BASS Then press the SET key press the D BASS key on the remote The D BASS indicator blinks 2 Turn the INPUT SEL MULTI CONTROL knob press the MULTI CONTROL key on the remote to select Music or Movie Then press the SET key 3 Adjust the level with the INPUT SEL MULTI CONTROL knob press...

Page 29: ...Q setting mode will be cancelled when the MANUAL EQ key is pressed Image of level adjustment LEVEL dB Variable levels Frequency 0 8 8 5 The TREBLE setting is displayed 6 Press the MULTI CONTROL key on the remote to select a frequency type Low 5kHz Mid 7kHz High 10kHz 7 Adjust the level of TREBLE with the INPUT SEL MULTI CONTROL knob press the MULTI CONTROL key on the remote 8 Press the SET key to ...

Page 30: ...nformation for Room EQ setting is memorized 2 Turn the INPUT SEL MULTI CONTROL knob to select one of preset numbers from 1 to 3 Then press the SET key Preset Call of sound pattern Press the SOUND PRESET key on the remote SOUND PRESET and 1 2 or 3 are dis played Factory default setting is flat The display turns to the original display in 3 seconds The level can be set to 0 by pressing the FLAT key ...

Page 31: ...ffect of making vocals more distinct at the time of music playback CENTER Only the CLEAR VOICE effect is ad justed The selected sound mode is held However a surround mode set during DVD play may not be held V F S setting 1 Press the SOUND SELECTOR key turn the INPUT SEL MULTI CONTROL knob to se lect SURROUND Then press the SET key 2 Turn the INPUT SEL MULTI CONTROL knob to select V F S Then press ...

Page 32: ... of 1 10 Press the SOUND SELECTOR key to end the op eration or to cancel it Basic use method For return to 2 channels stereo LISTEN MODE setting 1 Press the SOUND SELECTOR key turn the INPUT SEL MULTI CONTROL knob to se lect SURROUND Then press the SET key 2 Turn the INPUT SEL MULTI CONTROL knob to select LISTEN MODE Then press the SET key When using the remote control press the LIS TEN MODE key i...

Page 33: ...ntrol and playback will start To skip tracks To stop playback To stop playback To start playback To pause playback Do not touch the played side of disc Be sure to place a disc on the tray hori zontally Placing it with an inclination will result in malfunction Press the 0 key again to remove the disc The label side facing up L R 30 10 5 3 1 0 dB 1 2 3 4 5 Track No being played To play back a desire...

Page 34: ...ess the 6 key DVD CD 6 key on the remote to resume normal playback Each time the key on the main unit or on the remote con trol is pressed again the speed is changed in 5 steps The picture may be disturbed during fast forward and fast backward When the ON SCREEN key is pressed during on screen display I the on screen display disappears and the speed display is shown Press the 6 key DVD CD 6 key on...

Page 35: ...100 100 10 1 At the time of DVD Video With operation during stop the title is selected Play back of the selected title starts With operation during playback the chapter is se lected Playback of the selected chapter starts At the time of CD or VCD P B C off mode Playback of the selected track starts At the time of MP3 WMA JPEG file Playback of the selected file starts To play back from desired titl...

Page 36: ...the screen are displayed reduced The aspect ratio is not changed JPEG images can be rotated in steps of 90 Operation with mixed JPEG data and MP3 WMA data When the file following the JPEG data contains MP3 WMA data The MP3 WMA data are played back while the JPEG image is displayed When the file following MP3 WMA data contains JPEG data The next JPEG image is displayed when the playback of the MP3 ...

Page 37: ...ata may be played during display of a JPEG image In such a case the JPEG image cannot be rotated Setting the slide time Press the 1 key during display of the JPEG image The initial value is 10 sec For discs with mixed MP3 WMA data the set slide time is cleared and return to the initial value is made when the next playback data are MP3 WMA data 5 0 2 1 2 0 5 0 2 5 1 0 5 2 Directory display example ...

Page 38: ...ideo discs the display may not be cor rect L R 30 10 5 3 1 0 dB 1 2 3 4 5 L R 30 10 5 3 1 0 dB 1 2 3 4 5 TTL L R 30 10 5 3 1 0 dB 1 2 3 4 5 The display contents of the display on the main unit are switched each time this is pressed 1 In case of a disc compatible with CD TEXT The CD TEXT function When this unit plays a disc compatible with CD TEXT the disc title and the song titles recorded on the ...

Page 39: ...re execute the pre setting of stations Presetting radio stations manually Manual preset w A station can also be tuned in even when it is not preset For details read Tuningintoanon presetradiostation Autotuning Manual tuning q When the TUNER BAND key is pressed the unit will automatically be switched on and reception status will be reached Receivingbroadcaststation DVD TUNER CONTROL PRE AMPLIFIER S...

Page 40: ...ns can be memorized 1 2 3 4 5 3 Tuning PresetCall If radio stations have already been stored with AUTO MEMORY Auto memory function or manual presetting select a station using the 4 1 key the 4 key on the remote Each press of the key switches the preset stations in sequence The indicator TUNED lights up when a station is received The indicator ST lights up during stereo reception When the key is pr...

Page 41: ...isplayed The AUTO indicator goes off Monaural reception Normally use the Auto tuning stereo reception In MANUAL mode FM stations are received in mon aural Receiving broadcast station Select the tuning mode according to the radio wave receiving condition Auto tuning Whenthereceivingcondition is good Manual tuning Whenthereceivingcondition is poor Weak radio waves 1 Select the tuner input 2 Press th...

Page 42: ...c keys on the remote control unit 4 Press the ENTER key again Repeat steps 1 2 3 and 4 to preset other stations To memorize an RDS station wait for the station name to appear on the display before performing step 2 FM L R MHz TUNED ST AUTO 30 10 5 3 1 0 dB 1 2 3 4 5 If several stations are preset under the same num ber the previous memory is replaced with the latest memory contents Sequence for pr...

Page 43: ...y displayed PTY Program Type Search r The tuner automatically searches for a station which is currently broadcasting a specified program type genre The RDS indicator lights up when an RDS broadcast sig nal is received Some functions may not be provided or be given dif ferent names depending on countries or areas RDS RadioDataSystem Before using RDS ForreceptionofRDSstations theautomemoryfunc tion ...

Page 44: ...l Other Music News Current Affairs Information Sport Education Drama Culture Science Varied Weather Finance Children s programs Social Affairs Religion Phone In Travel Leisure Jazz Music Country Music National Music Oldies Music Folk Music Documentary Use program type table on the right for your convenience Pop M Rock M Easy M Light M Classics Other M News Affairs Info Sport Educate Drama Culture ...

Page 45: ... display returns to the original display If a program of the desired type is found that program is received and the program type name display changes to the station name display To cancel the search press the PTY key again Display while searching for a Rock Music broadcast PTY 1 2 3 4 5 PS display when an RDS station is received FM L R MHz TUNED ST AUTO RDS 30 10 5 3 1 0 dB 1 2 3 4 5 Press the ENT...

Page 46: ...e an equivalent volume to CD 1 Press the MODE key turning the INPUT SEL MULTI CONTROL knob to select IN PUT LEVEL Then press the SET key 2 Select input level Then press the SET key Select below item TAPE VIDEO1 VIDEO2 TV AUX Decrease the volume Increase the volume Turn INPUT SEL MULTI CONTROL knob press the INPUT SELECTOR key on the remote Decrease the volume Increase the volume Operation with the...

Page 47: ...nnection Then switch on both units The D AUDIO IN terminal is only for connection of digital audio players Con nect only compatible portable equipment 2 SettheinputtoD AUDIO When this unit is connected with a special cable to a Kenwood digital audio player compatible with digital audio link the digital audio player can be operated from this unit or its remote control To skip files Fast forward and...

Page 48: ...ment is possible at the range of 7 to 7 Even when the sound mode has been set for a digital audio player the setting becomes Off while the player is con nected to this unit The volume key of the digital audio player cannot be used for volume adjustment When the use of the digital audio player is to be ended switch off the power for both units and then pull the connection cord from the terminal of ...

Page 49: ...units 2 Selectaninputsource TUNER DVD CD TAPE VIDEO1 VIDEO2 TV or AUX Select an input source other than D AUDIO When a digital audio player with direct encoding function is connected the sound played back by this unit can be recorded by the digital audio player 1 2 0 3 Preparingtherecordingsource TUNER Tune in to the station DVD CD Pause playback at the start of the track or chapter to be recorded...

Page 50: ...m the speakers when switching to REC OUT ON Perform options setting for external recording Q Please refer to the instruction manual of the digital audio player for the recording settings for the digital audio player 6 Startrecording 1 Start recording with the digital audio player For details refer to the instruction manual of the digital audio player 2 Start playback of the source audio source wit...

Page 51: ...qualizer effect is not re flected in the recorded sound Initial setting The settings for D Bass TONE and ROOM EQ do not influence the recording In order to prevent clipping of the digital signal record ing is done with a slightly lower volume It is possible to adjust the recording level so that no clipping is done while looking at the level meter Setting the record ing level Setting the recording ...

Page 52: ...ess the Numeric keys as shown below To select track No 23 10 10 3 To select track No 30 10 10 10 0 Up to 32 tracks can be programmed When PGM FULL is displayed no more tracks can be programmed If you made a mistake press the CLEAR key and enter the track No again When a track No is entered the track will be added to the end of the existing program 2Select track numbers in the order you want to pla...

Page 53: ...ke press the CLEAR key and enter the track No again When a track No is entered the track will be added to the end of the existing program P 01 has been deleted L R 30 10 5 3 1 0 dB PGM 1 2 3 4 5 Each time the key is pressed the last track in the program is cleared L R 30 10 5 3 1 0 dB 1 2 3 4 5 Goes off The program mode is canceled when the unit is turned off or the disc is ejected The programmed ...

Page 54: ...key switches the random mode 1 RandomPlayback TheRDMindicatorlightsup 2 Normal Playback The RDM indicator goes off L R 30 10 5 3 1 0 dB RDM 1 2 3 4 5 The RANDOM indication lights and random playback starts Random playback is canceled when playback is stopped Playback stops after each track has been played once The random playback can also be repeated by pressing the REPEAT key on the remote contro...

Page 55: ...re disc is repeated For a DVD video the title being played will be repeated In case of program playback the entire program will be repeated Cancel not lit Repeat playback is canceled Each time the key is pressed the setting changes as shown below REPEAT ONE repeat the file that is playing REPEAT repeat the folder that is playing REPEAT repeat the disc that is playing Cancel not lit Repeating MP3 W...

Page 56: ...eration after program playback or random playback has been canceled ER Use the remote control for operation Operation of repeat playback also is possible using the on screen display OŒ Various disc playback features 3 Press the A3B key on the remote when you want to choose a scene sound as the beginning point 4 Press the A3B key again to choose a scene sound as the end point L R 30 10 5 3 1 0 dB 1...

Page 57: ...irst and playback starts from there Depending on the disc this operation may not take place The scene also can be selected with the number keys In case of selection with the number keys playback starts from the selected scene Step 3 is not required Depending on the disc a different operation may be specified Playback starts from the selected scene When the menu has a hierarchical structure switchi...

Page 58: ...een display is not displayed when the menu screen is displayed for a DVD Video U Use the remote control for operation Various disc playback features Select the DVD CD input Basic operation with on screen display 1 Press the ON SCREEN key to display the on screen display 2 Press the MULTI CONTROL fi keys to se lect the on screen display for operation 3 Press the MULTI CONTROL keys to se lect an icon...

Page 59: ... Select the time display icon during playback 2 Select Time Search from the submenu 3 Use the number keys to enter the time for the title being played back and press the ENTER key Example 12 min 34 sec Press 1 2 3 4 Playback starts from the scene of the entered time 4 Memory playback icon This is used to register the point to be played back for memory playback which can be called easily Memory reg...

Page 60: ...inema voice icon Cinema voice mode ON OFF is displayed This is used when the words of a DVD Video recorded with Dolby digital multi channel audio are difficult to understand Switching the cinema voice mode Select the cinema voice icon and select On or Off from the submenu VISUAL On screen display 0 Subtitle icon The subtitle is displayed Switching the subtitles Select the subtitle icon and select ...

Page 61: ...int to be played back for memory playback which can be called easily Refer to 4 of Operation of the on screen display for DVD Video O for the operation for Memory registration and Memory playback 4 Repeat icon The repeat playback mode is displayed Changing the repeat playback mode Select the repeat icon and select the repeat playback mode from the submenu Off Repeat playback is canceled Track The ...

Page 62: ...F S icon and select the mode from the submenu Off V F S Movie V F S Music C V Movie C V Music 8 Tag display icon Used for ON OFF setting for the display function displaying the album name the title and the artist name on the TV screen Using the tag display function Select the tag display icon and select On from the submenu 4 Repeat icon The repeat playback mode is displayed Changing the repeat pla...

Page 63: ...yed Press the MULTI CONTROL fi key to select a numeri cal value and press the ENTER key to adjust Picture quality adjustment ends when Normal Fine Soft or Cinema has been selected Adjust the picture quality When User Mode 1 or User Mode 2 has been selected 1 Press the MULTI CONTROL fi key to se lect the picture quality and press the ENTER key Contrast The contrast between light and dark parts of the...

Page 64: ...d return is made to the next higher menu When an item is selected on the menu screen with the ENTER Select keyorthenumerickeys advance is made to the next lower menu level When the advance destination is the scene to be played the contents will be played Returning When several menus scenes can be selected in each level screen switching is possible with the keys NEXT and 4 PREV P B C is switched ON...

Page 65: ...ched Sleeptimer Set the number of minutes after which the unit is to be turned OFF Press the SLEEP key repeatedly to set the time The unit is turned OFF automatically after the set time has elapsed Each press increases the timer period by 10 minutes The sleep timer can be set up to 90 minutes 10 20 30 70 80 90 Cancel 10 20 L R 30 10 5 3 1 0 dB 1 2 3 4 5 Sleep timer indica tor lights Duration for s...

Page 66: ...put jacks Set the POWER switch of the M AX7 to the ON position The programs of PROG 1 and PROG 2 can be activated at the same time For the simultaneous programs setting keep the time intervals of 1 minute or more between timer programs in order to avoid time overlapping 2 Set the timer setting program number 1 Press the MODE key turn the INPUT SEL MULTI CONTROL knob to select TIMER SET Then press ...

Page 67: ...heOFFtime 1 Turn the INPUT SEL MULTI CONTROL knob to adjust the time 2 Press the SET key L R 30 10 5 3 1 0 dB 1 1 2 3 4 5 If OFF is selected the key function return to ordinary mode Switching as shown below is done each time the knob is turned EVERYDAY SUNDAY MONDAY TUESDAY WEDNESDAY THURSDAY FRIDAY SATURDAY MON FRI TUE SAT SAT SUN L R 30 10 5 3 1 0 dB 1 1 2 3 4 5 L R 30 10 5 3 1 0 dB 1 1 2 3 4 5 ...

Page 68: ...ted above 1 Turn the INPUT SEL MULTI CONTROL knob to select the preset station No 2 Press the SET key Switching as shown below is done each time the knob is turned PLAY Timer play back AI PLAY Timer play with gradually increasing volume When PLAY is selected the timer playback will start at the set volume level When AI PLAY is selected the timer playback will start at volume 0 and increase to the ...

Page 69: ...ivatingthetimerprogram Once the timer setting procedure has been performed the timer program can be deactivated or acti vated easily When the unit is in on press the TIMER key on the remote Each press of the TIMER key changes the items 1 Activate PROG 1 timer 2 Activate PROG 2 timer 1 2 Activate both PROG 1 and PROG 2 timer Deactivate the timer Timer indicator is off The timer program contents rem...

Page 70: ... Then press the SET key 2 Turn the INPUT SEL MULTI CONTROL knob to switch the brightness 3 Press the SET key Each time the key is pressed the mode switches L R 30 10 5 3 1 0 dB 1 2 3 4 5 The brightness of the display part of the main amplifier M AX7 also is switched Switching as shown below is done each time the knob is turned DIMMER OFF Normal brightness DIMMER ON Brightnessofthedisplayisreduced ...

Page 71: ... SET AUTO POWER SAVE A P S function When the unit is ON and the unit is left for about 30 minutes with DVD CD not operating the unit is switched off standby automatically by this function This is convenient when you forgot to switch off the unit This function can be activated or deactivated by the following operation L R TUNED ST AUTO 30 10 5 3 1 0 dB 2 3 4 5 L R TUNED ST AUTO 30 10 5 3 1 0 dB 2 3...

Page 72: ...hed Only DOLBY DIGITAL Player Menu Language Set the display language for menu screens etc of this unit Disc Menu language Set the display language for menu screens etc of this disc Audio Language Set the disc audio language Subtitle Language Set the disc subtitle language Still Mode Select this to suppress blurring of still pictures NTSC PAL Set the video format from NTSC to PAL Explanation of tec...

Page 73: ...I CONTROL fi keys to select the item to be changed Then press the EN TER key 4 Press the MULTI CONTROL fi keys to change the contents Then press the ENTER key MAIN SET UP MENU EXIT The setting mode can be canceled by pressing the SET UP MENU screen or by pressing the MULTI CONTROL key Each time the key is pressed the mode switches MAIN f SOUND h VISUAL j When the MULTI CONTROL key is pressed during ...

Page 74: ...ect this to change the password for parental control after a password has been set Cannot be selected when no password has been set Temporary Unlocked Select this for temporary cancellation of parental control when the viewing restrictions are to be canceled temporarily after a password has been set Cannot be selected when no password has been set 4 3 Select when a standard 4 3 TV is connected 16 ...

Page 75: ... press the ENTER key When a wrong number has been entered press the MULTI CONTROL fi keys to delete the entered number completely and then enter it again The password has been set Changing the password 1 Press the MULTI CONTROL fi keys to select the Change Password Then press the ENTER key 2 Enter the presently set password with the number keys Then press the ENTER key 3 Enter the new password with ...

Page 76: ...ion is done when the disc prohibits 96 kHz digital output Bitstream Bitstream output is made Select this for connection to a Dolby digital decoder PCM Output is made with conversion to 48 kHz 2 ch PCM Select this for no connection to a Dolby digital decoder Bitstream Bitstream output is made Select this for connection to a DTS decoder PCM Output is made with conversion to 48 kHz 2 ch PCM Select th...

Page 77: ...l mode setting also is done Refer to page 73 for the operation method Press the ENTER key Setting item Setting contents Player Menu Lan guage Initial setting English Disc Menu Language Initial setting English Audio Language Initial setting English English French Spanish German Italian Japanese Chinese Taiwanese English French Spanish German Italian Other Select this for selection of the language w...

Page 78: ...dian 7577 Catalan 6765 Chinese 9072 Corsican 6779 Croatian 7282 Czech 6783 Danish 6865 Dutch 7876 English 6978 Esperanto 6979 Estonian 6984 Faroese 7079 DVDmenulanguagecodelist Fiji 7074 Finnish 7073 French 7082 Frisian 7089 Galician 7176 Georgian 7565 German 6869 Greek 6976 Greenlandic 7576 Guarani 7178 Gujarati 7185 Hausa 7265 Hebrew 7387 Hindi 7273 Hungarian 7285 Icelandic 7383 Indonesian 7378 ...

Page 79: ...o be sold in the future C SW LS RS L FSL FSR R System selection Each time the key is pressed the mode switches SPEAKER MODE SP LEVEL SP DISTANCE 2 Press the ENTER key The mode for surround system selection is reached 3 Press the MULTI CONTROL fi keys to se lect FRONT SYSTEM or 5 1CH SYSTEM FRONT SYSTEM Select this for listening with a front surround sys tem Original for this unit 5 1CH SYSTEM Selec...

Page 80: ...woofer as desired 5 Press the ENTER key The SP LEVEL indication blinks Press the SP SETUP key to end the operation 1 Press the SP SETUP key on the remote con trol press the MULTI CONTROL keys to select SP DISTANCE Setting the speaker distance Each time the key is pressed the mode switches SPEAKER MODE SP LEVEL SP DISTANCE 2 Press the ENTER key 3 Press the MULTI CONTROL fi keys to set the distance b...

Page 81: ...nthere is a great difference in temperature between this unit and the outside This unit may not function properly if condensation occurs In this case leave the unit for a few hours and restart the operation after the condensation has dried up Be specially cautious against condensation in a following circumstances When this unit is carried from one place to another across alargedifferenceintemperat...

Page 82: ...lay a cracked or warped disc During playback the disc rotates at high speed in the player Therefore to avoid danger never use a cracked or deformed disc or a disc repaired with tape or adhesive agent Please do not use discs which are not round be cause they may cause malfunction Disc accessories The disc accessories stabilizer protection sheet protec tion ring etc which are marketed for improving ...

Page 83: ...me ON or channel switching is not possible Sound is not produced The STANDBY TIMER indicator blinks in red and no sound is output The STANDBY TIMER indicator blinks in green No sound from the headphones Sound is not produced from the left or right speaker The clock display blinks without changing the figures Timer operation is not possible Insert the system control cord securely all the way 9 Conn...

Page 84: ... format of the disc being played does not match that of the connected TV monitor The DVD disc being played does not contain the recording of subtitles The subtitle mode is set to off Press the SUBTITLE key to switch on the subtitle mode U Remedy DVD CD player section Playback starts but no image sound is seen heard The picture is disrupted when the image is fast forwarded or fast reversed The pict...

Page 85: ...t Confirm the switching of the screen size of the connected TV the adjustment for the vertical screen size Playback of a JPEG file not compatible with this unit is being tried Please refer to Types of playable discs Pull the power plug from the wall outlet and insert it again while pressing the key Remedy DVD CD player section Thevoice orsubtitle languagecannotbechanged The viewing angle cannot be...

Page 86: ... An attempt is made to select a 33rd track during programing of CD W R EQ ERROR1 The measurement is impossible because measuring room is too noisy R EQ ERROR2 The measurement is impossible because no signal is input in the microphone TRAY OPEN DVD CD tray is opened Displayed Message In case of difficulty In addition to the audio signal a TOC Table of Contents is recorded on a CD The TOC correspond...

Page 87: ...Ω 10 kΩ Pre out Front Surround1 Surround2 Center Subwoofer 600 mV 600 Ω 10 kΩ D AUDIO OUT 1V 32 Ω 10 kΩ DIGITAL OUT Optical out PCM Bitstreem 21 15 dBm Wave length 660 nm Tuner section FM tuner section Tuning frequency range 87 5 MHz 108 MHz MW AM tuner section Tuning frequency range 531 kHz 1 602 kHz DVD CD player section Laser Semiconductor laser Video format PAL NTSC Composite video output leve...

Page 88: ...k of the unit in the spaces designated on the warranty card and in the space provided below Refer to the model and serial numbers whenever you call upon your dealer for informa tion or service on this product Model Serial Number 5613 81 88 EN 06 1 6 0 54 PM 88 ...

Reviews: