


English
13
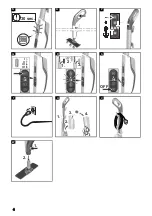
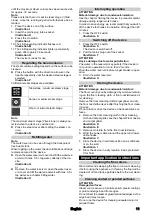
Removing the carpet glider from the floor nozzle
몇
CAUTION
Beware of burns to your feet
The carpet glider can heat up during the steaming pro-
cess.
Do not operate or remove the carpet glider bare-footed
or using open sandals.
Only operate or remove the carpet glider using suitable
footwear.
1. Press the strap on the carpet glider downwards us-
ing your toecap.
2. Lift the floor nozzle upwards.
Illustration E
Care and service
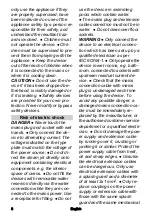
Draining the water reservoir
ATTENTION
Device damage due to water putrefaction
If the device is not put into operation for more than 2
months, the water in the reservoir may putrefy.
Drain the water reservoir before breaks in operation.
3. Press the OFF switch.
The device is switched off.
4. Pull the mains plug out of the socket.
5. Remove the reservoir cover.
6. Drain the water reservoir.
The cartridge can remain the water reservoir.
Illustration U
Replacing the decalcification cartridge
ATTENTION
Device damage and shortened service life
If the replacement intervals (indicator light) for the de-
calcification cartridge are not observed, there is a risk of
device damage and the service life of the device may be
shortened.
Observe the replacement intervals (indicator light).
Note
The replacement intervals depends on the local water
hardness. Areas with hard water (e.g. III/IV) have a
higher replacement interval than areas with soft water
(e.g. I/II).
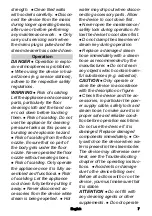
Indicator lamp at end of the run time
The "decalcification cartridge indicator light" indicates
when the decalcification cartridge has to be replaced:
The indicator light flashes 2 hours before the run
time expires.
Illustration R
The indicator light flashes more quickly 1 hour be-
fore the run time expires.
The indicator light and the LED strip on the device
light up when the run time of the decalcification car-
tridge has expired. The floor covering symbols on
the handle do not light up. The pump switches off
automatically (no water steam) to prevent damage
to the device.
Inserting the decalcification cartridge
ATTENTION
Device damage
There is a risk of damage to the device if the used decalci-
fication cartridge is re-used.
Work carefully in order to prevent mixing up the cartridges.
Installation information
When steaming for the first time after removing and re-
inserting the decalcification cartridge, the steam jet may
be weak or irregular, and individual drops of water may
be expelled. The device requires a short running-in pe-
riod in which the decalcification cartridge fills with water.
The steam volume that is expelled increases constantly
until the maximum steam volume has been reached af-
ter approx. 30 seconds.
Note
Removing the water reservoir makes it easier to remove
and install the decalcification cartridge.
7. Press the OFF switch.
The device is switched off.
8. Remove the reservoir cover.
9. Remove the decalcification cartridge.
10. Insert the new decalcification cartridge and press it
firmly into place.
11. Press the On switch.
The device is switched on.
12. Press and hold the RESET button for 4 seconds.
The "replace decalcification cartridge" indicator light
goes out and the run time for the decalcification car-
tridge starts again.
Illustration Q
13. Allow the device to heat up.
14. Press and hold the steam lever for approximately 30
seconds to vent the decalcification cartridge.
Setting the water hardness
ATTENTION
Device damage due to calcification
Without a decalcification cartridge, the device may cal-
cify if the water hardness is set incorrectly.
Always work with a decalcification cartridge.
Set the device to the local water hardness.
Set the device to the current water hardness before us-
ing it in an area with a different water hardness (e.g. af-
ter a move).
Note
Your water board or municipal utilities authority can pro-
vide information on hardness of tap water.
The water hardness is set using the RESET button. The
water hardness setting is stored until a new setting (e.g.
after a move) is made. The device is set to the highest
water hardness (level IV) in the factory. The device indi-
cates the set water hardness with flash pulses.
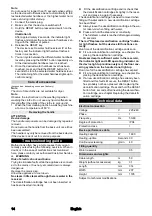
Water hardness levels and flash pulses
Note
The anti-calcification effect of the decalcification car-
tridge is activated as soon as the reservoir is filled with
water and the device is put into operation. Lime in the
water is absorbed by the granulate in the decalcification
cartridge. Additional descaling is not required.
Note
The granulate in the cartridge can discolour on contact
with water due to the mineral content in the water, which
is no cause for concern and has no negative effects on
the device, cleaning work or the functionality of the car-
tridge.
Hardness
range
°dH
mmol/l
Number
of flash
pulses
Interval
between
flash
pulses
I
Soft
0-7
0-1.3
1x
4 seconds
II Medium 7-14
1.3-2.5
2x
III Hard
14-21
2.5-3.8
3x
IV Very
hard
>21
>3.8
4x


