


14
English
Note
Do not pause for longer than 15 seconds when setting
as the device will otherwise be set automatically to the
last selected water hardness or the highest water hard-
ness set during initial start-up.
1. Connect the mains plug.
2. Make sure that the device is switched off.
3. Hold the RESET button pressed and switch on the
device.
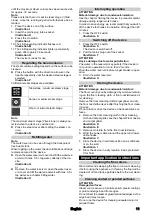
Illustration Q
After approximately 2 seconds, the indicator light
flashes and signals the current water hardness set-
ting with the number of pulses.
4. Release the RESET key.
The device is set to water hardness level IV at the
factory and the indicator light therefore flashes 4
times in succession.
5. You can cycle between the different water hardness
levels by pressing the RESET button repeatedly un-
til the desired water hardness level is reached.
6. Once the desired water hardness level has been
reached, press and hold the RESET button for 3
seconds to store the selected water hardness level.
The indicator light for the water hardness lights up to
confirm saving.
Care of accessories
(Accessories - depending on scope of delivery)
Note
The micro fibre cloths are not suitable for dryer.
Note
Observe the instructions on the washing tag when
washing the cloths. Do not use any liquid softeners as
this will affect the ability of the cloths to pick up dirt.
1. Wash the floor cleaning cloths in a washing machine
at a max. temperature of 60 °C.
Removing the handle
ATTENTION
Device damage
The handle components can be damaged by repeated
removal.
Do not remove the handle from the basic unit once it has
been assembled.
The handle may only be removed from the basic device
if the device is sent out for service purposes.
Troubleshooting guide
Malfunctions often have simple causes that you can
remedy yourself using the following overview. When in
doubt, or in the case of malfunctions not mentioned
here, please contact your authorised Customer Service.
몇
WARNING
Risk of electric shock and burns
Trying to eliminate faults while the appliance is connect-
ed to the mains or has not yet cooled down is always
dangerous.
Remove the mains plug.
Allow the appliance to cool down.
No steam / little steam although there is water in the
reservoir
The decalcification cartridge has not been inserted or
has been inserted incorrectly.
Fit the decalcification cartridge and/or check that
the decalcification cartridge sits tightly in the reser-
voir and press in again if necessary.
The decalcification cartridge has been removed when
filling with water and/or a new decalcification cartridge
has been fitted
Always leave the decalcification cartridge in the wa-
ter reservoir when filling with water.
Press and hold the steam lever constantly.
The full steam output is reached after approximately
30 seconds.
The red "Replace decalcification cartridge" indica-
tor light flashes but the device still functions cor-
rectly
Run time of the decalcification cartridge ends soon.
Fit a new decalcification cartridge, see chapter Re-
placing the decalcification cartridge.
No steam despite sufficient water in the reservoir,
the indicator light and LED operating indicator on
the device light up continuously red, the floor cov-
ering symbols on the handle do not light up
Run time for the decalcification cartridge has expired
Fit a new decalcification cartridge, see chapter Re-
placing the decalcification cartridge.
If a new decalcification cartridge has already been
fitted and this fault still occurs, the RESET button
has probably not been pressed after replacing the
decalcification cartridge. Press and hold the RESET
button for 4 seconds after inserting the decalcifica-
tion cartridge, see chapter Replacing the decalcifi-
cation cartridge.
Technical data
Subject to technical modifications.
Electrical connection
Voltage
V
220-240
Phase
~
1
Frequency
Hz
50-60
Degree of protection
IPX4
Protection class
I
Device performance data
Heating capacity
W
1600
Heating-up time
Seconds 30
Continuous steaming
g/min
40
Filling quantity
Water reservoir
l
0,5
Dimensions and weights
Cable length
m
5,0
Weight (without accessories)
kg
3,1
Length
mm
314
Width
mm
207
Height
mm
1185


